
Technical information

Site technical documentation myC2-3
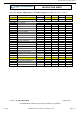
Test Sheet 04 - CONSUMPTION TEST 4-13
Test Sheet 05 - HOTLINE MENU 4-14
Test Sheet 06 - RADIO TEST 4-15
CHAPTER 5 - MAINTENANCE PROCEDURES
5-2 SHORT LOOP PROCESS 5-1
5-1 TECHNICAL WORK LEVELS 5-3
5-2 SHORT LOOP PROCESS 5-3
5-3 MAINTENANCE TOOLS 5-3
LEVEL 0 MAINTENANCE 5-5
Proc sheet 0 01 - Remove and place the battery 5-6
LEVEL 1 MAINTENANCE 5-7
Proc sheet 1 01 - Remove and place the lower housing of mobile 5-8
Proc sheet 1 02 - Remove and place the antena 5-9
Proc sheet 1 03 - Remove and place the Plug shock absorber 5-10
Proc sheet 1 04 - Remove and place the keyboard 5-11
Proc sheet 1 05 - Remove and place the micro rubber 5-12
Proc sheet 1 06 - Remove and place of Fpc conductive foam 5-13
Proc sheet 1 07 - Remove and place the MMI board 5-14
Proc sheet 1 08 - Remove and place the metal dome 5-15
Proc sheet 1 09 - Remove and place the equipped Flap 5-16
Proc sheet 1 10 - Remove and place of lower equipped 5-17
Proc sheet 1 11 - Remove and place FPC conductive foam of upper housing flap 5-18
Proc sheet 1 12 - Remove and place window flap 5-19
LEVEL 2 MAINTENANCE 5-20
Proc sheet 2 02 - Remove and place the HP,Vibrator, FPC, Lcd flap 5-21
LEVEL 3 MAINTENANCE 5-23
Proc sheet 3 01 - Return to Sagem factory 5-24
Proc Sheet 3 02 - return to the client 5-26
OUT OF WARRANTY INTERVENTION 5-27
Proc Sheet 4 01 - REMOVING REPLACING THE DATA AUDIO CHARGE CONNECTOR 5-28
Contents REF MTB DTS 8- Indice B - February 21 2006 Page INDEX-3