
User Manual


17
EN
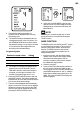
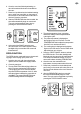
5. The temperature, time and convection
settings can be adjusted before or during
the warming cycle.
a) The warming temperature is displayed as
the top gure on the LCD screen. Turn the
TEMPERATURE dial to adjust the temperature
from 50°C to a maximum of 230°C.
b) The time is displayed as the bottom gure on
the LCD screen. Turn the TIME dial to adjust
the time up to 2 hours.
6. Press the START/CANCEL button to activate
the WARM function. The button backlight will
illuminate red, the oven alert will sound and the
LCD screen will illuminate orange.
7. The timer will be displayed and automatically
begin to count down. The cycle can be stopped
at any time by pressing the START/CANCEL
button.
8. At the end of the WARM cycle, the oven
alert will sound. The START/CANCEL button
backlight will go out and the LCD screen will
illuminate white.
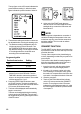
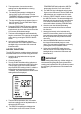
AIR FRY FUNCTION
The AIR FRY function combines intense heat and
maximized airow to cook foods crispy and brown.
1. Insert the air frying basket into the top rack
height position.
2. Close the oven door.
3. Turn the FUNCTION dial until the indicator on
the LCD screen reaches the AIR FRY function.
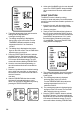
The top gure on the LCD screen indicates
the preset AIR FRY setting of 220°C, while the
bottom gure indicates the preset time of
':15 MINS’. The preset SUPER CONVECTION
setting will also be displayed.
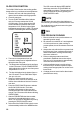
4. The AIR FRY temperature, time, convection
and frozen settings can be adjusted before or
during the AIR FRY cycle.
a) The AIR FRY temperature is displayed as
the top gure on the LCD screen. Turn the
TEMPERATURE dial to adjust the AIR FRY
temperature from 50°C to a max of 230°C.
b) The AIR FRY time is displayed as the bottom
gure on the LCD screen. Turn the TIME dial to
adjust the time up to a maximum of 2 hours.
5. Press the START/CANCEL button to activate
the AIR FRY function. The button backlight will
illuminate red, the oven alert will sound and the
LCD screen will illuminate orange. The LCD
screen will indicate a blinking ‘PREHEATING’.
6. Once the oven has nished preheating,
an alert will sound and food can be inserted
into the oven.
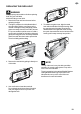
7. Arrange food evenly on the included air fry
basket. For best results, place food in a single
layer and leave space between pieces. Insert
the air fry basket into rack position Close the
oven door.
8. After the PREHEATING alert has sounded,
the timer will automatically begin to count
down. The cycle can be stopped at any time by
pressing the START/CANCEL button.
9. At the end of the AIR FRY cycle, the oven
alert will sound. The START/CANCEL button
backlight will go out and the LCD screen will
illuminate blue.
IMPORTANT
When cooking fatty foods (e.g. chicken wings) we
recommend using the grilling rack (placed in the
roasting pan) instead of the air fry basket to prevent
the oil dripping. Discard excess oil in between the
batches.