
Operation Manual


Portal
62
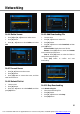
15.2 Add App
1. Press [ok] button to enter Spark App Store.
2. Press [◄, ►] and [▲, ▼] buttons to select one
point.
3. Press [ok] button to enter.
4. Press [◄, ►] buttons to select Add to portal.
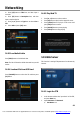
15.3 Remove App
In Spark App Store menu:
1. Press [◄, ►] and [
▲▼
, ] buttons to select one
point that you are added.
2. Press [ok] button to enter.
3. Press [
▲ ▼
, ] buttons to select Remove from
portal.
In Spark Portal menu:
1. Press [◄, ►] and [
▲▼
, ] buttons to select one
point.
2. Press [blue] button to enter.
3. Press [
▲ ▼
, ] buttons to select Remove from
portal.
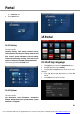
15.4 Move App
In Spark Portal menu:
1. Press [◄, ►] and [
▲▼
, ] buttons to select one point.
2. Press [yellow] button.
3. Press [◄, ►] and [
▲▼
, ] buttons to move it.
4. Press [ok] button to confirm.
Note: App Store and Setting can't move.
15.5 Run APP
In Spark App Store menu:
1. Press [◄, ►] and [
▲▼
, ] buttons to select one point.
2. Press [ok] button to enter.
3. If you are adding, press [
▲▼
, ] buttons to select Run. Or
you must press Add to portal first, and then select Run.
4. Press [ok] button.
In Spark Portal menu:
1. Press [◄, ►] and [
▲▼
, ] buttons to select one point.
2. Press [ok] button.
15.6 Navigation Menu
1. Press [MENU] button to display the navigation menu.
2. Press icon to display the default internet point.
3. Press icon to display a browser, you can use it like
IE.
4. Press icon to make browser to display front
internet point that you linked.
You created this PDF from an application that is not licensed to print to novaPDF printer (http://www.novapdf.com)