
Installation Manual

Installation Instructions
S-5!® Warning! Please use these products responsibly! Visit our website or
contact your S-5! distributor for available load test results. The user and/or
installer of these parts is responsible for all necessary engineering and design to
gured and the proper
Notice to S-5! users: c layout and assembly schematics for S-5! products
are the responsibility of the user or project designer. Due to the many variables
involved with speci
particulars, the manufacturer cannot and does not express any opinions as to
liability with respect thereto. This document is an installation guide only and the
photographs and drawings herein are for the purpose of illustrating installation,
tools and techniques, not system designs. Information contained within is
intended to apply to the document as a whole.
Tools Needed
• Screw Gun* • String Line
• Rag • Tape Measure
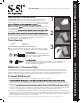
RibBracket is mounted directly onto the crown of the trapezoidal sheet using the
Bi-metal stainless steel screws (provided) or Bulb-Tite rivets (not provided).
R
9/32" (7.7mm) Diameter - Alu/Alu Flat Head
Bulb-Tite Rivet with 5/8" (16mm) EPDM Washer
Grip: 0.032" / 0.8mm - 9.5mm
S
1/4" (6.3mm) Diameter - 1" (25mm) Length - Stainless Steel Self-Tapping Screw
with Hardened Steel Piercing Point - 5/16" (8mm) Hex Head - 5/8" (16mm)
Stainless Steel/EPDM Sealing Washer
RibBracket
™
Placement Tips
To ensure brackets are installed in a straight line, install a single RibBracket on each end of the roof at a measured,
consistent distance from the bottom edge or ridge of the roof. Use a string line between the two brackets. Mount the
remaining RibBrackets along the string line, directly into the roof. Do not remove the EPDM rubber gasket; this is for
weather-proofing. For upslope bracket placement techniques reference the S-5! website at www.S-5.com.
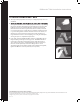
To Install RibBracket
™
1. The only surface preparation necessary is to simply wipe away excess oil and debris.
2.
pre-punched holes, or pre-drilling the proper-sized hole through the four pre-punched holes and riveting with
bulb-type rivets (as per rivet manufacturers installation instructions). To achieve tested holding strength, secure the
RibBracket b
seated. Do not over-drive fasteners; a slight extrusion of rubber around the washer is a good visual-tightness check. If a
fastener has been over-driven, it is important to remove the fastener and replace it with a bulb rivet or larger diameter
fastener. To avoid stripping, use screw gun with depth-sensing nose piece or adjustable torque clutch.
3. From either end of the RibBracket, slide the included M8-1.25 hex flange nut (flange side up) into the top groove. The
RibBracket is now ready to install ancillaries by using a standard M8 bolt through the slotted top thru-hole and the
previously inserted hex flange nut. For critical attachment applications utilizing an M8-1.25 X 16 mm Hex Flange Bolt,
tighten the M8 bolt to 160 inch pounds (13 foot pounds).
2
3
1
Not Provided
Provided
RibBracket
™
& RibBracket™ Mini Install
888-825-3432 | www.S-5.com
The right way to attach almost anything to metal roofs!
These instructions are for use by those experienced in the trade. Always follow appropriate safety precautions and use appropriate tools.
*For time saving tool recommendations contact S-5!