OPERATOR'S MANUAL 3/8 in. (10 mm) Drill-Driver Model No. D45C 24 DOUBLE INSULATED 20 ® 00--1100 5 A FA LLF 00-3-3/ 8/8 THANK YOU FOR BUYING A RYOBI DRILL-DRIVER Your new drill-driver has been engineered and manufactured to Ryobi's high standard for dependability, ease of operation, and operator safety. Properly cared for, it will give you years of rugged, trouble-free performance. CAUTION: Carefully read through this entire operator's manual before using your new drill-driver.
TABLE OF CONTENTS ■ Table of Contents ............................................................................................................................................... 2 ■ General Safety Rules .....................................................................................................................................2-3 ■ Specific Safety Rules and/or Symbols ............................................................................................................
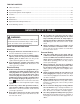
GENERAL SAFETY RULES ■ Tool Use and Care ■ ■ ■ ■ ■ ■ Use clamps or other practical way to secure and support the workpiece to a stable platform. Holding the work by hand or against your body is unstable and may lead to loss of control. Do not force tool. Use the correct tool for your application. The correct tool will do the job better and safer at the rate for which it is designed. Do not use tool if switch does not turn it on or off.
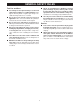
SPECIFIC SAFETY RULES AND/OR SYMBOLS Hold tool by insulated gripping surfaces when performing an operation where the cutting tool may contact hidden wiring or its cord. Contact with a “live” wire will make exposed metal parts of the tool “live” and shock the operator. Additional Rules For Safe Operation ■ Make sure your extension cord is in good condition. When using an extension cord, be sure to use one heavy enough to carry the current your product will draw. A wire gage size (A.W.G.
SYMBOLS SYMBOL NAME DESIGNATION/EXPLANATION V Volts Voltage A Amperes Current Hz Hertz Frequency (cycles per second) min Minutes Time Alternating Current Type or a characteristic of current Direct Current Type or a characteristic of current n0 No Load Speed Rotational speed, at no load .../min Revolutions or Reciprocation Per Minute Revolutions, strokes, surface speed, orbits etc. per minute --- Indicates danger, warning or caution. It means attention!!! Your safety is involved.
FEATURES KNOW YOUR DRILL-DRIVER KEYLESS CHUCK See Figure 1. Before attempting to operate your drill-driver, familiarize yourself with all operating features and safety requirements. Your drill-driver has a keyless chuck that allows you to hand tighten or release drill bit in the chuck jaws. SWITCH To turn your drill-driver ON, depress the switch trigger. Release switch trigger to turn your drill-driver OFF.
FEATURES PRODUCT SPECIFICATIONS: APPLICATIONS DRILL-DRIVER (Use only for the purpose listed below) D45C Chuck Capacity ■ ■ 1/16 in. to 3/8 in. (1.6 mm to 10 mm) 120 V, 60 Hz, AC only 4.5 Amperes Variable Speed 0-1000 RPM 24 Positions Rating Input Switch No Load Speed Clutch ■ ■ ■ Drilling in wood. Drilling in ceramics, plastics, fiberglass, and laminates. Drilling in both hard and soft metals. Using driving accessories, such as driving screws with screwdriver bits. Mixing paints.
OPERATION See Figure 3. CHUCK JAWS UNLOCK (Release) SELECTOR CHUCK BODY 24 REVERSIBLE 0-1 0 LFA REVERSE ® 0- 24 20 3/8 5 20 DRILL BIT LOCK (Tighten) 0-10 5 A LF 0-3/ 8 RIGHT FORWARD CHUCK COLLAR Fig. 4 Fig. 3 WARNING: This tool has the feature of being reversible. The direction of rotation is controlled by a selector located above the switch trigger.
OPERATION ADJUSTABLE TORQUE CLUTCH WARNING: Your drill is equipped with an adjustable torque clutch for driving different types of screws into different materials. The proper setting depends on the type of material and the size of screw you are using. Make sure to insert drill bit straight into chuck jaws. Do not insert drill bit into chuck jaws at an angle and then tighten, as shown in Figure 5.
OPERATION BIT STORAGE WARNING: See Figure 7. When not in use, bits provided with your drill can be placed in the storage area located on the bottom of your drill as shown in figure 7. Be prepared for binding or bit breakthrough. When these situations occur, drill has a tendency to grab and kick opposite to the direction of rotation and could cause loss of control when breaking through material. If not prepared, this loss of control can result in possible serious injury.
OPERATION MALLET TORQUE ADJUSTING RING HEX KEY 24 LEVEL ® 20 20 24 0-10 5 A LF 0-3/ 8 CHUCK JAWS KEYLESS CHUCK Fig. 10 TO RETIGHTEN A LOOSE CHUCK The chuck may become loose on the spindle and develop a wobble. To tighten, follow these steps: ■ Unplug your drill. Fig. 9 CHUCK REMOVAL WARNING: See Figure 10. Whenever necessary to remove the chuck for replacement, etc. use the following procedure: ■ Unplug your drill.
MAINTENANCE WARNING: When servicing use only identical Ryobi replacement parts. Use of any other parts may create a hazard or cause product damage. GENERAL DOUBLE INSULATION All parts represent an important part of the double insulation system and should be serviced only at an authorized service center. Avoid using solvents when cleaning plastic parts. Most plastics are susceptible to damage from various types of commercial solvents and may be damaged by their use.
RYOBI 3/8 in. DRILL-DRIVER – MODEL NO. D45C The model number will be found on a plate attached to the motor housing. Always mention the model number in all correspondence regarding your RYOBI 3/8 in. DRILL-DRIVER or when ordering parts. SEE BACK PAGE FOR PARTS ORDERING INSTRUCTIONS 20 24 1 2 5 0-10 A LF 0-3/ 8 3 SEE NOTE "A" PARTS LIST Key No. Part No. Description Quan. 1 982672-001 Data Plate .....................................................................................
OPERATOR'S MANUAL 3/8 in. (10 mm) Drill-Driver Model No. D45C DOUBLE INSULATED • SERVICE Now that you have purchased your tool, should a need ever exist for repair parts or service, simply contact your nearest Ryobi Authorized Service Center. Be sure to provide all pertinent facts when you call or visit. Please refer to the insert or call 1-800525-2579 in the United States or 1-800-265-6778 in Canada for your nearest Ryobi Authorized Service Center. You can also check our website at www.ryobitools.