
Specifications

Avolites Rolacue Operators Manual - page 11
rq96man 19/09/1996 18:30
2.5.3 Stopping and Starting your Chase
The STOP and GO buttons stop and start a Connected Chase.
The STOP button steps through a Stopped Chase.
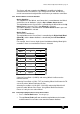
2.5.4 Changing the direction of a Chase
You can change the direction of a Connected Chase by using the three
Arrow Keys at the bottom of the Sequence Control area.
The Right and Left Arrows send the Chase Forwards and Backwards
respectively, and the Double-Ended Arrow makes the Chase Bounce
backwards and forwards, with the Right or Left Arrow indicating which
direction it is currently going in.
A number of the Chase Parameters are definable for each chase. Details of
these can be found in section 7.29 Setting the Chase Parameters.
3. Getting started with Intelligent Fixtures
3.1 Getting ready
Congratulations. Presumably you have managed to power up correctly and
avoided blowing up the desk. If you have not yet powered up, go back to
Section 1.2.1 The important stuff and follow the instructions then come back
and join us.
If you are programming a new show from the beginning, you probably want to
clear all the old junk out of the desk that the previous user left behind. To
clear the desk, do a WIPEALL. See 1.6.1 To do a WIPEALL.
3.2 Using Intelligent Fixtures
The Rolacue is designed to control Intelligent Fixtures and has many
powerful features to allow fast programming combined with hands on control.
This starts with the Patch system which uses Personality Files. These are
stored on the 3.5 inch Personality Disks supplied with your desk.
Each different type of Fixture has a different Personality File built for it.
Updates can be supplied from Avolites by modem or on disk, or they can
easily be customised if you have access to a PC. See Section 13.3,
Customising Personality Files.
3.3 Patching Intelligent Fixtures
When patching Intelligent Fixtures using a Rolacue, you can either enter the
DMX addresses for Fixtures that have already been addressed, or let the
desk generate an address for each Instrument, write it down and then go
around and address your rig.
Either way, it is useful to write the addresses down.
The desk will normally create addresses from DMX Channel 1 upwards for
Dimmers and DMX 512 down for other types of device.
• Turn the key to Program.
Puts you in LIVE PROGRAM MODE menu.
• Check that the grey LAMPS button on the Preset Bank is selected. (Its
LED should be lit - if it isn’t, press the LAMPS button.)