
Instruction manual


7
Important: Overwriting a scene that is used in any chase or show will alter all occurrences of the
scene in all of the chases or shows that use it. Deleting the scene will not give a blank scene in chases
or shows that use it - only when the scene is re-programmed will the change take effect.
Other functions while programming scenes
Pressing the ‘ALL’ key will select all fixtures making the level buttons affect all of the connected
fixtures simultaneously. If all fixtures are selected then pressing the ‘ALL’ key again will deselect all
fixtures.
Pressing and holding the ‘ALL’ key for about 1 second will clear all fixture outputs and any running
chase or show will be stopped.
Pressing and holding a scanner selection key for about 1 second will clear the selected fixture.
Pressing the ‘JOIN’ key at the same time as selecting a fixture will allow more than one fixture to be
selected at a time. The level buttons will then affect all of the selected fixtures simultaneously.
Pressing the ‘JOIN’ key at the same time as a scanner selection key can also be used to deselect a
fixture without clearing it.
Scenes and fade rate
When a scene is saved it is also saved with a crossfade rate. When the navigator is powered up the
fade rate defaults to 25% which will provide a smooth fade between scenes. It is possible to alter the
crossfade rate for each scene to allow fade or snap between scenes. This is best set once all scenes
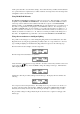
have been initially programmed for position and colour. To alter the crossfade rate select Scene from
the main menu, this will access the scene menu as before:
Programmed scenes in the current page are shown by dimly lit lights above the scanner selection keys.
The scene page may be selected by using the keys. Press the fixture key of the scene you wish
to recall. Your lighting fixtures will move to position themselves to the settings for the selected scene,
the rate at which they do this is determined by the scene crossfade rate. To change the rate, select
Fade and use the keys to alter the fade rate. A fade rate of 0% will cause the scenes to be
instantly switched to; other fade rates will produce fades between scenes of varying rates (1% = fast
fade, 100% = slow fade). To see the effect of the new fade rate you must select another scene and then
re - select the scene that you wish to alter the fade rate for. Selecting off will clear all of the attached
lighting fixtures in the same way as pressing and holding the ‘ALL’ key. Once you are happy with
the fade rate for the scene select Quit to return to the scene menu then use Store to re - save the scene
with the new fade rate. To aid in this process the scene last recalled will be indicated by a brightly lit
light above the scanner selection keys when you are prompted for the scene to store to. If the lighting
fixtures are in the process of changing state it is important to wait until the final positions have been
reached before saving to avoid the intermediate state being inadvertantly saved. Please note that
while in programming mode all scenes will be recalled with the crossfade rate set from the scene fade
setting as described above. Only in Playback Only mode, or when previewing chases or shows, will
scenes be recalled with their stored fade rates.
Changing a previously stored scene
The process to change a scene is very similar to changing the fade rate. From the main menu select
Scene and recall the scene you wish to edit by setting the scene page with the keys and select
the scene from the page with the 1-16 scanner selection keys (available scenes will be shown by dimly
lit lights above the scanner selection keys). Once the scene to edit has been recalled, select Quit to
return to the main menu. Alter any fixtures by selecting the fixture with scanner selection keys 1-16
and then use the level up and down keys and/or joystick to adjust as before. Once the scene has been