
Instruction manual


6
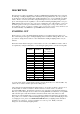
From the Edit menu select Quit again. You will be asked if the changes made are to be saved:
Select Ok to save the changes or Quit to abandon the changes. Either way you will be returned to
fixture type selection. If you have saved a new fixture type you may now assign this new type to other
fixtures. Up to 22 custom fixture types may be stored in addition to the pre-programmed fixture types.
PROGRAMMING SCENES
A scene is the state of all the lighting fixtures at a particular time. As an example you may wish to
have several lights directed towards a stage with different colours and/or gobos while a tunnel effect
shows red revolving stars. Each scene must be set up by positioning the individual lights, selecting
colours, gobos, rotation, and any other effects. To do this ensure that you are in the main menu and
select the fixture you wish to set by pressing its scanner selection key. At this point the light above
the key will light and you will receive a brief message stating the fixture type of the selected fixture.
Pressing the level up and down keys will now alter the information sent to the selected lighting
fixture. You will be informed of the data value currently being sent on the selected level for the
selected fixture. Labelled level up and down buttons will affect the aspect of the attached lighting
fixture as described by the labelling, for example pressing the power up key will increase the power
level for the selected fixture while pressing the power down key will reduce the power level (Exactly
how the lighting fixture responds to the power level will be described in it’s manual). To quickly
increase or decrease a level press and hold its up or down key for about 1 second, after which time the
level will be quickly increased or decreased. The other level buttons work in a similar manner
affecting colour, pan, tilt, gobo and rotation. Fixtures that use pan and tilt can also be positioned by
using the joystick. When the joystick is being used the levels for X (Pan) and Y (Tilt) positions are
briefly displayed as the joystick is moved. Repeat the positioning process for all the other fixtures that
you are using by selecting them and altering the levels for the desired effects. Once all fixtures have
been set up you can save the state of all the fixtures as a scene.
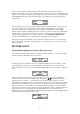
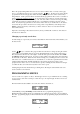
To save the scene select Scene from the main menu, this will access the scene menu as shown below:
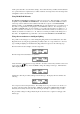
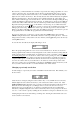
From the scene menu select Store , the display will show the following:
This is the prompt asking which scene store is to be used to hold the scene. You may select a page
from 1 - 8 in which the scene is to be stored by using the keys. If there are any scenes already
programmed in the selected page they will be shown by the lights above the scanner selection keys
being dimly lit. At this point it should be noted that already programmed scenes can be overwritten or
deleted without any warning being given. To save the scene, select a scene store from 1 - 16 in the
current page by pressing one of the scanner selection keys. The scene will be saved and a message
informing you that the save has been completed will be given, you will then be returned to the scene
menu. Select Quit to return to the main menu. The process of selecting and altering fixtures to create
more scenes can then be repeated. To delete a stored scene the procedure is the same as storing a
scene except that that you should press and hold the scanner selection key of the scene you wish to
delete for about 1 second; after which the scene will be deleted.