
Instruction manual


5
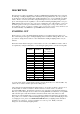
Level DMX channel Step size Fade or Switch
1 - Power 1 1 Switch
2 - Colour 2 12 Switch
3 - Pan 3 (Joystick X) 1 Fade
4 - Tilt 4 (Joystick Y) 1 Fade
5 - Gobo 5 12 Switch
6 - Rotate 6 (Unused) 1 (Unused) Fade
7 7 (Unused) 1 (Unused) Fade
8 8 (Unused) 1 (Unused) Fade
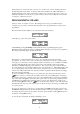
Selecting Lvl steps through the levels 1 to 8. Selecting DMX will step through DMX channels 1-8
that is being controlled by the selected level. For example, the fixture may respond to DMX data on
channel 4 as power; by selecting level 1 (Lvl) and then setting the DMX channel for this level to 4
(DMX) enables the power on DMX channel 4 to be controlled by the level 1 (Power) up and down
keys. In this way the levels for the particular lighting fixture can be set so that the corresponding up
and down keys control the correct DMX channels in the fixture. The ammount that the DMX channel
data is increased or decreased by when the level up and down keys are used can be set by using the
keys; this is shown under “Step”. The value 12 used by the TinyScan Plus for colour and gobo
channels will move the colour wheel by half a step and gobo wheel by a full step so that they may be
accurately positioned during scene programming. For the step size used by other lighting fixtures
please refer to the manufacturers manual.
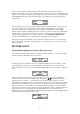
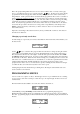
If the fixture uses X (pan) and Y (tilt) then select Joy to allow the joystick to be assigned to the
fixtures X and Y DMX channels, the display will be similar to this:
A ‘-’ after X or Y indicates that no DMX channel is assigned to the joysticks’ X (Pan) or Y (Tilt)
axis. Selecting X or Y will step through DMX channels 1-8 that the X(Pan) or Y(Tilt) axis of the
joystick is assigned to. Selecting Inv will allow the joystick movement to be inverted for either X or
Y, none or both joystick axes. If a channel has it’s X(Pan) or Y(Tilt) joystick movement inverted this
will be indicated by an ‘i’ after the X or Y channel number. Select Quit to return to personality edit,
then Quit again to return to the Edit menu.
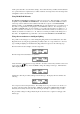
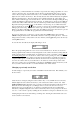
From the Edit menu select Fade, this will allow you to tell the Navigator which levels are to be faded
during a scene crossfade for this fixture type. The display should look something like this:
Normally you should set the levels used for power, pan and tilt to be faded and colour and gobo levels
to switch during a scene fade. Select the appropriate level by selecting Lvl then use Sel to toggle
between fade and switch for this level. Levels not used by the fixture may be set to either option.
Select Quit to return to the Edit menu.
From the Edit menu select Name to change the name from User to something more recognisabe to aid
in identification. You will get a display similar to the following:
The name being changed will be displayed on the second line of the display. Use to move the
cursor to the character of the name to change and then use the keys to select the character or
symbol to place into the name. When finished select Quit to return to the Edit menu.