
Instruction manual


3
Connect a 12-25v DC power supply capable of delivering 300mA to the DC input jack of the
Navigator then switch on the power to the lighting fixtures. Switch on the power to the Navigator. On
switch on of the Navigator you will be greeted by the opening screen followed by a message indicating
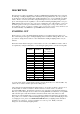
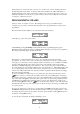
that the MIDI interface is present if it has been fitted. You will then be given the main menu that
looks like this:
The Navigator has two modes of operation. Programming mode allows the fixtures connected to the
unit to be set up and scenes, chases and shows to be created. Playback Only mode allows saved
scenes, chases and shows to be recalled only; either manually or by MIDI if the optional MIDI
interface has been installed. When the unit is first switched on from new it will power up in Playback
Only mode with scenes and chases for Discovery scanners, Defender Scanners and TinyScan plus
scanners already programmed to get you started. Please go to the Using Playback Only Mode
section of this manual first before you attempt any re-programming of the Navigator.
Please Note: Throughout this manual reference is made to scanner selection keys 1-16 even though
there are 20 scanner selection keys on the Navigator. Scanner selection keys 17 - 20 are reserved for
future development.
FIXTURE SETUP
Using intelligent lighting from the Ryger Electronics range
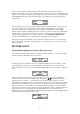
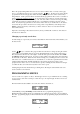
You must let the Navigator know what type of fixtures are being controlled. To do this select Setup
from the main menu. This will show the setup menu:
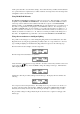
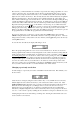
From the setup menu select Fixt to set the type of intelligent lighting used on each fixture. At this
point the light above the fixture 1 select key will light to show that fixture 1 is being set up. The
display will change to show the type of the intelligent lighting unit being used by fixture 1, similar to
this:
When the unit is new fixtures 1-4 will be set up for Discovery scanners, 5-8 set up for Defender
scanners and fixtures 9-12 for TinyScan plus units. Pressing the keys will select the type of
lighting fixture used on fixture 1. You will only need to change the fixture setup if you want to
change the type of lighting unit used on a specific fixture. If you do decide to change fixture settings
this will alter the way that the pre-programmed scenes are recalled - the scenes which use the altered
fixtures will need to be re-programmed to work with the new fixture settings. To alter the lighting
effect used by any fixture press its scanner selection key (the light above the key will light) and repeat
the type selection process. Continue in this way until all fixtures used are assigned the type of
lighting unit to be used. When all fixtures being used have been assigned a type select Quit. You will
be asked if the changed settings should be saved: