
How to Guide

FLOOR COATING TECHNICAL DATA RSD-02
ROCKSOLID
®
METALLIC GARAGE FLOOR COATING
Form: GDH-605
Rev.: 040517
1
.DESCRIPTION AND USES .
RockSolid
®
Metallic Garage Floor Coating is designed to
provide excellent hardness, adhesion and durability on
properly prepared concrete floors. It has excellent
resistance to salt, oil, gasoline and other harsh chemicals.
Garage Coat has zero VOCs making it environmentally
safe and is packaged in pouches, which reduces waste.
This product combines the key attributes from multiple
chemistries to provide a self-leveling, flexible, fast curing,
high gloss system.
RockSolid Metallic Garage Floor Coating can be applied
over multiple floor surfaces including tile. (Contact
RockSolid Floors for more information). The surface
should be free of loose particles, rust, oils and
contaminants. It is recommended that this product be
applied in a multi-directional (north, south, east and west)
motion to help ensure proper coating thickness.
The RockSolid Metallic Garage Floor Coating kit includes
the following:
Instructions
Concrete Etch
⅜” Nap Microfiber Roller Cover
Metallic Tint
Polycuramine Burst Pouch
Stir Stick
Items not supplied with the kit which need to be purchased
separately:
Roller Frame
Extension Pole
Stiff Bristled Broom or Scrub Brush
3” Paint Brush
Mixing Bucket
Other optional items that may be needed include:
Anti-Skid Additive
Heavy-Duty Degreaser
Concrete Patch & Repair
Paddle Mixer and Drill
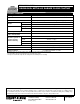
.PRODUCTS .
SKU Description
286893 Silver Metallic
286894 Copper Metallic
286895 Brown Metallic
286896 Cherry Metallic
299741 Amaretto Metallic
299743 Gunmetal Metallic
299744 Burnished Gold
299745 Brilliant Blue
. PRODUCT FEATURES .
Low odor and can be applied indoors
VOC free
45 minute pot life
Serves as both primer, basecoat and topcoat in one easy
coat
Patented Burst Pouch Technology
96% solids formulation
Has excellent self-leveling properties with built-in shine
7 day recoat window without sanding
.PACKAGING .
Two part Burst Pouch Technology
(U.S. Patent Number 8,381,903 B2)
.APPEARANCE .
High gloss
PRODUCT APPLICATION .
SURFACE PREPARATION
Proper surface preparation is critical to achieve best
results. Scrub heavily soiled areas with Rust-Oleum Heavy
Duty Degreaser or Rust-Oleum Cleaner & Degreaser (sold
separately). Scrub thoroughly, then rinse. Repeat as
needed. TION
Use the supplied concrete etch per the instructions to
provide the proper surface condition to ensure proper
adhesion. Rinse the floor thoroughly and allow it to dry
completely.
Moisture Testing - New concrete should be allowed to
cure for 30 days before application of any coating. If there
is any doubt about the dryness of the concrete, conduct a
test by simply taping a piece of 4 mil plastic sheet 2’x2’ on
the bare concrete for 24 hours. Be sure to tape all four
sides. After 24 hours, check the concrete for signs of
moisture. The concrete substrate will be darker if damp. If
moisture is found, allow additional drying time (10-14
days) and repeat the test.
Testing for Sealer - Check for curing compounds or other
types of sealers by pouring a small amount of water onto
the concrete. If water soaks in, the surface is suitable for
coating. If water beads up on the concrete, the surface is
not porous and a test application is warranted to ensure
proper adhesion will develop. Sanding or mechanical
abrading may be required if proper adhesion does not
develop.
Previously Coated Floors - Previously coated floors
need to be in good condition with proper adhesion to the
concrete substrate. Check the adhesion of the previous
coating by cutting a small X in the coating using a sharp
razor knife. Firmly apply a piece of 5” duct tape over the
center of the X cut, and then pull off with a fast snap. If
more than 10% of the taped area is removed, the original
coating is not bonded well and needs to be removed
chemically or mechanically with a grinder.