
- RUNCO International OWNER'S OPERATING MANUAL 1080p Digital Light ProcessingTM Projector and Digital High Definition (DHDTM) Controller VX-44d, VX-55d
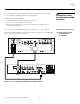
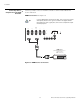
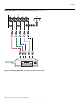
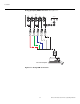
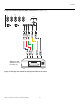
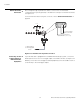
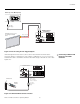


Table Of Contents
- TWO YEAR LIMITED WARRANTY
- Safety Precautions
- 1. Introduction
- 2. Controls and Functions
- 3. Installation
- 3.1 Remote Control
- 3.2 Quick Setup
- 3.3 Installation Considerations
- 3.4 Installing the Projection Lens
- 3.5 Installing the Optional CineWide Lens Mount
- 3.6 Mounting the VX-44d/-55d
- 3.7 Connections to the VX-44d/-55d and DHD Controller
- Connector Panel Access
- Connecting the DHD Controller to the VX-44d/-55d
- Connecting Source Components to the DHD Controller
- RS-232 Controller Connection
- Connecting 12-Volt Trigger Outputs to External Theater Equipment
- Connecting an External IR Receiver to the DHD Controller
- Connecting to AC Power
- 3.8 Turning on the Power
- 3.9 Adjusting the Picture Orientation
- 3.10 Primary Lens Adjustments
- 3.11 Installing and Adjusting the CineWide Anamorphic Lens
- 3.12 Calibrating Projector Input 2 (DVI)
- 3.13 Working With the Lamp
- 4. Operation
- 5. Maintenance and Troubleshooting
- 6. Serial Communications
- 7. Specifications
Installation
36 Runco VX-44d/-55d Owner’s Operating Manual
PRE
L
IMINAR
Y
Connecting to AC Power The VX-44d/-55d system includes two (2) AC power cords (one each for the DHD
Controller and projector).
DHD Controller: Plug the female end of one power cord into the AC receptacle on the
rear of the DHD Controller. Connect the other end to your AC power source
(100
to 240 VAC).
Projector: Similarly connect the VX-44d/-55d to a nearby AC outlet. The input voltage to
a VX-44d must be between 100 and 240 VAC. The input voltage to a VX-55d must be
between 200 and 240 VAC.
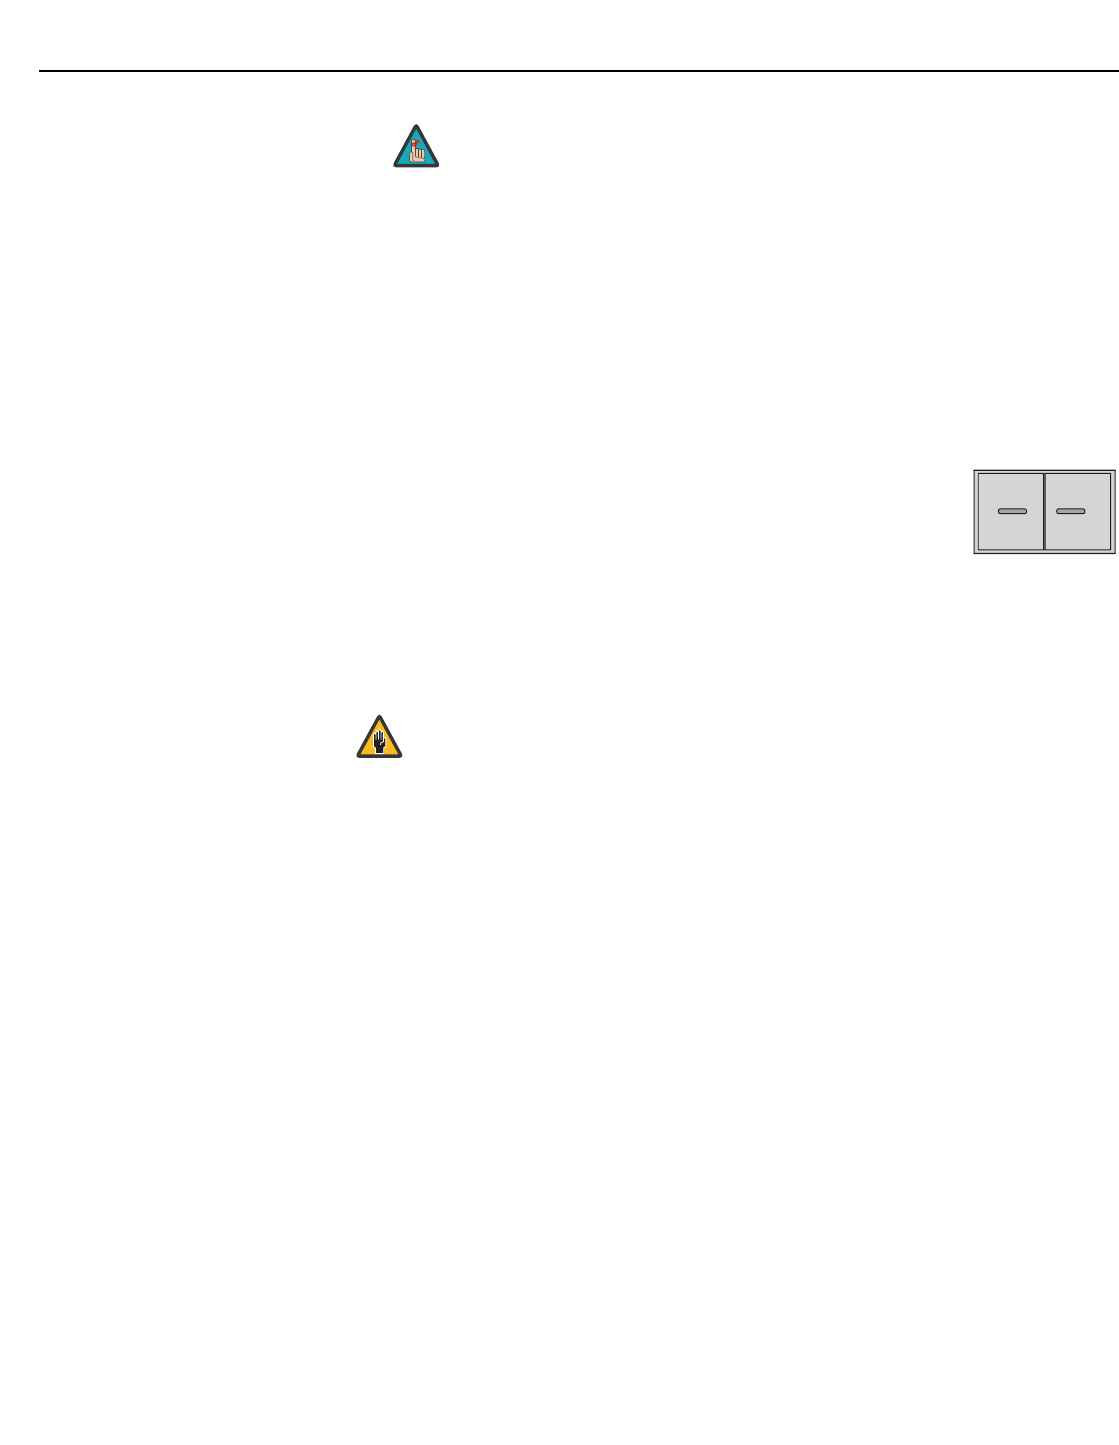
The LED status window displays an active pattern of segments to
indicate the projector is changing its state from powered down to
powered up. “--” appears in the display when the projector is
ready to be turned on.
AutoScope Lens Motor: With AutoScope-equipped projectors, a third power cord is
provided for the lens motor. Plug the female end of the AC power cord into the AC
receptacle on the rear of the lens motor assembly. Connect the other end to a 110 VAC
power source.
When an external IR receiver is connected to the wired IR input, the
built-in IR sensor on the DHD Controller is disabled.
Note
➤
The input voltage to the AutoScope lens motor must be between
100 and 120 VAC. Do not connect the AutoScope lens motor
to a 200-240
VAC power source!
Caution