
- RUNCO International OWNER'S OPERATING MANUAL 1080p Digital Light ProcessingTM Projector and Digital High Definition (DHDTM) Controller VX-44d, VX-55d

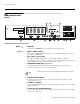
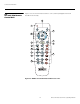

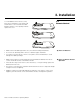
Table Of Contents
- TWO YEAR LIMITED WARRANTY
- Safety Precautions
- 1. Introduction
- 2. Controls and Functions
- 3. Installation
- 3.1 Remote Control
- 3.2 Quick Setup
- 3.3 Installation Considerations
- 3.4 Installing the Projection Lens
- 3.5 Installing the Optional CineWide Lens Mount
- 3.6 Mounting the VX-44d/-55d
- 3.7 Connections to the VX-44d/-55d and DHD Controller
- Connector Panel Access
- Connecting the DHD Controller to the VX-44d/-55d
- Connecting Source Components to the DHD Controller
- RS-232 Controller Connection
- Connecting 12-Volt Trigger Outputs to External Theater Equipment
- Connecting an External IR Receiver to the DHD Controller
- Connecting to AC Power
- 3.8 Turning on the Power
- 3.9 Adjusting the Picture Orientation
- 3.10 Primary Lens Adjustments
- 3.11 Installing and Adjusting the CineWide Anamorphic Lens
- 3.12 Calibrating Projector Input 2 (DVI)
- 3.13 Working With the Lamp
- 4. Operation
- 5. Maintenance and Troubleshooting
- 6. Serial Communications
- 7. Specifications
Controls and Functions
10 Runco VX-44d/-55d Owner’s Operating Manual
PRE
L
IMINAR
Y
2.4
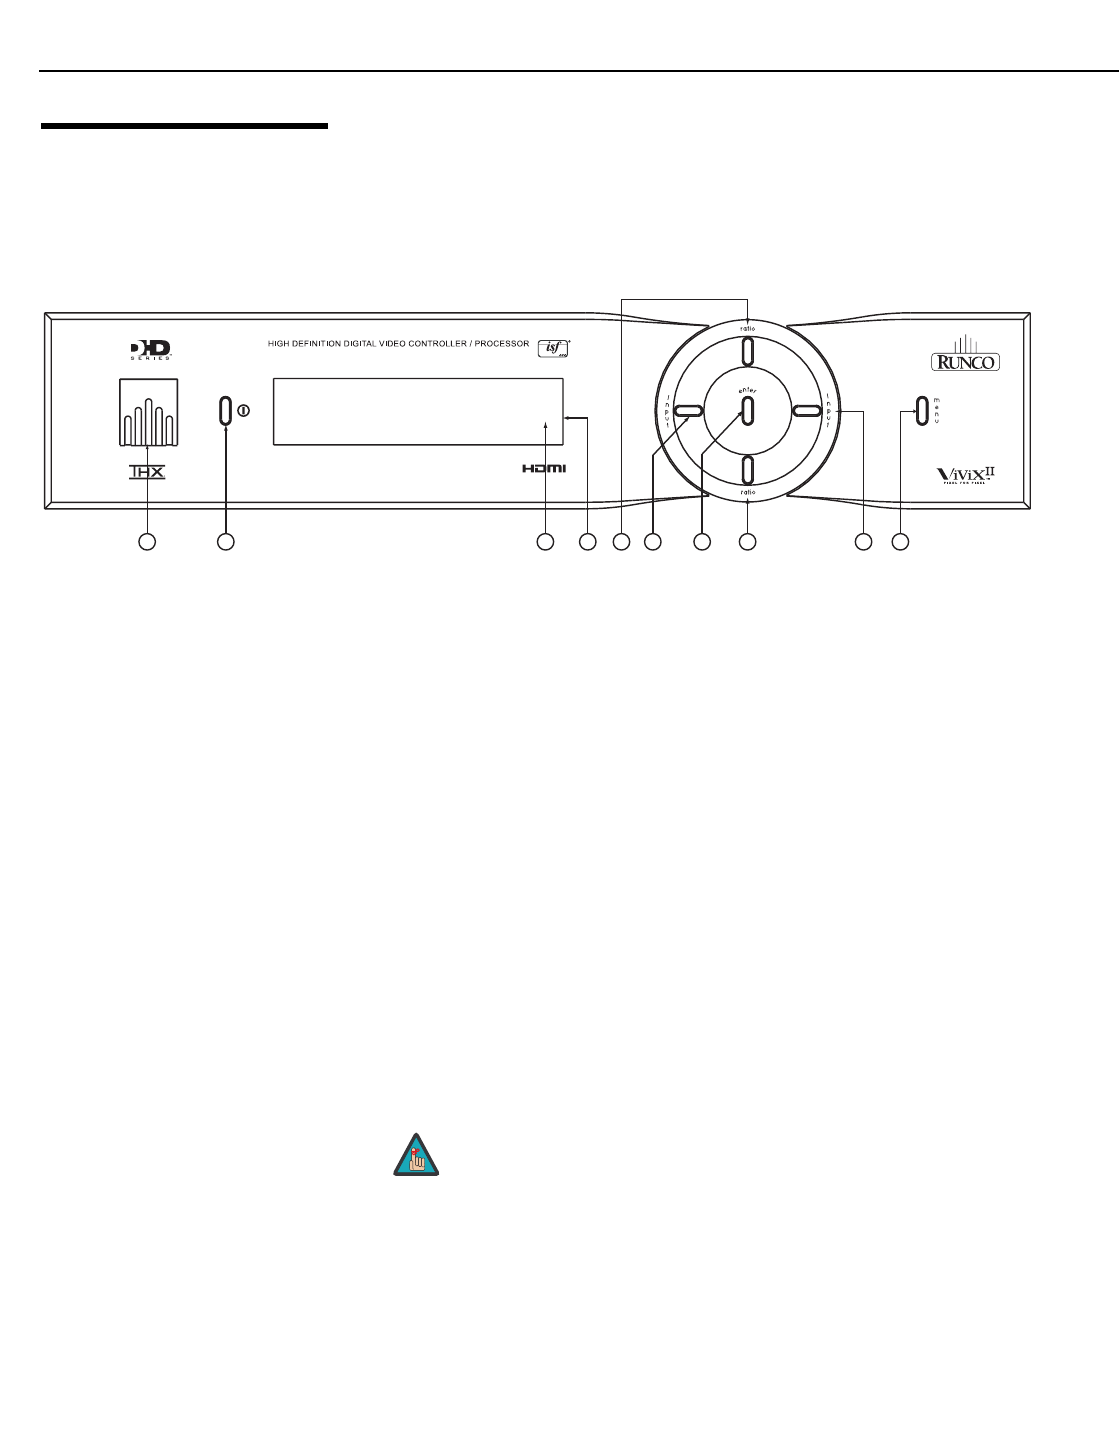
DHD Controller Front
Panel
Figure 2-4 shows the controls and indicators on the DHD Controller front panel; the
paragraphs that follow describe them.
Figure 2-4. DHD Controller Front Panel
1. RUNCO ICON
Lights red to indicate that the DHD Controller is in standby mode; lights blue to
indicate that the unit is on.
2. POWER BUTTON
Press once to toggle from standby mode to on mode. Press it again to return to
standby mode. For a discrete on or off command, you can use the direct access
buttons on the remote control.
3. IR SENSOR
Receives IR commands from the remote.
4. VACUUM FLUORESCENT DISPLAY
Can be used instead of the On-Screen Display (OSD). Displays currently-selected
menu or – if no menu is selected – the current source, signal format (NTSC or PAL),
input resolution and aspect ratio.
5. UP BUTTON
Use to direct select aspect ratios or move the menu cursor up in the OSD. When no
menu is present on-screen, the UP button toggles through aspect ratios in the
following order:
16:9 - 4:3 - Letterbox - VirtualWide - Cinema - Virtual Cinema
6. LEFT BUTTON
Used to direct select inputs or move the menu cursor left in the OSD. When no menu
is present on-screen, the LEFT button toggles through the different sources, in this
order:
HDMI 2 - HDMI 1 - HD/RGB2 - HD/RGB1 - Component SD - S-Video 2 - S-Video 1 -
Composite
2
3
1
45
6
7
8
9
10
Virtual Cinema is available only on the VX-44d/-55d/CineWide. For
more information about aspect ratios, refer to
Table 4-1.
Note