
Specifications


Table Of Contents
- TWO YEAR LIMITED WARRANTY
- Safety Precautions
- 1. Introduction
- 2. Controls and Functions
- 3. Installation
- 3.1 Remote Control
- 3.2 Quick Setup
- 3.3 Installation Considerations
- 3.4 Installing the Projection Lens, Lamp and Cooling
- 3.5 Installing the Optional CineWide Lens Mount
- 3.6 Mounting the SC-1
- 3.7 Connections to the SC-1 and DHD Controller
- Input Panel Access
- Connecting the DHD Controller to the SC-1
- Connecting Source Components to the DHD Controller
- RS-232 Controller Connection
- Connecting 12-volt Trigger Outputs to External Equipment
- Connecting an External IR Receiver to the DHD Controller
- Connecting an External Power Supply/Ballast to the Projection Head
- Connecting to AC Power
- 3.8 Turning on the Power
- 3.9 Maximizing Light Output
- 3.10 Adjusting the Picture Orientation
- 3.11 Primary Lens Adjustments
- 3.12 Installing and Adjusting the CineWide Anamorphic Lens
- 3.13 Calibrating Projector Input 2 (DVI)
- 3.14 Working With the Lamp
- 4. Operation
- 5. Maintenance and Troubleshooting
- 6. Serial Communications
- 7. Specifications
Installation
Runco SC-1 Owner’s Operating Manual 33
PRE
L
IMINAR
Y
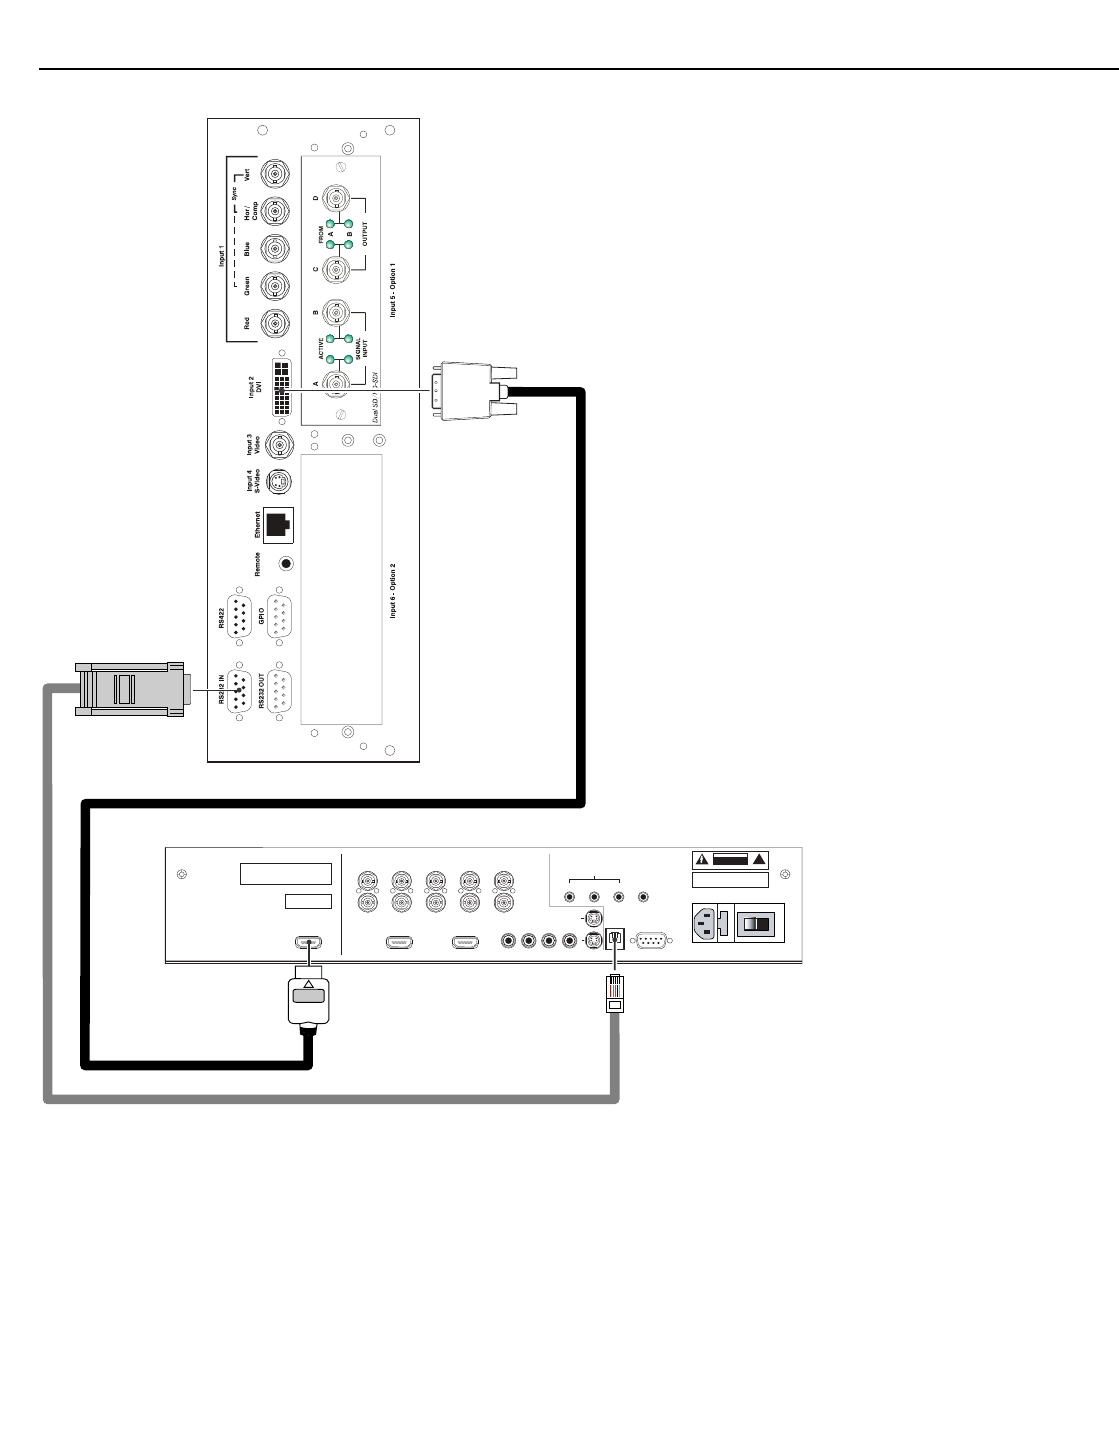
Figure 3-13. Connecting the SC-1 to the DHD Controller
Pb Pr Y
Video
3
IR
RS-232 Control
S-Video 1
S-Video 2
HD1
HD2
1
2
R/Pr G/Y B/Pb
R/Pr G/Y B/Pb H V
HDMI 1 HDMI 2HDMI Out
HV
TRIGGERS
RS-232 Out
CAUTION:
TO REDUCE THE RISK OF ELECTRIC
SHOCK, DO NOT REMOVE COVER. NO USER-
SERVICEABLE PARTS INSIDE. REFER SERVICING
TO QUALIFIED SERVICE CENTER.
AVIS : RISQUE DE CHOC ELECTRIQUE-NE PAS OUVRIR
CAUTION
RISK OF ELECTRIC SHOCK
DO NOT OPEN
!
WARNING:
TO REDUCE THE RISK OF FIRE
OR ELECTRIC SHOCK, DO NOT EXPOSE
THIS APPLIANCE TO RAIN OR MOISTURE.
100-230VAC 50-60 Hz, 165 Watts Max
INPUTS
SYSTEM CONTROL INTERFACE
Component Video
Serial No
Video Processor / Controller
Model
Made In USA
RS-232 OUT
DHD Controller
SC-1 Input Panel
HDMI OUT