
Specifications


Table Of Contents
- TWO YEAR LIMITED WARRANTY
- Safety Precautions
- 1. Introduction
- 2. Controls and Functions
- 3. Installation
- 3.1 Remote Control
- 3.2 Quick Setup
- 3.3 Installation Considerations
- 3.4 Installing the Projection Lens, Lamp and Cooling
- 3.5 Installing the Optional CineWide Lens Mount
- 3.6 Mounting the SC-1
- 3.7 Connections to the SC-1 and DHD Controller
- Input Panel Access
- Connecting the DHD Controller to the SC-1
- Connecting Source Components to the DHD Controller
- RS-232 Controller Connection
- Connecting 12-volt Trigger Outputs to External Equipment
- Connecting an External IR Receiver to the DHD Controller
- Connecting an External Power Supply/Ballast to the Projection Head
- Connecting to AC Power
- 3.8 Turning on the Power
- 3.9 Maximizing Light Output
- 3.10 Adjusting the Picture Orientation
- 3.11 Primary Lens Adjustments
- 3.12 Installing and Adjusting the CineWide Anamorphic Lens
- 3.13 Calibrating Projector Input 2 (DVI)
- 3.14 Working With the Lamp
- 4. Operation
- 5. Maintenance and Troubleshooting
- 6. Serial Communications
- 7. Specifications
Installation
26 Runco SC-1 Owner’s Operating Manual
PRE
L
IMINAR
Y
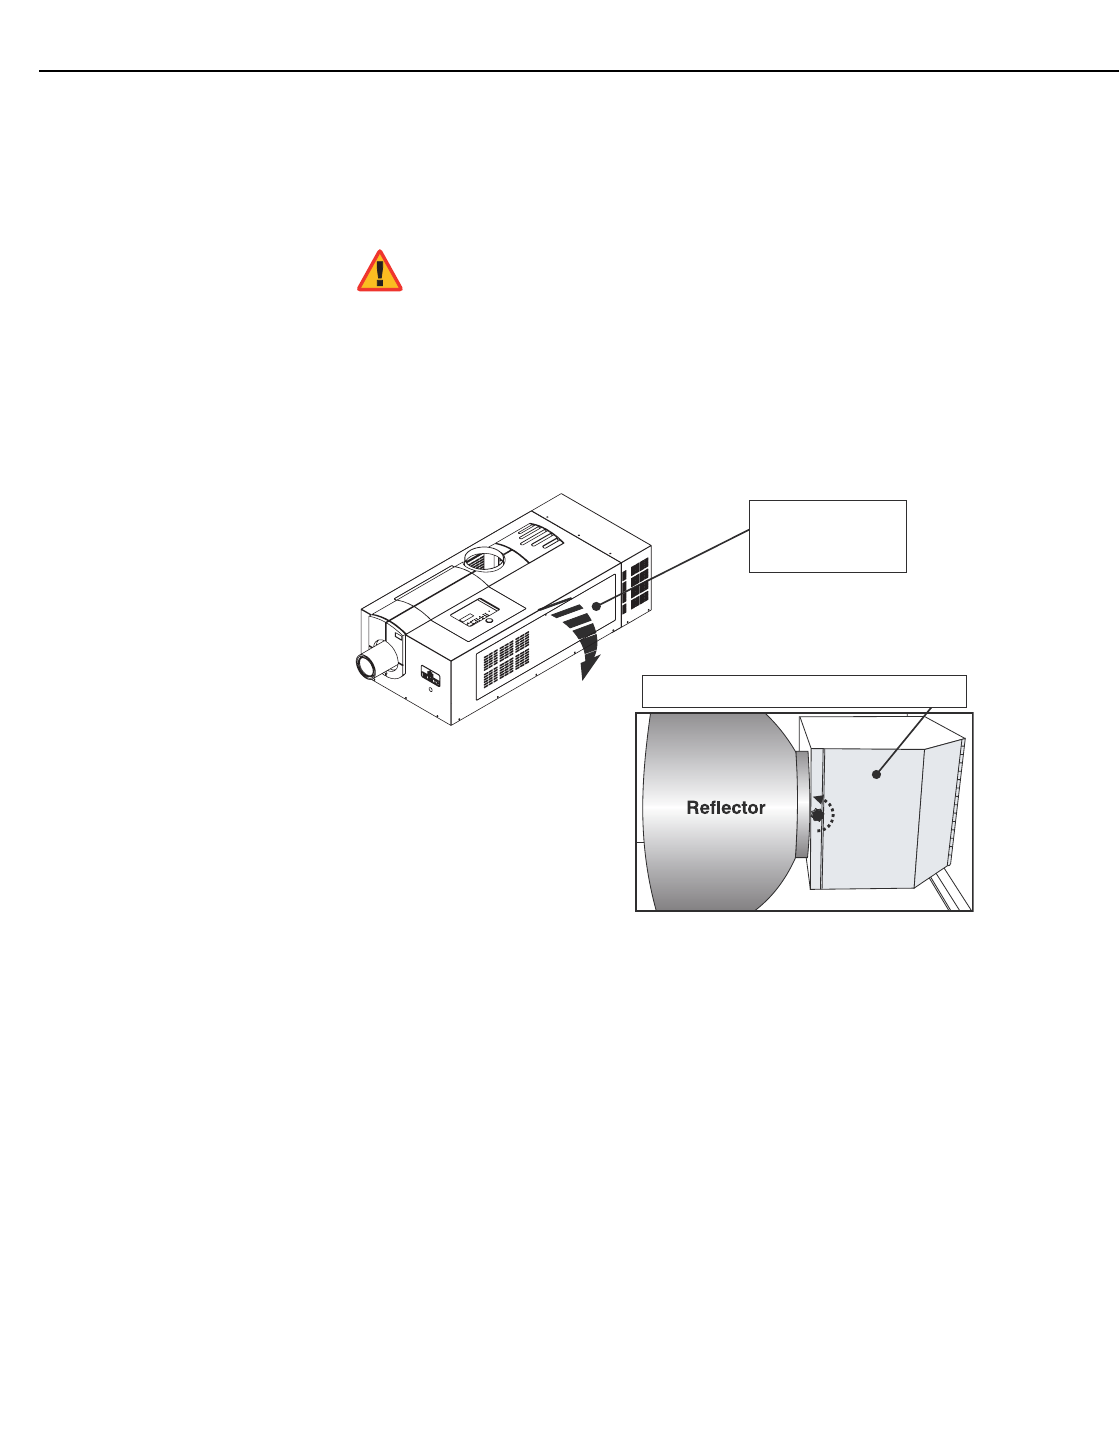
Installing the Lamp To install the lamp, remove the screw holding the lamp/air filter cover in place. Then, lift
the cover up and away from the projector.
Turn the knob to open the inner lamp cooling compartment and reveal the cathode end (–)
of the lamp; see
Figure 3-6.
Figure 3-6. Accessing the Lamp Cooling Compartment
➤
Xenon arc lamps are under high pressure and must be handled
with great care at all times. Lamps may explode if dropped or
mishandled.
Never open the lamp door unless you are wearing protective
clothing. Recommended protective clothing includes — but may
not be limited to — protective gloves, latex lab gloves, a
double-layer 0.040” acetate face shield, and a quilted ballistic nylon
jacket or welder’s jacket.
WARNING
(turn to
open)
Remove
Lamp/Air Filter
Cover
Lamp Cooling Compartment Door