
Specifications


Table Of Contents
- TWO YEAR LIMITED WARRANTY
- Safety Precautions
- 1. Introduction
- 2. Controls and Functions
- 3. Installation
- 3.1 Remote Control
- 3.2 Quick Setup
- 3.3 Installation Considerations
- 3.4 Installing the Projection Lens, Lamp and Cooling
- 3.5 Installing the Optional CineWide Lens Mount
- 3.6 Mounting the SC-1
- 3.7 Connections to the SC-1 and DHD Controller
- Input Panel Access
- Connecting the DHD Controller to the SC-1
- Connecting Source Components to the DHD Controller
- RS-232 Controller Connection
- Connecting 12-volt Trigger Outputs to External Equipment
- Connecting an External IR Receiver to the DHD Controller
- Connecting an External Power Supply/Ballast to the Projection Head
- Connecting to AC Power
- 3.8 Turning on the Power
- 3.9 Maximizing Light Output
- 3.10 Adjusting the Picture Orientation
- 3.11 Primary Lens Adjustments
- 3.12 Installing and Adjusting the CineWide Anamorphic Lens
- 3.13 Calibrating Projector Input 2 (DVI)
- 3.14 Working With the Lamp
- 4. Operation
- 5. Maintenance and Troubleshooting
- 6. Serial Communications
- 7. Specifications
Specifications
110 Runco SC-1 Owner’s Operating Manual
PRE
L
IMINAR
Y
7.3
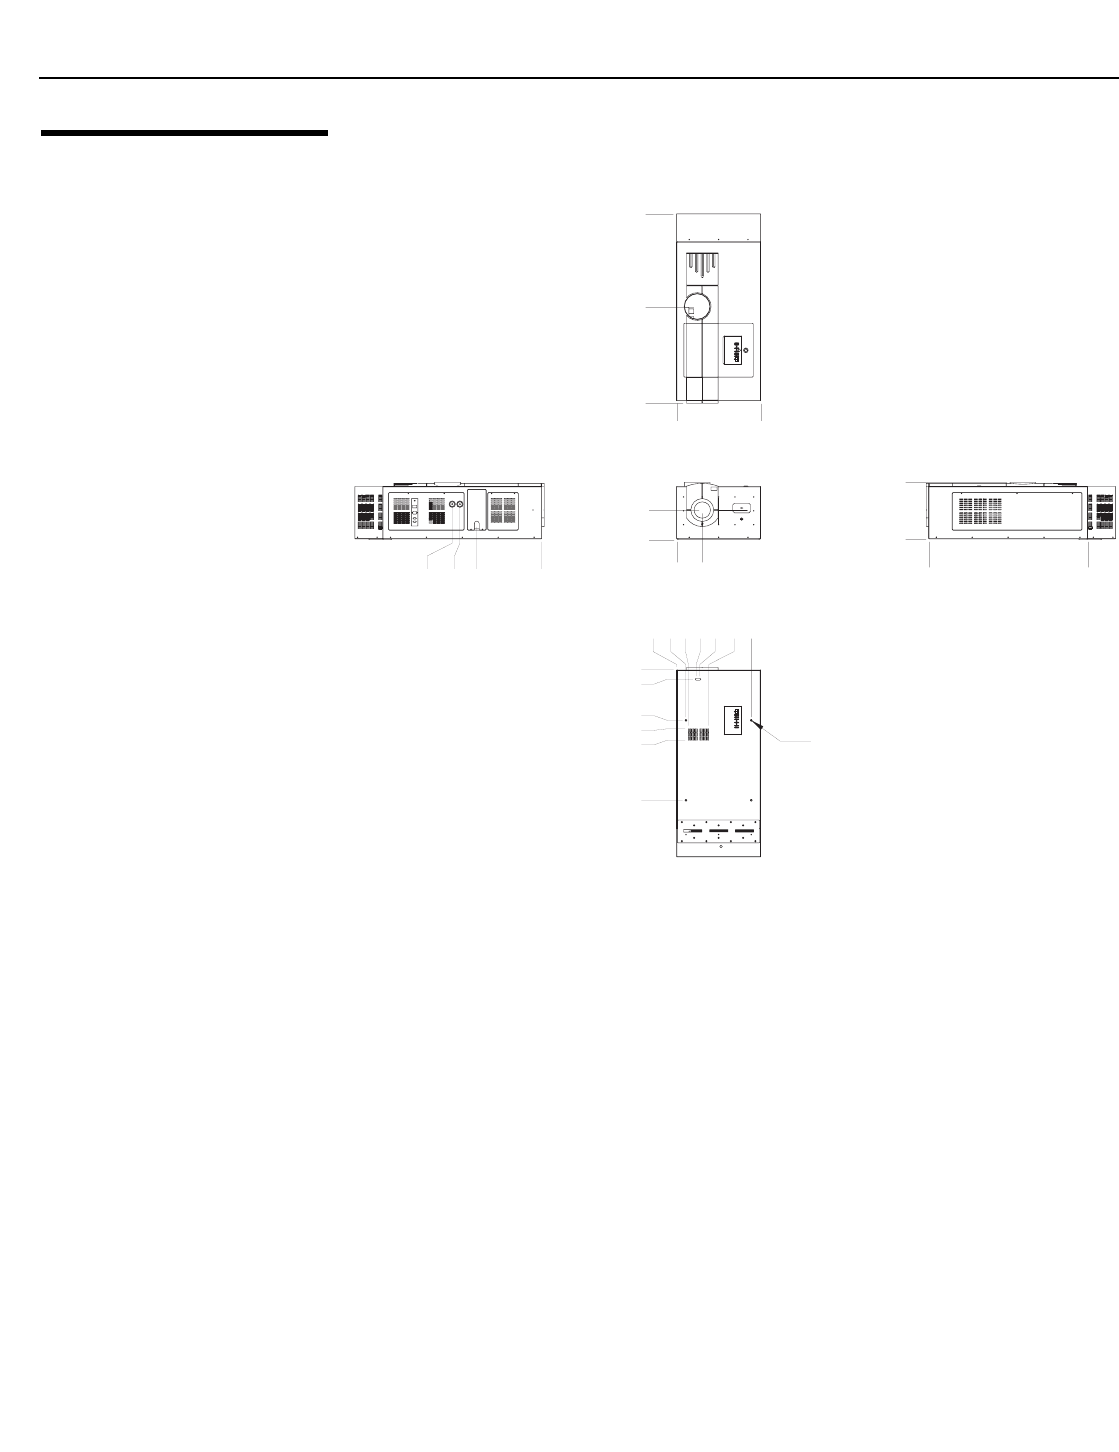
SC-1 Dimensions
Figure 7-1 and Figure 7-2 show the SC-1 dimensions (all dimensions are in inches).
Figure 7-1. SC-1 Dimensions (with Built-In Power Supply/Lamp Ballast)
0
7.875
0
9.042
0
48.712
0
17.355
0
15.450
39.950
18.052
21.552
2.875
0
2.875
22.875
3.612
9.862
6.013
7.138
Ø
.625
0
29.638
58.037
0
25.750
0
25.100
27.450
19.925