ADAMTM Advanced Digital Audio Matrix SYSTEM INSTALLATION GUIDE ™ Advanced Digital Audio Matrix ™ 9330-7467-000 Rev E1 8/97
Contents Unpacking the Components 1 Mounting the Central Matrix Components 1 ADAM Circuit Cards 1 Front Card Access 1 Card Removal and Installation 1 Unused Back Card Slots 2 Master Controller Card DIP Switches 2 Power Supply Removal/Installation 2 AC Power Connection 2 ADAM Frame Power-Up 2 Circuit Card Reset and Fail Indication 2 Alarm Operation 2 Connections to the ADAM Card Frame 3 Configuration Computer Connection and Check 3 Program Assign Panel (PAP) Installation 3 UIO-256 Input/Output Frame 4 Conn
1 Unpacking the Components Unpack the contents of the shipping crates and carefully inspect for damage. Notify the freight carrier immediately if any damage is noted. Check off all items as noted in the packing lists. Safety Tip Use caution when lifting the system components. A fully loaded ADAM Card Frame, for example, weighs approximately 75 lbs (34 kg). 2 Mounting the Central Matrix Components Bolt the ADAM Card Frame into the front of the equipment rack.
vided by the Audio Input/Output Card in slot number 8. Therefore, if your intercom system uses fewer than ten Audio Input/Output Cards, make sure that slots 9 and 8 are filled in any case. Also, never remove cards 9 and 8 at the same time as the intercom system will cease to operate. assure continued operation of the ADAM Frame in the event that one power supply fails. If desired, two separate AC power phases may be connected.
Note 10 ft (3 m). Note that some PC’s cannot operate reliably at the higher baud rate. The power supply alarm will also sound if a power supply is turned off. This is normal. Either turn on the power supply, or turn off the ALARM OVERRIDE switch. 9 Connections to the ADAM Card Frame An ADAM Intercom System can be setup in a variety of configurations to meet different user requirements.
number 1. Reset the switches, as shown in Table 5, page 11, so that each PAP has a unique panel number. 3. By default, all PAP’s are supplied with the lower of two ranges of IFB’s selected. For example, a PAP-952 is set by default to work with IFB numbers 1 to 24. If a second PAP-952 is connected, it can be reset to work with IFB numbers 25 to 48 if desired. To select the low or high range, set DIP switch number 3 as shown in Table 6, page 11. 9.3 9.3.1 9.2.
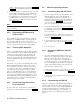
Once an input has been assigned to a key, it is then necessary to define a device to be activated by that key. This is accomplished in the keypanel edit screen for the port to which the digital input was assigned. (See “Key Panel Setup: Key Assignments and Key Restrictions” in the CSedit User Manual.) 4. Also using CSedit within each intercom system, remove scroll restrictions for each intercom port, party line etc. that will be made available for key assignment in other intercom systems.
then makes the necessary talk and listen connections so that a conversation can take place. It also sends data to the device being called; for example, to display the caller’s name at a keypanel, or to activate a telephone line at a TIF-951 Telephone Interface etc. 10.2 3. Connect devices to the intercom ports as noted in the worksheet. Refer to any installation notes included below for the type of device being connected. 4.
numeric displays should change from asterisks (****) to dashes (----). • • When the KP-12’s keypanel address is initially set, it is automatically saved. Unlike KP-9X series keypanels, no power-off reset is required. To change the intercom port number at a later time, see “Service Menu” in the KP-12 User Manual. Refer to the KP-12 User Manual for complete user information. 10.
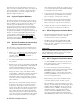
Pressing a PL4 key will activate its talk/listen assignment, and at the same time, it will disable the PL1 through PL3 keys directly above it. When the ISO key is turned off, the previous state of the other three keys will be restored. This ISO feature is selectable using an internal DIP switch in the CDP-950. The following procedures describe the installation and programming of the CDP-950 for use in an ADAM intercom system: 10.8.3 Installing the CDP-950 1.
Table 1. ADAM Master Controller Card DIP Switch Settings (S1)1 Switch No. 1 2 3 4 5 6 Description (On=closed; Off=open) Default Setting (On=closed; Off=open) CSedit baud rate select2 Off: 9600 baud On: 38.4 Kbaud Keypanel Incoming message option3 Off: Normal operation On: All callers displayed in Incoming Messages window Keypanel "busy" and "in-use" flash4 Off: Enable On: Disable Off Off Off Trunk master baud rate select.5 Off: 38.
Intercom Port Numbers, Grouped by Audio I/O Card Number AIO #2 AIO #3 AIO #4 AIO #5 AIO #6 AIO #7 AIO #8* AIO #9* AIO #10 AIO #11 AIO #12 AIO #13 AIO #14 AIO #15 AIO #16 AIO #17 Logical Keypanel Number AIO #1 10 ADAM Installation Manual Table 2.
Table 3. Address DIP Switch Settings for KP-95/96/97/98 Keypanels and the TIF-951 Telephone Interface Logical Keypanel Number SW 4 SW 5 SW 6 SW 7 1 Address DIP Switch Settings Closed Open Open Open 2 Open Closed Open Open 3 Closed Closed Open Open 4 Open Open Closed Open 5 Closed Open Closed Open 6 Open Closed Closed Open 7 Closed Closed Closed Open 8 Open Open Open Closed Table 4. CDP-950 intercom Range Selection Ports Controlled* Table 5.
Table 7. UIO-256 DIP Switch SW1 Settings for Input/Output Range I/O Range DIP Switch Settings 1 2 3 4 5 6 7 8 1-16* Open Open Open Open Open Open Open Closed 17-32 Open Open Open Closed Open Open Open Closed 33-48 Open Open Open Open Closed Open Open Closed 49-64 Open Open Open Closed Closed Open Open Closed * Default Table 8. UIO-256 Relay Outputs Connector (J5) Relay Output Numbers* Table 9.
Intercom System Planning Worksheet, Sheet 1 of 6 Intercom Port No. ADAM Audio I/O Card No. Logical Keypanel Number* 1 1 1 2 1 2 3 1 3 4 1 4 5 1 5 6 1 6 7 1 7 8 1 8 9 2 1 10 2 2 11 2 3 12 2 4 13 2 5 14 2 6 15 2 7 16 2 8 17 3 1 18 3 2 19 3 3 20 3 4 21 3 5 22 3 6 23 3 7 24 3 8 CSedit Alpha CSedit Alias Description (Device type, location, user etc.
Intercom System Planning Worksheet, Sheet 2 of 6 Intercom Port No. ADAM Audio I/O Card No. Logical Keypanel Number* 25 4 1 26 4 2 27 4 3 28 4 4 29 4 5 30 4 6 31 4 7 32 4 8 33 5 1 34 5 2 35 5 3 36 5 4 37 5 5 38 5 6 39 5 7 40 5 8 41 6 1 42 6 2 43 6 3 44 6 4 45 6 5 46 6 6 47 6 7 48 6 8 14 ADAM Installation Manual CSedit Alpha CSedit Alias Description (Device type, location, user etc.
Intercom System Planning Worksheet, Sheet 3 of 6 Intercom Port No. ADAM Audio I/O Card No. Logical Keypanel Number* 49 7 1 50 7 2 51 7 3 52 7 4 53 7 5 54 7 6 55 7 7 56 7 8 57 8 1 58 8 2 59 8 3 60 8 4 61 8 5 62 8 6 63 8 7 64 8 8 65 9 1 66 9 2 67 9 3 68 9 4 69 9 5 70 9 6 71 9 7 72 9 8 CSedit Alpha CSedit Alias Description (Device type, location, user etc.
Intercom System Planning Worksheet, Sheet 4 of 6 Intercom Port No. ADAM Audio I/O Card No. Logical Keypanel Number* 73 10 1 74 10 2 75 10 3 75 10 4 77 10 5 78 10 6 79 10 7 80 10 8 81 11 1 82 11 2 83 11 3 81 11 4 85 11 5 86 11 6 87 11 7 88 11 8 89 12 1 90 12 2 91 12 3 92 12 4 93 12 5 94 12 6 95 12 7 96 12 8 16 ADAM Installation Manual CSedit Alpha CSedit Alias Description (Device type, location, user etc.
Intercom System Planning Worksheet, Sheet 5 of 6 Intercom Port No. ADAM Audio I/O Card No. Logical Keypanel Number* 97 13 1 98 13 2 99 13 3 100 13 4 101 13 5 102 13 6 103 13 7 104 13 8 105 14 1 106 14 2 107 14 3 108 14 4 109 14 5 110 14 6 111 14 7 112 14 8 113 15 1 114 15 2 115 15 3 116 15 4 117 15 5 118 15 6 119 15 7 120 15 8 CSedit Alpha CSedit Alias Description (Device type, location, user etc.
Intercom System Planning Worksheet, Sheet 6 of 6 Intercom Port No. ADAM Audio I/O Card No. Logical Keypanel Number* 121 16 1 122 16 2 123 16 3 124 16 4 125 16 5 126 16 6 127 16 7 128 16 8 129 17 1 130 17 2 131 17 3 132 17 4 133 17 5 134 17 6 135 17 7 136 17 8 18 ADAM Installation Manual CSedit Alpha CSedit Alias Description (Device type, location, user etc.
8 7 6 4 5 3 1 2 REVISIONS ZONE REV ADAM INTERCOM MATRIX FRAME PORT NO. 1 - 40 PANEL NO. 1 PANEL NO.
8 7 6 4 5 3 1 2 REVISIONS ZONE REV ADAM INTERCOM MATRIX FRAME PANEL NO. 1 PANEL NO.
8 7 6 4 5 3 2 1 REVISIONS J23 J25 NOT USED J24 J1 J2 XCP-955 STATION BREAK OUT J26 PORTS 25 - 48 J27 J23 J25 NOT USED J24 J1 C J2 2001 2 1004 2 2002 2 1006 J28 2003 2 2 IN OUT IOUT IN PORTS 73 - 96 J27 1008 J28 2004 2 OUT AUDIO OUT 25 - 48 JACKFIELD IN KP DATA 25 - 48 JACKFIELD IN AUDIO IN 49 - 72 JACKFIELD OUT AUDIO OUT 49 - 72 JACKFIELD IN OUT KP DATA 49 - 72 JACKFIELD IN AUDIO IN 73 - 96 JACKFIELD OUT OUT AUDIO OUT 73 - 96 JACKFIELD IN OUT KP DATA
8 7 6 4 5 3 1 2 REVISIONS ZONE REV D J23 J24 J1 J2 J23 J24 J1 C J2 J23 J24 J1 J2 J23 J24 J26 PORTS 1 - 24 J27 J25 NOT USED J28 XCP-955 STATION BREAK OUT J26 PORTS 25 - 48 J27 J25 NOT USED J28 XCP-955 STATION BREAK OUT J26 PORTS 49 - 72 J27 J25 NOT USED J28 XCP-955 STATION BREAK OUT J26 PORTS 73 - 96 J27 J25 NOT USED J28 1001 2 1002 2 2001 2 1003 2 1004 2 2002 2 1005 2 1006 2 2003 2 1007 2 1008 2 2004 2 IN OUT OUT IN OUT IN IN OUT IN IN OUT IN AUD
8 7 6 4 5 3 2 1 REVISIONS J27 1002 J28 2001 J23 J25 NOT USED J24 J1 J2 1003 PORTS 25 - 48 J27 1004 J25 NOT USED J2 J1 2 1006 J28 2003 2 J26 PORTS 73 - 96 J27 1008 J28 1102 J2 2 AUDIO IN 25 - 48 JACKFIELD OUT AUDIO OUT 25 - 48 JACKFIELD IN 1103 2 1104 J2 2 OUT AUDIO IN 49 - 72 JACKFIELD OUT AUDIO OUT 49 - 72 JACKFIELD IN 1105 J1 2 1106 J2 2 IN 2 2 OUT OUT AUDIO OUT 73 - 96 JACKFIELD IN 1107 J1 2 1108 J2 2 2004 J5 J4 J5 J4 J5 J6 J3 2
8 7 6 4 5 3 1 2 REVISIONS ZONE REV D J23 J24 J1 J2 J23 J24 J1 C J2 J23 J24 J1 J2 J23 J24 J26 PORTS 1 - 24 J27 J25 NOT USED J26 PORTS 25 - 48 J27 J26 PORTS 49 - 72 J27 2 OUT AUDIO IN 1 - 24 JACKFIELD AUDIO OUT 1 - 24 JACKFIELD OUT IN J26 PORTS 73 - 96 J27 1101 3 1102 3 1003 2 1004 2 IN OUT AUDIO OUT 25 - 48 JACKFIELD OUT IN 1103 3 2 1006 2 IN OUT AUDIO OUT 49 - 72 JACKFIELD OUT IN 1104 3 2 1008 2 IN OUT AUDIO OUT 73 - 96 JACKFIELD OUT IN 1105 3
8 7 6 4 5 3 2 1 REVISIONS XCP954-48 STATION BREAK OUT J55 2001 PORTS 1 - 48 OUT AUDIO OUT 1 - 24 JACKFIELD IN 2 OUT KP DATA 1 - 24 JACKFIELD IN 5 J52 1003 AUDIO IN 25 - 48 JACKFIELD OUT J54 1004 AUDIO OUT 25 - 48 JACKFIELD IN IN 2 2 OUT J47 J48 J56 J1 C J51 2002 5 1005 XCP954-48 STATION BREAK OUT PORTS 49 - 96 J55 IN 2 J2 J53 OUT 1006 2 2003 2 J52 1007 J54 1008 OUT OUT J56 2004 2 AUDIO IN 49 - 72 JACKFIELD OUT AUDIO OUT 49 - 72 JACKFIELD IN KP DATA 4
8 7 6 4 5 3 1 2 REVISIONS ZONE REV 1001 2 J2 D J53 XCP954-48 STATION BREAK OUT PORTS 1 - 48 J55 J52 J54 J47 J48 J56 J1 C J51 1002 2 2001 5 1003 2 1004 2 2002 5 1005 2 J2 J53 XCP954-48 STATION BREAK OUT PORTS 49 - 96 J55 J52 J54 J47 J56 J48 1006 2 2003 5 1007 2 1008 2 2004 5 IN OUT OUT IN OUT OUT IN OUT OUT IN OUT OUT AUDIO OUT 1 - 24 JACKFIELD KP DATA 1 - 24 JACKFIELD AUDIO IN 25 - 48 JACKFIELD AUDIO OUT 25 - 48 JACKFIELD KP DATA 25 - 48 JACKFIELD AUDIO IN 49 - 7
8 7 6 4 5 3 1 2 REVISIONS ZONE REV DESCRIPTION DATE APPROVED D D ADAM MATRIX FRAME REAR VIEW ADAM MATRIX FRAME FRONT VIEW +2.1V + 5V PS 1 +15V +2.1V POWER GOOD + 5V -15V -15V AC2 2 1 AC1 7 R.U. 12.
8 7 6 5 4 3 1 2 REVISIONS ZONE REV TYPICAL 25 PAIRS SCSI-2 CABLE 50 PINS MALE SCSI-2 CONNECTOR 1 26 D C B 1 PAIR 01 1 26 2 27 PAIR 02 2 27 3 28 PAIR 03 3 28 4 29 PAIR 04 4 29 5 30 PAIR 05 5 30 6 31 PAIR 06 6 31 7 32 PAIR 07 7 32 8 33 PAIR 08 8 33 9 34 PAIR 09 9 34 10 35 PAIR 10 10 35 11 36 PAIR 11 11 36 12 37 PAIR 12 12 37 13 38 PAIR 13 13 38 14 39 PAIR 14 14 39 15 40 PAIR 15 15 40 16 41 PAIR 16 16 41 17 42 PAIR 17 17 42 18 43 PAIR 18 18 4
8 7 6 5 4 3 1 2 REVISIONS ZONE REV TYPICAL 25 PAIRS TELCO CABLE 50 PINS MALE TELCO CONNECTOR 1 26 D B 1 26 PAIR 02 2 27 3 28 PAIR 03 3 28 4 29 PAIR 04 4 29 5 30 PAIR 05 5 30 6 31 PAIR 06 6 31 7 32 PAIR 07 7 32 8 33 PAIR 08 8 33 9 34 PAIR 09 9 34 10 35 PAIR 10 10 35 11 36 PAIR 11 11 36 12 37 PAIR 12 12 37 13 38 PAIR 13 13 38 14 39 PAIR 14 14 39 15 40 PAIR 15 15 40 16 41 PAIR 16 16 41 17 42 PAIR 17 17 42 18 43 PAIR 18 18 43 19 44 PAIR 19 19 4
8 7 6 4 5 3 1 2 REVISIONS ZONE REV TYPICAL 25 PAIRS TO RJ45 CABLE 50 PINS MALE TELCO CONNECTOR D C B 3 1 26 4 5 2 27 6 3 3 28 7 2 4 29 1 8 D 1 ASSEMBLY DETAIL 6 31 6 3 7 32 7 2 8 33 1 8 TELCO 50 PINS, MALE 90 DEGREE COVER RJ45 CONNECTOR 2 PART NO. 90207553008 RJ45 OCTOPUS CABLE WITH 90 DEGREE COVER SCREWLOCK TELCO, MALE 9 34 4 5 10 35 6 3 11 36 7 2 12 37 1 8 13 38 4 5 14 39 6 3 15 40 7 2 16 41 1 8 RJ45 CONNECTOR PART NO.
8 7 6 5 4 3 1 2 REVISIONS ZONE REV DESCRIPTION DATE APPROVED CABLE DETAILS D D 4 + 1 2 3 4 5 6 7 8 INTERCOM KEY PANEL CH. 1 - 8 C 9 10 11 12 13 14 15 16 INTERCOM KEY PANEL CH. 9 - 16 - 26 27 28 29 30 31 32 33 34 35 36 37 38 39 40 41 B RJ11 CONNECT TO AIO-8-BC, J2 RS485 + RS485 - INTERCOM KEY PANEL CH.
8 7 6 4 5 3 1 2 REVISIONS ZONE REV DESCRIPTION DATE APPROVED CABLE DETAILS D D 5 + 1 2 3 4 5 6 7 8 INTERCOM KEY PANEL CH. 1 - 8 C 9 10 11 12 13 14 15 16 INTERCOM KEY PANEL CH. 9 - 16 DE-9-P CONNECT TO XCP954-48 - 26 27 28 29 30 31 32 33 6 1 2 C ASSEMBLY DETAILS TELCO 50 PIN, MALE CONN: CINCH 57-30500 34 35 36 37 38 39 40 41 180 DEGREE COVER 8 3 7 CABLE: BELDEN 8777 B B 9 INTERCOM KEY PANEL CH.
8 7 6 5 4 3 1 2 REVISIONS ZONE REV TYPICAL 34 PAIRS SCSI-2 CABLE 50 PINS MALE SCSI-2 CONNECTOR 6 1 35 2 36 3 37 4 38 5 39 6 40 7 41 8 42 9 43 10 44 11 45 12 46 13 47 14 48 15 49 16 50 17 51 18 52 19 53 20 54 21 55 22 56 23 57 24 58 25 59 26 60 27 61 28 62 29 63 30 64 31 65 32 66 33 67 34 68 D C B 1 35 2 36 3 37 4 38 5 39 6 40 7 41 8 42 9 43 10 44 11 45 12 46 13 47 14 48 15 49 16 50 17 51 18 52 19 53 20 54 21 55 22 56 23 57 24 58 25 59 26 60 27 61 28 62 29 63 30 64 31 65 32 66 33 67 34 68 S
8 7 6 4 5 3 2 1 REVISIONS ZONE REV DESCRIPTION DATE APPROVED D D DE-9-S FEMALE, 9 PINS " D " SUB CONNECT TO P. C. DE-9-P MALE, 9 PINS " D " SUB CONNECT TO MATRIX RXD 2 3 TXD TXD 3 2 RXD GROUND 5 5 GROUND XCP-ADAM-MC J1 RS232C SERIAL PORT COM. 1 OR COM. 2 C C DE-9-P MALE, 9 PINS " D " SUB CONNECT TO MATRIX B DE-25-S FEMALE, 25 PINS " D " SUB CONNECT TO P. C. RXD 2 2 TXD TXD 3 3 RXD GROUND 5 7 GROUND XCP-ADAM-MC J1 B RS232C SERIAL PORT COM. 1 OR COM.
8 7 6 4 5 3 1 2 REVISIONS ZONE REV DESCRIPTION DATE APPROVED D D DE-9-P MALE, 9 PINS " D " SUB CONNECT TO MATRIX XCP-ADAM-MC RS485 + RS485 GROUND TELCO AMP CHAMP MALE, 50 PINS CONNECT TO TM9589 COMM. PORT 6 + 1 - CONN.
8 7 6 4 5 3 1 2 REVISIONS DA-15P (MALE) DA-15P (MALE) D DE-9-P MALE, 9 PINS " D " SUB CONNECT TO MATRIX XCP-ADAM-MC 1 2 3 4 5 9 10 11 12 13 14 15 1 2 3 4 5 9 10 11 12 13 14 15 ZONE REV DE-9-P MALE, 9 PINS " D " SUB CONNECT TO UIO-256 J2 DESCRIPTION DATE APPROVED D RS485 + 6 1 RS485 + RS485 - 1 2 RS485 - 2 N/C GROUND UIO-256 TO UIO-256 INTERCONNECT CABLE GROUND UIO-256 TO XCP-ADAM-MC MASTER CONTROLLER BREAKOUT PANEL DE-9-P MALE, 9 PINS " D " SUB TO XCP-ADAM-MC, J3 C DE-9-
8 7 6 4 5 3 1 2 REVISIONS ZONE REV DESCRIPTION DATE APPROVED CONTACTS RJ 11 MOD PLUG 123456 (VIEW FROM CABLE ENTRANCE) D D LATCH DE-9S (FEMALE) TO STATION BREAKOUT PANEL DATA - 1 AUDIO FROM MATRIX + 2 AUDIO TO MATRIX + 3 1 2 9 AUDIO TO MATRIX 7 AUDIO FROM MATRIX 8 3 6 RJ-11 INTERCOM CABLE TO STATION BREAKOUT PANEL IN FIRST INTERCOM SYSTEM 1 + DE-9P (MALE) DATA - 1 2 6 4 4 5 9 5 2 AUDIO FROM MATRIX + 2 4 AUDIO TO MATRIX - 5 AUDIO FROM MATRIX - 7 DATA + 1 7
8 7 6 4 5 3 1 2 REVISIONS ZONE REV DESCRIPTION DATE APPROVED D D TO INTERCOM STATION TO INTERCOM STATION BREAKOUT PANEL TO INTERCOM STATION BREAKOUT PANEL TO CDP-950 + - 1 2 DATA 2 6 4 4 5 9 AUDIO TO MATRIX 5 9 9 + - 7 8 3 AUDIO FROM MATRIX + TO TO INTERCOM STATION BREAKOUT PANEL CDP-950 2 + - 1 2 4 3 5 4 9 4 5 1 6 1 6 C 1 2 6 + - TO INTERCOM STATION TO INTERCOM STATION BREAKOUT PANEL 1 2 6 4 5 7 8 1 2 3 2 3 4 4 5 5 6 6 RJ 11 RJ 11 5 6 1
Index CDP-950 Camera Delegate Panel DIP switch settings for range selection 11 General information 7 Interconnect cable wiring diagrams 38 Circuit Cards Access 1 Card slot numbering and usage 27 Master Controller Card DIP Switches Removal and Installation 1 Reset and Fail Indication 2 System clock signals 1 Unused Back Card Slots 2 DIP switch settings for panel number Mounting 1 TIF-951 Telephone Interface 11 7 Trunking Data cable wiring diagram 35 Intercom port interconnect cable wiring diagrams 37