
Intercom System User Manual

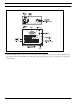


Table Of Contents
- READ ME FIRST
- CHAPTER 1 Menu List for DKP-8, DKP-12, and KP-12 Keypanels
- CHAPTER 2 Power-Up and Initial Settings
- CHAPTER 3 Basic Intercom Operation
- CHAPTER 4 Telephone Operation
- CHAPTER 5 Using the Top-Level Menu
- General Description
- Top Level Menu, - - - - (Clear call waiting)
- Top Menu Level, Call List Names
- Top Level Menu, Display
- General Description
- Top Level Menu, Display, CHANS ON
- Top Level Menu, Display, Exclusive
- Top Level Menu, Display, Group (1-4)
- Top Level Menu, Display, KEY ICOM
- Top Level Menu, Display, KEY TYPE
- Top Level Menu, Display, Level 2
- Top Level Menu, Display, Listen
- Top Level Menu, Display, Page Use
- Top Level Menu, Display, Port Num
- Top Level Menu, Display, SOLO
- Top Level Menu, Display, Version
- Top Level Menu, Key List
- Top Level Menu, Level
- Top Level Menu, Lists
- Top Level Menu, Menus
- Top Level Menu, Page (1-4)
- Top Level Menu, TGL LISN (Toggle Listen ON/OFF)
- CHAPTER 6 Menu Mode
- Select Control Operation in Menu Mode
- Menus, Autodial (for KP-12/DKP-12 Only)
- Menus, KEY ASGN
- Menus, KEY ASGN, General Description
- Menus, KEY ASGN, AUTODIAL (For KP-12, DKP-12 Only)
- Menus, KEY ASGN, AUTOFUNC
- Menus, KEY ASGN, CLEAR
- Menus, KEY ASGN, COPY
- Menus, KEY ASGN, LISTS
- Menus, KEY ASGN, LISTS
- Menus, KEY ASGN, LISTS, IFB
- Menus, KEY ASGN, LISTS, IFSL
- Menus, KEY ASGN, LOCAL I/O (For KP-12 Only)
- Menus, KEY ASGN, PHONE (For KP-12, DKP-12 Only)
- Menus, KEY ASGN, REDIAL (For KP-12, DKP-12 Only)
- Menus, KEY ASGN, UPL
- Menus, Key Opt Menu
- General Description
- Menus, KEY OPT, BTN LOCK (Button Lock)
- Menus, KEY OPT, CHIME
- Menus, KEY OPT, CLR OPT
- Menus, KEY OPT, COPY
- Remember to save you changes if you want them retained for future use. See “Menus, SERVICE, SAVE ...
- Menus, KEY OPT, EXCLUSIVE
- Menus, KEY OPT, GROUP (1-4)
- Menus, KEY OPT, LATCHING
- Menus, KEY OPT, SOLO
- Menus, SERVICE MENU
- General Description
- Menus, SERVICE, DIMMER
- Menus, SERVICE, FOOT SW (with GPI module ONLY)
- Menus, SERVICE, KEY TYPE
- Menus, SERVICE, LOCK/UNLOCK
- Menus, SERVICE, MIC CTRL
- Menus, SERVICE, MIC COMP
- Menus, SERVICE, MIC GAIN
- Menus, SERVICE, MOD ASGN
- Menus, SERVICE, MUTE LVL
- Menus, SERVICE, OPTO-ISO (KP-12 with GPI Module Only)
- Menus, SERVICE, OUT CTRL
- Menus, SERVICE, RESET
- Menus, SERVICE, SAVE CFG
- Menus, SERVICE, SET ADDR
- Menus, SERVICE, SIDETONE
- Menus, SERVICE, TALLY
- Menus, SERVICE, TEST PNL
- Menus, SERVICE, TONE
- Menus, SERVICE, USM (Unswitched Microphone, for KP-12 with Rear Connector Module Only)
- Appendix A KP-12 Audio Transmit Board Connections
- Appendix B Replacing the KP-12 Power Supply

9
CHAPTER 2
Power-Up and Initial Settings
Applying Power
Versions with an AC power connector have a power switch on the back panel. Versions with an external power supply and DC
power jack do not have a power switch: plug in the power supply to apply power.
“MD1”, “Key Type” and “Set Addr” Messages
• If the keypanel displays MD or KEY TYPE in the call waiting window at power-up, this indicates that service adjustments
must be made before using the keypanel. To correct the MD1 service message, see “Menus, SERVICE, MOD ASGN” on
page 40. To correct the KEY TYPE service message, see “Menus, SERVICE, KEY TYPE” on page 38.
Normally, when the keypanel is powered-up for the first time, the call waiting window will display SET ADDR. This means
that you must set the address prior to first use of the keypanel. The address is based on the intercom port number to which the
keypanel is connected as follows:
Determining the Address, CS9XXX Intercoms
For intercom port numbers ending in 1 through 9, the keypanel address is the last digit of the port number. If the last digit of
the port number is 0, us 10 as the address.
Determining the Address, ADAM and ADAM CS Intercoms
Determine the keypanel’s address using Table 7 on page 47.
Determining the Address, Zeus Intercom Systems
The address is the number (1-8) printed next to the connector on the back panel of the Zeus Frame. (This number repeats for
each group of 8 connectors. The intercom system is able to distinguish between two keypanels set to the same address by the
group where each one is connected.)
NOTE: Cronus system and the AIO-16 card do not require you to set the address because they automatically set the address
when installed into the system.