
Troubleshooting guide


76 4: Primary Server Migration
RSA Authentication Manager 6.1 to 8.1 Migration Guide
Before You Begin
• Dump the version 6.1 log file. For more information, see Dump the Database and
Log Files on a Non-Appliance Primary Server on page 61.
• Make sure that you placed the dump file in one of the following locations:
– Your local machine
If the dump file exceeds 2 GB, you cannot import the dump file from the local
machine, the option that file through your browser.
– A Windows shared folder
– A Network File System (NFS)
The RSA Authentication Manager 8.1 server in the directory
/opt/rsa/am/migration. To copy the file to version 8.1, you can use a Secure
Copy Protocol (SCP). If you use an SCP client, log on as rsaadmin, and enter the
operating system password that you specified during Quick Setup.
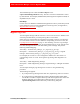
Procedure
1. In the Operations Console, Deployment Configuration > Migration > From
Version 6.1 > Log Migration.
2. When prompted, enter the Super Admin User ID and password.
3. Specify the location of the log dump file. Under Server Migration File Location,
do one of the following:
• Select Local Machine, and browse to locate the file on your local machine.
• Select Windows Shared Folder to locate the file on a Windows shared
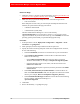
folder. Do the following:
– In the Windows Shared Folder field, enter the path to an existing
Windows shared folder, for example, \\example.com\migration_folder
– If the shared folder requires a user name, enter the user name in the
Folder User Name field.
– If the shared folder requires a password, enter the password in the Folder
Password field.
• Select NFS (Network File System) Shared Folder to locate the file on an
NFS. In the NFS Shared Folder field, enter the path to an NFS server and file
directory, for example, fileserver.example.net:/migration_directory.
• Select Authentication Manager 8.1 Server to locate the file at the following
location on RSA Authentication Manager 8.1:
/opt/rsa/am/migration
4. Click Next.
5. Review the Summary - Log Migration page.