
User's Manual
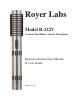


Table Of Contents
- TABLE OF CONTENTS
- Model R-122V Vacuum Tube Ribbon Microphone
- Introduction
- Active Ribbon Technology
- Description
- Applications
- Ribbons in the Digital World
- User Guide
- Using the R-122V vacuum tube Ribbon Microphone
- Power Supply Input Module
- Operation
- Amplification Considerations
- The Sweet Spot
- Finding and Working with the Sweet Spot
- Proximity Effect and Working Distance
- The Sound That Is “More Real than Real”
- Microphone Techniques
- General Tips for Using the Royer R-122V
- Stereophonic Microphone Techniques
- Specialized Recording Techniques
- Recording on the Back Side of the R-122V
- Care & Maintenance
- Troubleshooting
- Features
- Electrical Specifications
- Mechanical Specifications
- Polar Pattern
- Frequency Response
- Warranty

User Guide
Using the R-122V vacuum tube Ribbon Microphone
The head amplification system used in the R-122V consists of a sub-miniature military grade
vacuum tube configured as a cathode follower. This circuit arrangement offers ideal impedance
matching properties and very high headroom. The vacuum tube is powered from a dedicated
power supply that supplies high voltage B+ and heater current through the microphone cable.
The tube's heater supply is a "constant current" design that enables the tube to perform correctly,
even with microphone cables of varying lengths.
To ensure long service life for your R-122V vacuum tube ribbon microphone, care should be
taken when connecting the microphone to its power supply. We have prepared a few tips to
ensure that your R-122V ribbon microphone will perform perfectly for many years; a general set
of good habits that apply to both tube ribbon microphones and tube condenser microphones.
CAUTION! Before plugging your power supply into an AC source, confirm that the
VOLTAGE SELECTOR SWITCH is in the correct position for the country in which it will be
used. Failure to follow this procedure may result in a blown fuse or damage to your
microphone.
The microphone must be plugged into the power supply via the 7-pin cable before the supply is
turned on. Do not operate the power supply without the microphone connected!
1. Always be certain that the correct microphone cable is used with the microphone, and that
the cable is in good serviceable order. The R-122V uses a 7-pin cable configuration that
provides the tube's working voltages and carries the audio signal to the preamplifier. The
cable is specific to Royer products and may not be substituted with a cable from another
manufacturer unless the pin out and wiring configuration are identical to the R-122V's cable.
The audio output signal is available at the power supply and utilizes a standard 3-pin
configuration where a shield ground is carried through Pin-1, and a balanced differential
signal carried along Pins-2 and 3. Pin-2 is signal hot (positive) and Pin-3 is signal cold
(negative).
2. Although it is usually safe to “hot plug” most phantom powered and passive microphones to
a preamplifier or console with the phantom activated, we suggest that you de-activate the
phantom power prior to plugging the microphone to the cable, if possible. This reduces the
possibility of loud pops being transmitted to your monitor speakers should the volume
control be raised. Serious damage to your speakers could result from this mistake.
3. Be certain that the input channel fader or volume control is set to minimum before plugging
in any microphone. Preamplifier gain trim should be set to minimum.
4. Vacuum tube circuits require several minutes to stabilize. The R-122V’s power supply ramps
up power to the microphone slowly, minimizing stress on the microphone’s electronics and
6