
User's Manual
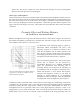


Table Of Contents
- TABLE OF CONTENTS
- Model R-122V Vacuum Tube Ribbon Microphone
- Introduction
- Active Ribbon Technology
- Description
- Applications
- Ribbons in the Digital World
- User Guide
- Using the R-122V vacuum tube Ribbon Microphone
- Power Supply Input Module
- Operation
- Amplification Considerations
- The Sweet Spot
- Finding and Working with the Sweet Spot
- Proximity Effect and Working Distance
- The Sound That Is “More Real than Real”
- Microphone Techniques
- General Tips for Using the Royer R-122V
- Stereophonic Microphone Techniques
- Specialized Recording Techniques
- Recording on the Back Side of the R-122V
- Care & Maintenance
- Troubleshooting
- Features
- Electrical Specifications
- Mechanical Specifications
- Polar Pattern
- Frequency Response
- Warranty

microphone away from it. Another trick is to alter the orientation of the microphone in such a
way that the noise is cancelled out. If you ever experience this situation while in the studio, try
rotating the microphone to identify the “null” point, and then reposition the mic and the sound
source. This is much like having a guitar player with single coil pickups turn around until
amplifier hum disappears.
Another source of noise can be traced to the microphone cable and its proximity to a noise
generating source. Electromagnetically induced noise can effectively be eliminated in cables
simply by moving the cable away from the offending source.
The Sweet Spot
Finding and Working with the Sweet Spot
Good engineers know the importance and benefits of finding and working with the “sweet spot”
of a given microphone. The sweet spot is usually defined as the optimum placement (working
distance and angular position) of any microphone relative to the sound source.
Each microphone has its own sweet spot, whether it is a ribbon, dynamic or condenser type. The
sweet spot will vary with the type of sound source and its volume intensity, the polar pattern of
the microphone and how consistent it is with frequency, and the acoustic environment.
Being in the sweet spot means the microphone and the sound source are in a harmony of sorts;
the acoustic information is exciting the microphone in such a fashion that the resulting
reproduction is very desirable, usually without the need for additional equalization or electronic
manipulation.
There are only general rules as to where the sweet spot may be found for any given microphone,
and usually experimentation reveals it. The sweet spot can be extremely variable since it depends
on the quirks of a given microphone and acoustics of a given room. Once the sweet spot is
discovered, this placement can become a rule of thumb starting point for future microphone
placement with similar sound sources. Remember this; if it sounds good, it’s probably right. If it
doesn’t, move the microphone. It’s almost always more effective to reposition the microphone
than to start fiddling with knobs. Knob twisting can affect headroom and phase coherency and
add unwanted noise.
The following is a list of variables that account for “sweet spot” effect.
1. Frequency response variations due to proximity effect.
2. Frequency response variation due to treble losses as a result of absorption and “narrowing” of
the pattern at high frequencies, causing weakening of highs as the microphone is moved
away from the sound source.
3. Variation in ratio of direct to reverberant sound. Tendency of a microphone to favor the
nearest sound source due to a combination of these items, plus the influence of the inverse
11