
User manual


Toast Titanium
www.roxio.com
64
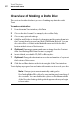
4 Click More for additional optional settings:
Disc Name: Type a name for the disc.
Icon: Choose a custom icon for the disc. (See Custom Icons and
Backgrounds on page 66.)
Disc View: Choose the default Finder view for this disc: icon,
list, or browser.
Background: Choose a custom background color or picture
for the disc. (See
Custom Icons and Backgrounds on page 66.)
5 Add files and folders to the disc by dragging and dropping them into
the Content Area from your hard disk or the Media Browser.
6 Insert a blank, recordable disc.
7 Optional: Change the destination recorder and number of copies at
the bottom of the screen.
8 Click the red Burn button at the bottom right of the Toast window.
Multi-session CDs: If you are making a data CD and would like
to leave the disc “open” so you can record additional data
sessions at a later time, click the Settings button at the bottom of
the screen near the Eject button. Then click the Advanced tab
and choose Write Session. You will be able to add data to this CD
until you have exceeded its capacity or you choose Write Disc to
“close” it. Each recording session will appear as a unique disc
icon on your desktop. This is normal Mac OS behavior and is not
controlled by Toast. You cannot make multi-session DVDs or Blu-
ray discs.
Toast displays a progress bar and status information as it records your disc.
If the files and folders you are recording exceed the capacity of a single
disc, Toast will automatically span this data across multiple discs. See
Disc
Spanning on page 71.