
Deployment Guide

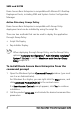

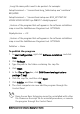


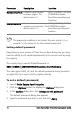
Table Of Contents
- Roxio Secure Burn Enterprise Deployment Guide
- Installing Roxio Secure Burn Enterprise from the command prompt
- Using the registry
- Using the Permissions Manager
- To launch the Permissions Manager
- To enter a new group or change a group key
- To set read and write permissions by machine
- To change group membership
- To delete a group key
- To enable a personal password
- To set a default password
- To enable logging
- To enable burning of non-encrypted discs
- To export settings
- To import settings
- System requirements
- Contact information

6 Roxio Secure Burn Enterprise Deployment Guide
To create Group Policy
1 Launch the Group Policy Object Editor.
2Under Computer Configuration, select Windows Settings
Scripts, and double-click Startup.
3 Click Add.
4 Browse to your script file.
5 Click OK.
6 Restart the client machine and verify the installatio
n during login.
To uninstall by editing the script file on Windows 7, Windows
8, Windows 8.1, and Windows 10, use the following
command: C:\ProgramData\Uninstall
\{D593D658-FF81-4069-
9A69-D9F6B17BD6A2}\setup.exe" /X {D593D658-FF81-4069-
9A69-D9F6B17BD6A2} /qn REBOOT=ReallySuppress
To use Zap Installer Deploy
• Create a Zap file based on the following example:
[Application]
; Only FriendlyName and SetupCommand are required, everything else
is optional.
; FriendlyName is the name of the program that will appear in the
software installation snap-in and the Add/Remove Programs tool.
; REQUIRED
FriendlyName = "Roxio Secure Burn Enterprise"
; SetupCommand is the command line used to run the program's
Setup. With Windows Server 2003 and later you must specify the fully
qualified path containing the setup program.