
Deployment Guide

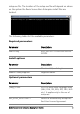
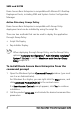
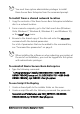

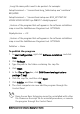


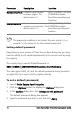
Table Of Contents
- Roxio Secure Burn Enterprise Deployment Guide
- Installing Roxio Secure Burn Enterprise from the command prompt
- Using the registry
- Using the Permissions Manager
- To launch the Permissions Manager
- To enter a new group or change a group key
- To set read and write permissions by machine
- To change group membership
- To delete a group key
- To enable a personal password
- To set a default password
- To enable logging
- To enable burning of non-encrypted discs
- To export settings
- To import settings
- System requirements
- Contact information

Roxio Secure Burn Enterprise Deployment Guide 5
You must have system administrator privileges to install
Roxio Secure Burn Enterprise from the command prompt.
To install from a shared network location
1 Copy the contents of the Roxio Secure Burn Enterprise installation
disc to a network location.
2 From a remote computer, go to the Start search box (Windows
Vista, Windows 7, Windows 8, Windows 8.1, and Windows 10),
or the Start
Run menu.
3 Browse to the shared copy of the disc and enter the setup.exe
command with
the desired parameters.
For a list of parameters that can be added to the command line,
see “Command line parameters” on page 2.
When installing the software or when rebooting your system at
the end of an installation, you must be logged into the system
with administrator privileges.
To uninstall Roxio Secure Burn Enterprise
• Type the following command:
“C:\ProgramData\Uninstall\{D593D658-FF81-4069-9A69-
D9F6B17BD6A2}\setup.exe" /X {D593D658-FF81-4069-9A69-
D9F6B17BD6A2} /qn REBOOT=ReallySuppress
To use Script File Deploy
1 Create a shared path to the installer folder on the server.
2 Create a script file with the following comma
nd line parameter:
\\server\shared folder\setup.exe ROX_KEYTEXT=XX-XXXXX-
XX
XXX-XXXXX /qn REBOOT=ReallySuppress.