
Deployment Guide

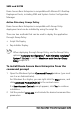
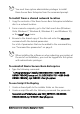

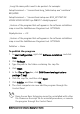


Table Of Contents
- Roxio Secure Burn Enterprise Deployment Guide
- Installing Roxio Secure Burn Enterprise from the command prompt
- Using the registry
- Using the Permissions Manager
- To launch the Permissions Manager
- To enter a new group or change a group key
- To set read and write permissions by machine
- To change group membership
- To delete a group key
- To enable a personal password
- To set a default password
- To enable logging
- To enable burning of non-encrypted discs
- To export settings
- To import settings
- System requirements
- Contact information

4 Roxio Secure Burn Enterprise Deployment Guide
SMS and SCCM
Roxio Secure Burn Enterprise is compatible with Micr
osoft’s Desktop
Deployment tools, including SMS and System Center Configuration
Manager.
Active Directory Group Policy
Roxio Secure Burn Enterprise is compatible with Group P
olicy
deployment and can be installed by using the script file.
There are two methods that can be used to deploy the application
through Group Policy:
• Script File Deploy
• Zap Installer Deploy
When deploying through Group Policy, use the Group Policy
options (Computer Configuration
Administrative Templates
System Scripts) to set the Maximum wait time for Group
Policy scripts to 0.
To install Roxio Secure Burn Enterprise from the
command prompt
1 Open the Windows System Command Prompt window. (you must
run it as an Administrator).
For Windows 8 or higher, you can right-click the Start menu, and
click Command Prompt (Admin) in the context menu.
If a User Account Control prompt appears, click Yes to continue
installation.
2 Call the product setup.exe, and include the desired command line
parameters.