
Deployment Guide

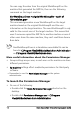
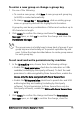
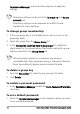

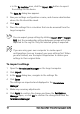

Table Of Contents
- Roxio Secure Burn Enterprise Deployment Guide
- Installing Roxio Secure Burn Enterprise from the command prompt
- Using the registry
- Using the Permissions Manager
- To launch the Permissions Manager
- To enter a new group or change a group key
- To set read and write permissions by machine
- To change group membership
- To delete a group key
- To enable a personal password
- To set a default password
- To enable logging
- To enable burning of non-encrypted discs
- To export settings
- To import settings
- System requirements
- Contact information

Roxio Secure Burn Enterprise Deployment Guide 17
2 Click Always use this password.
3 If the button is disabled, the app
lication may not support the use
of a default password.
4 The password input dialog box appears.
5Enter a password.
6 The password must be at least eigh
t characters and include one or
more capital letters and at least one number, symbol, or
punctuation character. Until your password has met these
requirements, the password strength indicator is set to Invalid,
an
d the Save button is disabled.
7 Click Apply. The changes are applied the next time you restart
Roxio Secure Burn Enterprise.
Be sure to write down your password and store it in a safe
place. Roxio Secure Burn Enterprise is not able to re
trieve lost
passwords.
To enable logging
•In the Permissions Manager, enable the Enable logging check box.
To enable burning of non-encrypted discs
In the Permissions Manager, enable the Burn non-encrypted discs
check box.
To export settings
1Open the Permissions Manager on the computer with the settings
that you wish to export.
2 Choose one of the following:
• In the By user account area, click the Export grp or Export Reg
button to export the settings for the user account