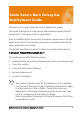
Roxio Secure Burn Enterprise Deployment Guide Welcome to the system administrator’s deployment guide. This guide is designed to help system administrators deploy Roxio® Secure Burn™ Enterprise in their organization. Prior to installing Roxio Secure Burn Enterprise, please ensure that all previous versions of the software have been uninstalled and that all other applications are closed. The default installation location for Roxio Secure Burn Enterprise is C:\Program Files(x86)\Roxio\Roxio Burn.
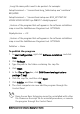
Individuals can simply install Roxio Secure Burn Enterprise by running the setup.exe installer program included on their installation disc or in the installation files. Setup.exe is an installer designed with a graphical user interface, and it provides all instructions necessary for normal installation. To learn how to use Roxio Secure Burn, please open the application, click the Help menu, and select from one of the available options.
setup.exe file. The location of the setup.exe file will depend on where on the system the Roxio Secure Burn Enterprise install files are located.
SMS and SCCM Roxio Secure Burn Enterprise is compatible with Microsoft’s Desktop Deployment tools, including SMS and System Center Configuration Manager. Active Directory Group Policy Roxio Secure Burn Enterprise is compatible with Group Policy deployment and can be installed by using the script file.
You must have system administrator privileges to install Roxio Secure Burn Enterprise from the command prompt. To install from a shared network location 1 Copy the contents of the Roxio Secure Burn Enterprise installation disc to a network location. 2 From a remote computer, go to the Start search box (Windows Vista, Windows 7, Windows 8, Windows 8.1, and Windows 10), or the Start Run menu. 3 Browse to the shared copy of the disc and enter the setup.exe command with the desired parameters.
To create Group Policy 1 Launch the Group Policy Object Editor. 2 Under Computer Configuration, select Windows Settings Scripts, and double-click Startup. 3 Click Add. 4 Browse to your script file. 5 Click OK. 6 Restart the client machine and verify the installation during login. To uninstall by editing the script file on Windows 7, Windows 8, Windows 8.1, and Windows 10, use the following command: C:\ProgramData\Uninstall\{D593D658-FF81-40699A69-D9F6B17BD6A2}\setup.
; Long file name paths need to be quoted. For example: SetupCommand = "\\server\share\long_folder\setup.exe" /unattend REQUIRED SetupCommand = "\\server\share\setup.exe /ROX_KEYTEXT-XXXXXXX-XXXXX-XXXXX /qn REBOOT=ReallySuppress" ; Version of the program that will appear in the software installation snap-in and the Add/Remove Programs tool. OPTIONAL DisplayVersion = 4.0 ; Version of the program that will appear in the software installation snap-in and the Add/Remove Programs tool.
Using the registry You can use registry keys to control settings such as disc finalizing, write permissions, event logging, and passwords. Finalizing the disc It is recommended that you always finalize the disc. There is a registry key to control the finalize disc function. The registry key is named “ForceDiscClosed” in HKEY_CURRENT_USER\SOFTWARE\Roxio\Basic Burn\Preference. The value type is DWORD, and the value number should be 0 or 1. • 0 — By default discs are not finalized.
• 0 — Logging is disabled for the current user. The registry key will be ignored if logging is set in the Permissions Manager. Changing the log file location You can change where the log is stored with the “LogPath” registry key in HKEY_CURRENT_USER\SOFTWARE\Roxio\Basic Burn\Preference The registry is empty by default and writes to the default location: C:\ProgramData\Roxio Log Files.
Parameter Description Location NumeralCharNum Password must contain numbers (digits). The default value is 1. SpecialCharNum HKEY_CURRENT_USER\SO FTWARE\Roxio\Basic Burn\Preference\Numeral CharNum Password must contain HKEY_CURRENT_USER\SO symbols or punctuation. The FTWARE\Roxio\Basic default value is 1. Burn\Preference\SpecialC harNum The password condition is met when the user meets (=) or exceeds (>) the value set for the relevant parameter.
You must restart the computer to apply the device access control settings for Roxio Secure Burn Enterprise. The registry key will be ignored if the password is set in the Permissions Manager. Using the Permissions Manager In Roxio Secure Burn Enterprise, the Permissions Manager enables the system administrator to create and modify user groups.
Setting passwords Depending on your version of Roxio Secure Burn Enterprise, you may have the ability to allow users to add a personal password to the discs they burn. Discs with passwords can be read by anyone who knows the password. You can also set a default password. Enabling logging Depending on your version of Roxio Secure Burn Enterprise, you may have the ability to allow the application to report the event logs.
• Access only the data encrypted with Roxio Secure Burn: When marked, only the disc or USB data encrypted with Roxio Secure Burn can be read. Burning non-encrypted discs Depending on your version of Roxio Secure Burn Enterprise, you may have the ability to enable and disable burning of non-encrypted discs. This allows the user to burn the disc without encryption, so that the disc can be read outside of the groups. This setting is disabled by default.
You can copy the value from the original WorkGroupID on the machine that generated the GRP file, then run the following command on the target machine: GenWorkGroupID.exe This command generates a new WorkGroupID on the target machine based on the original WorkGroupID and the user information on the target machine. The new WorkGroupID is only valid for the current user of the target machine.
To enter a new group or change a group key 1 Do one of the following: • To create a new group, click New. A new group and group key (a GUID) is created automatically. • To change Group Key or Group Name, click an existing group name or group key and edit the highlighted information. A group key can be any combination of letters and numbers up to 40 characters in length.
Permissions Manager, and restart the computer to apply the settings. Permission settings can be set at the By machine and By user account level. Permission settings can be exported as an REG file and imported to other machines. To change group membership 1 If the new group key is not already listed, enter it in one of the group key fields. 2 Select the group from the Group Name list.
2 Click Always use this password. 3 If the button is disabled, the application may not support the use of a default password. 4 The password input dialog box appears. 5 Enter a password. 6 The password must be at least eight characters and include one or more capital letters and at least one number, symbol, or punctuation character. Until your password has met these requirements, the password strength indicator is set to Invalid, and the Save button is disabled. 7 Click Apply.
• In the By machine area, click the Export REG button to export the settings for the device. The Save As dialog box appears. 3 Give your settings configuration a name, and choose a destination where the file should be saved. 4 Click Save. 5 Place the settings file in a location that can be accessed from the target computer. You can export group settings by clicking Export GRP or Export REG, but the membership settings between groups will not be exported to the reg file.
System requirements Roxio Secure Burn Enterprise has the following minimum system requirements: • Microsoft® Windows® 7, 8, 8.1, 10 Ultimate, Professional, or Enterprise; 32-bit or 64-bit with latest service pack Important: For Windows 7, security update 3033929 must be installed to avoid an operating system boot issue. For more information, visit https://support.microsoft.com/en-us/kb/ 3033929.
• Phone Number: +44 1628 677 620 • Hours of operation: 8 a.m. to 6 p.m. GMT Japan • E-mail address: vlpsales@roxio.jp Oceania • E-mail address: vlp.oceania@roxio.
Copyright © 2016 Corel Corporation. All rights reserved. Roxio® Secure Burn™ Enterprise Deployment Guide INFORMATION IS PROVIDED BY COREL ON AN “AS IS” BASIS, WITHOUT ANY OTHER WARRANTIES OR CONDITIONS, EXPRESS OR IMPLIED, INCLUDING, BUT NOT LIMITED TO, WARRANTIES OF MERCHANTABLE QUALITY, SATISFACTORY QUALITY, MERCHANTABILITY OR FITNESS FOR A PARTICULAR PURPOSE, OR THOSE ARISING BY LAW, STATUTE, USAGE OF TRADE, COURSE OF DEALING OR OTHERWISE.