800113332 GRB DG9020 30 40:1800113332 GRB DG9020 30 40 14/03/08 9:04 Page 1 Instructions for use Gebrauchsanweisung Notice d'utilisation Gebruiksaanwijzing Istruzioni d'uso Instrucciones de uso Manual de instruções 1800113332 - 10/2008
1800113332 GRB DG9020 30 40:1800113332 GRB DG9020 30 40 14/03/08 9:04 Page 3 GB 1 • UNDERSTANDING YOUR STEAM GENERATOR 1 2 3 4 5 14 12 11 10 9 7 6 18 17 16 15 13 8 1. 2. 3. 4. 5. 6. 7. 8.
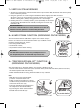
1800113332 GRB DG9020 30 40:1800113332 GRB DG9020 30 40 14/03/08 9:04 Page 4 GB 2. PREPARING YOUR STEAM GENERATOR 1. 2. 3. 4. (1) Place your steam generator on a stable, horizontal heat-resistant work surface. Remove the water tank by pulling the handles upwards (1). Fill the water tank taking care not to exceed the maximum level (2). Replace it fully down in its housing (3).
1800113332 GRB DG9020 30 40:1800113332 GRB DG9020 30 40 14/03/08 9:04 Page 5 GB 4 • OPERATING THE CONTROL PANEL • Flashing green light : the water is heating up in the boiler. • Continuous green light : steam is ready for use. • Continuous red light : the water tank is empty. • Orange “boiler rinse” light flashes : your boiler needs rinsing. Note: the appliance must be cold (see section 11).
1800113332 GRB DG9020 30 40:1800113332 GRB DG9020 30 40 14/03/08 9:04 Page 6 GB Recommendations: To prime the steam circuit, either before using the iron for the first time, or if you have not used the steam function for a few minutes, press the steam control button several times in a row, holding the iron away from your clothes. This will enable any cold water to be removed from the steam circuit.
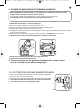
1800113332 GRB DG9020 30 40:1800113332 GRB DG9020 30 40 14/03/08 9:04 Page 7 GB 7 • VERTICAL STEAM IRONING 1. Set the iron temperature control and the steam output control dial (located on the control panel) to the maximum position. 2. Hang the garment on a coat hanger and hold the fabric slightly taut with one hand. As steam is very hot, never attempt to remove creases from a garment while it is being worn, always hang garments on a coat hanger. 3.
1800113332 GRB DG9020 30 40:1800113332 GRB DG9020 30 40 14/03/08 9:04 Page 8 GB 10 • MAINTAINING YOUR STEAM GENERATOR • Before cleaning, ensure that the appliance is unplugged and that the soleplate and the iron rest have cooled down. • Do not use any cleaning or descaling products for cleaning the soleplate or the base-unit. • Never hold the iron or the base unit under the tap. • Do not place the iron on a metal rest as this could damage it.
1800113332 GRB DG9020 30 40:1800113332 GRB DG9020 30 40 14/03/08 9:04 Page 9 GB Before attempting to rinse the boiler of your generator, it is essential to leave it to cool for at least 2 hours in order to avoid any risk of scalding. If the orange “boiler rinse” light flashes, you can continue ironing normally but remember to rinse the boiler first, the next time that you use it. 1. Check that the generator is cold and unplugged. 2. Place your steam generator on the edge of your sink. 3.
1800113332 GRB DG9020 30 40:1800113332 GRB DG9020 30 40 14/03/08 9:04 Page 10 GB II - TO RINSE THE BOILER WITHOUT THE RINSING ACCESSORY Before attempting to rinse the boiler of your generator, it is essential to leave it to cool for at least 2 hours in order to avoid any risk of scalding. If the orange “boiler rinse” light flashes, you can continue ironing normally but remember to rinse the boiler first, the next time that you use it. 1. Check that the generator is cold and unplugged. 2.
1800113332 GRB DG9020 30 40:1800113332 GRB DG9020 30 40 14/03/08 9:04 Page 11 GB 13 • SAFETY RECOMMENDATIONS • Your steam generator is an electrical appliance. It should be used under normal conditions. It is intended for domestic use only. • For your safety, this appliance conforms to the applicable standards and regulations (Low Voltage, Electomagnetic Compatibility, Materials in contact with foodstuffs, Environmental Directives, as applicable...
1800113332 GRB DG9020 30 40:1800113332 GRB DG9020 30 40 14/03/08 9:04 Page 12 GB 14 • IS THERE A PROBLEM ? PROBLEMS POSSIBLE CAUSES SOLUTIONS • The thermostat light and the on/off switch are not illuminated. • The appliance is not switched on. • Check that your appliance is correctly plugged in and press the illuminated on/off switch (on the front of the base-unit). • Droplets of water run through the “Precision Steam Jet” nozzle. • The soleplate is not hot enough.
1800113332 GRB DG9020 30 40:1800113332 GRB DG9020 30 40 14/03/08 9:04 Page 13 D 1 • LERNEN SIE IHREN DAMPFGENERATOR KENNEN 1 2 3 4 5 14 12 11 10 9 7 6 18 17 16 15 13 8 1. “Precision Steam Jet”-Düse (je nach Modell) 2. “Precision Steam Jet”-Taste (je nach Modell) 3. Feuchtdampftaste (je nach Modell) 4. Dampftaste 5. Temperaturregler für die Sohlentemperatur 6. Temperatur-Kontrollleuchte 7. Boiler zur Dampferzeugung (im Inneren des Gehäuses) 8. Dampfkabelbefestigungsclip 9.
1800113332 GRB DG9020 30 40:1800113332 GRB DG9020 30 40 14/03/08 9:04 Page 14 D 2 • VORBEREITUNG IHRES DAMPFGENERATORS 1. 2. 3. 4. Stellen Sie den Dampfgenerator auf eine stabile, waagrechte und hitzeunempfindliche Fläche. Ziehen Sie den abnehmbaren Wassertank an den Griffen heraus (1). Füllen Sie den Wassertank maximal bis zur Füllmarke (2). Schieben Sie ihn bis zum Anschlag hinein (3). (2) (1) (3) Welches Wasser verwenden ? Ihr Gerät ermöglicht die Benutzung von Leitungswasser.
1800113332 GRB DG9020 30 40:1800113332 GRB DG9020 30 40 14/03/08 9:04 Page 15 D 4 • FUNKTION DES BEDIENUNGSFELDES • Die grüne Kontrollleuchte blinkt: Der Boiler heizt auf. • Die grüne Kontrollleuchte bleibt an: Der Dampfgenerator ist einsatzbereit. • Die rote Kontrollleuchte “Abnehmbarer Wasserbehälter leer” bleibt an: Der Wasserbehälter ist leer. • Die orange Kontrollleuchte “Boiler spülen” leuchtet auf: Der Boiler muss gespült werden. Achtung: Das Gerät muss kalt sein (siehe Kapitel 11).
1800113332 GRB DG9020 30 40:1800113332 GRB DG9020 30 40 14/03/08 9:04 Page 16 D Unsere Tipps: Bei der ersten Benutzung, oder wenn Sie die Dampftaste einige Minuten nicht benutzt haben, betätigen Sie diese mehrmals hintereinander. Halten Sie dabei das Bügeleisen weg von der Bügelwäsche. Hierdurch wird das kalte Wasser aus dem Dampfkreislauf entfernt.
1800113332 GRB DG9020 30 40:1800113332 GRB DG9020 30 40 14/03/08 9:04 Page 17 D 7 • VERTIKALES AUFDÄMPFEN 1. Stellen Sie den Temperaturregler des Bügelautomaten und die Dampfleistung auf dem Bedienungsfeld auf die Maximalposition. 2. Hängen Sie das Kleidungsstück auf einen Bügel, und straffen Sie es mit der Hand. Da der austretende Dampf sehr heiß ist, ein Kleidungsstück niemals an einer Person, sondern immer auf dem Bügel glätten. 3.
1800113332 GRB DG9020 30 40:1800113332 GRB DG9020 30 40 14/03/08 9:04 Page 18 D 10 • DIE REINIGUNG IHRES DAMPFGENERATORS • Vergewissern Sie sich vor dem Reinigen Ihres Dampfgenerators, dass der Stecker gezogen und das Gerät abgekühlt ist. • Verwenden Sie für die Sohle oder den Wassertank weder ein Reinigungsmittel noch einen Entkalker. • Halten Sie den Bügelautomaten bzw. das Gehäuse nie unter fließendes Wasser.
00113332 GRB DG9020 30 40:1800113332 GRB DG9020 30 40 14/03/08 9:04 Page 19 D Vor dem Spülen des Boilers muss dieser mindestens 2 Stunden lang abkühlen, um jedes Verbrennungsrisiko auszuschließen. Wenn die orange Kontrollleuchte “Boiler spülen” aufleuchtet, kann der Bügelvorgang ganz normal zu Ende geführt werden, aber Sie sollten nicht vergessen, den Boiler vor der nächsten Benutzung zu spülen. 1. Das Gerät darf nicht an den Stromkreislauf angeschlossen sein und muß kalt sein. 2.
1800113332 GRB DG9020 30 40:1800113332 GRB DG9020 30 40 14/03/08 9:04 Page 20 D Wenn Sie den Spülschlauch nicht benutzen, berücksichtigen Sie bitte unsere Hinweise im Abschnitt II : II. SPÜLEN DES DRUCKBEHÄLTERS OHNE SPÜLSCHLAUCH: Vor dem Spülen des Boilers muss dieser mindestens 2 Stunden lang abkühlen, um jedes Verbrennungsrisiko auszuschließen.
1800113332 GRB DG9020 30 40:1800113332 GRB DG9020 30 40 14/03/08 9:04 Page 21 D 13 • SICHERHEITSHINWEISE • Lesen Sie diese Gebrauchsanleitung vor dem ersten Einsatz Ihres Gerätes sorgfältig durch: Eine unsachgemäße Handhabung entbindet ROWENTA von jeglicher Haftung. • Um Ihre Sicherheit zu gewährleisten, entspricht dieses Gerät den anwendbaren Normen und Bestimmungen (Bestimmungen über Niederspannung, elektromagnetische Verträglichkeit, Materialien in Kontact mit Lebensmitteln, Umweltverträglichkeit...
1800113332 GRB DG9020 30 40:1800113332 GRB DG9020 30 40 14/03/08 9:04 Page 22 D 14 • EIN PROBLEM ? PROBLEM? MÖGLICHE URSACHEN RATSCHLÄGE • Die Kontrollleuchten des Generators • Das Gerät ist nicht angeschaltet. leuchten nicht auf. Die Temperaturkontrollleuchte des Bügeleisen und der beleuchtete Ein - und Ausschalter leuchten nicht auf. • Prüfen Sie, ob das Gerät korrekt an den Stromkreislauf angeschlossen ist, und drücken Sie den beleuchteten Ein-/ Ausschalter (auf der Vorderseite des Gehäuses).
1800113332 GRB DG9020 30 40:1800113332 GRB DG9020 30 40 14/03/08 9:05 Page 23 F 1 • DECOUVREZ VOTRE GENERATEUR 1 2 3 4 5 14 12 11 10 9 7 6 18 17 16 15 13 8 1. Buse de diffusion « jet de vapeur précision » (selon modèle) 2. Touche « jet de vapeur précision » (selon modèle) 3. Touche « vapeur humide » (selon modèle) 4. Commande vapeur 5. Bouton de réglage de température du fer 6. Voyant vapeur 7. Chaudière (à l’intérieur du boîtier) 8. Clip de rangement du cordon vapeur 9.
1800113332 GRB DG9020 30 40:1800113332 GRB DG9020 30 40 14/03/08 9:05 Page 24 F 2 • PREPAREZ VOTRE GENERATEUR 1. Placez le générateur sur un emplacement stable et horizontal ne craignant pas la chaleur. 2. Retirez le réservoir d’eau amovible à l’aide des poignées en le tirant vers le haut (1). 3. Remplissez le réservoir d’eau sans dépasser le niveau Max. (2). 4. Remettez le bien à fond dans son logement. (3).
1800113332 GRB DG9020 30 40:1800113332 GRB DG9020 30 40 14/03/08 9:05 Page 25 F 4 • FONCTIONNEMENT DU TABLEAU DE BORD • Voyant vert clignote : la chaudière chauffe. • Voyant vert allumé : la vapeur est prête. • Voyant rouge « réservoir d’eau » allumé : le réservoir est vide. • Voyant orange « vidange de la chaudière » clignote : Attention : l’appareil doit être froid (voir paragraphe 11). vous devez rincer votre chaudière.
1800113332 GRB DG9020 30 40:1800113332 GRB DG9020 30 40 14/03/08 9:05 Page 26 F Nos conseils : • Lors de la première utilisation ou si vous n’avez pas utilisé la vapeur depuis quelques minutes : appuyez plusieurs fois de suite sur la commande vapeur en dehors de votre linge. Cela permettra d’éliminer l’eau froide du circuit de vapeur.
1800113332 GRB DG9020 30 40:1800113332 GRB DG9020 30 40 14/03/08 9:05 Page 27 F 7 • POUR DEFROISSER VERTICALEMENT 1. Réglez le thermostat du fer sur la position maxi. Si besoin, réglez le bouton de débit vapeur situé sur le tableau de bord sur la position maxi. 2. Suspendez le vêtement sur un cintre et tendez légèrement le tissu d’une main. La vapeur produite étant très chaude, ne défroissez jamais un vêtement sur une personne, mais toujours sur un cintre. 3.
1800113332 GRB DG9020 30 40:1800113332 GRB DG9020 30 40 14/03/08 9:05 Page 28 F 10 • POUR ENTRETENIR VOTRE GENERATEUR • Avant tout entretien, assurez-vous que l’appareil est débranché et que la semelle et la plaque repose fer sont froides. • N’utilisez aucun produit d’entretien ou de détartrage pour nettoyer la semelle ou le boîtier. • Ne passez jamais le fer ou son boîtier sous l’eau du robinet. • Evitez de poser le fer sur un repose-fer métallique, ce qui pourrait l’abîmer.
1800113332 GRB DG9020 30 40:1800113332 GRB DG9020 30 40 14/03/08 9:05 Page 29 F Avant de procéder à la vidange de votre générateur, il est impératif de le laisser refroidir pendant plus de 2 heures, pour éviter tout risque de brûlure. Si le voyant orange « vidange de la chaudière » clignote, vous pouvez continuer votre séance de repassage normalement, mais pensez à rincer votre chaudière avant la prochaine utilisation. 1. L’appareil doit être débranché et froid. 2.
1800113332 GRB DG9020 30 40:1800113332 GRB DG9020 30 40 14/03/08 9:05 Page 30 F Si vous ne souhaitez pas ou si vous ne pouvez pas utiliser l’accessoire de vidange, reportez vous à nos conseils en paragraphe II ci-dessous : II - POUR RINCER LA CHAUDIERE SANS L’ACCESSOIRE DE VIDANGE : Avant de procéder à la vidange de votre générateur, il est impératif de le laisser refroidir pendant plus de 2 heures, pour éviter tout risque de brûlure.
1800113332 GRB DG9020 30 40:1800113332 GRB DG9020 30 40 14/03/08 9:05 Page 31 F 13 • CONSEILS POUR VOTRE SECURITE Lisez attentivement le mode d’emploi avant la première utilisation de votre appareil : une utilisation non conforme au mode d’emploi dégagerait ROWENTA de toute responsabilité. • Pour votre sécurité, cet appareil est conforme aux normes et réglementations applicables (Directives Basse Tension, Compatibilité Electromagnétique, Matériaux en contact des aliments, Environnement …).
1800113332 GRB DG9020 30 40:1800113332 GRB DG9020 30 40 14/03/08 9:05 Page 32 F 14 • UN PROBLEME AVEC VOTRE GENERATEUR PROBLEMES CAUSES POSSIBLES SOLUTIONS • Le générateur ne s’allume pas. • Le voyant du fer et l’interrupteur lumineux marche/arrêt ne sont pas allumés. • L’appareil n’est pas sous tension. • Vérifiez que l’appareil est bien branché et appuyez sur l’interrupteur lumineux marche/arrêt (situé à l’avant du boîtier).
1800113332 GRB DG9020 30 40:1800113332 GRB DG9020 30 40 14/03/08 9:05 Page 33 NL 1 • ONTDEK UW STOOMGENERATOR. 1 2 3 4 5 14 12 11 10 9 7 6 18 17 16 15 13 8 1. Opening “nauwkeurig gerichte stoomspray” (afhankelijk van model) 2. Knop “nauwkeurig gerichte stoomspray” (afhankelijk van model) 3. Extra-stoomknop (afhankelijk van model) 4. Stoom-bedieningsknop 5. Thermostaatknop om de temperatuur van de zool in te stellen. 6. Controlelampje van het strijkijzer 7. Stoomtank (boiler) 8.
1800113332 GRB DG9020 30 40:1800113332 GRB DG9020 30 40 14/03/08 9:05 Page 34 NL 2 • MAAK UW STOOMGENERATOR VOOR GEBRUIK GEREED 1. 2. 3. 4. Plaats de stoomgenerator op een stabiel en horizontaal vlak dat hittebestendig is. Verwijder het waterreservoir door dit m.b.v. de handgrepen naar boven te trekken (1). Vul het waterreservoir. Let hierbij op het niveau "max" (2). Plaats het goed terug in de behuizing (3).
1800113332 GRB DG9020 30 40:1800113332 GRB DG9020 30 40 14/03/08 9:05 Page 35 NL 4 • BEDIENINGSPANEEL • Groen lampje knippert : het water in de stoomtank (boiler) wordt verwarmd. • Groen lampje brandt continu : de stoom is klaar. • Rood lampje brandt continu : het waterreservoir is leeg. • Oranje controlelampje « stoomtank spoelen » knippert : u moet de stoomtank omspoelen. Let op: het apparaat moet hierbij koud zijn (zie paragraaf 11).
1800113332 GRB DG9020 30 40:1800113332 GRB DG9020 30 40 14/03/08 9:05 Page 36 NL Adviezen : • Bij het eerste gebruik of wanneer u het strijkijzer niet gedurende enkele minuten hebt gebruikt : druk verschillende keren achter elkaar op de stoomknop, maar richt niet op het wasgoed. Hierdoor kan het koude water uit het stoomcircuit verwijderd worden.
1800113332 GRB DG9020 30 40:1800113332 GRB DG9020 30 40 14/03/08 9:05 Page 37 NL 7 • VERTICAAL GLADSTRIJKEN 1. Zet de temperatuurknop van het strijkijzer en de stoomregelaar op het bedieningspaneel op de maximumstand in. 2. Hang het kledingstuk op een klerenhanger en trek de stof met één hand een beetje strak. De vrijkomende stoom is erg heet. Strijk kledingstukken daarom nooit terwijl ze worden gedragen maar altijd op een kleerhanger. 3.
1800113332 GRB DG9020 30 40:1800113332 GRB DG9020 30 40 14/03/08 9:05 Page 38 NL 10 • HET SCHOONMAKEN VAN UW STOOMGENERATOR • Zorg voor elke schoonmaakbeurt dat het apparaat uitgeschakeld is en dat de strijkzool en het strijkijzerplateau koud zijn. • Gebruik geen enkel onderhoudsproduct bij het schoonmaken van de strijkzool of de stoomtank. • Houd nooit het strijkijzer of de behuizing onder stromend water.
1800113332 GRB DG9020 30 40:1800113332 GRB DG9020 30 40 14/03/08 9:05 Page 39 NL Laat, voordat u uw generator omspoelt, deze gedurende meer dan 2 uur afkoelen, om het gevaar van brandwonden te voorkomen. Wanneer het oranje controlelampje « stoomtank spoelen » knippert, kunt u uw strijkbeurt gewoon afmaken, maar vergeet niet om vóór de eerstvolgende strijkbeurt de stoomtank om te spoelen. 1. De stekker moet uit het stopcontact gehaald zijn en het apparaat moet koud zijn. 2.
1800113332 GRB DG9020 30 40:1800113332 GRB DG9020 30 40 14/03/08 9:05 Page 40 NL Wilt of kunt u het spoelaccessoire niet gebruiken, volg dan de onderstaande aanwijzingen. II - OMSPOELEN VAN DE STOOMTANK ZONDER HET SPOELACCESSOIRE Laat, voordat u uw generator omspoelt, deze gedurende meer dan 2 uur afkoelen, om het gevaar van brandwonden te voorkomen.
1800113332 GRB DG9020 30 40:1800113332 GRB DG9020 30 40 14/03/08 9:05 Page 41 NL 13 • VEILIGHEIDSVOORSCHRIFTEN • Lees deze gebruiksaanwijzing zorgvuldig door voordat u het apparaat in gebruik neemt : als het apparaat niet overeenkomstig de gebruiksaanwijzing wordt gebruikt, vervalt de aansparkelijkheid van ROWENTA.
1800113332 GRB DG9020 30 40:1800113332 GRB DG9020 30 40 14/03/08 9:05 Page 42 NL 14 • EEN PROBLEEM MET UW STOOMGENERATOR PROBLEMEN MOGELIJKE OORZAKEN • Het apparaat is niet aangesloten op het elektriciteits• De stoomgenerator werkt niet. • Het controlelampje van het strijkijzer en net. het lampje van de aan/uit-knop branden niet. OPLOSSINGEN • Controleer of de stekker in het stopcontact zit en druk op de aan/uit-schakelaar op de zijkant van de behuizing.
1800113332 GRB DG9020 30 40:1800113332 GRB DG9020 30 40 14/03/08 9:05 Page 43 I 1 • SCOPRITE IL VOSTRO GENERATORE DI VAPORE 1 2 3 4 5 14 12 11 10 9 7 6 18 17 16 15 13 8 1. Ugello “Getto di Vapore Precision” (secondo il modello) 2. Pulsante "Getto di Vapore Precision" (secondo il modello) 3. Pulsante vapore continuo (secondo il modello) 4. Pulsante vapore 5. Termostato regolazione temperatura piastra ferro 6. Spia luminosa ferro da stiro 7. Caldaia 8.
1800113332 GRB DG9020 30 40:1800113332 GRB DG9020 30 40 14/03/08 9:05 Page 44 I 2 • PREPARATE IL VOSTRO GENERATORE DI VAPORE 1. 2. 3. 4. (1) Appoggiate il generatore su una superficie stabile e piana resistente al calore. Togliete il serbatoio dell’acqua per mezzo delle prese tirandolo verso l’alto (1). Riempite il serbatoio dell’acqua senza superare il livello massimo (2). Riposizionatelo bene in sede (3).
1800113332 GRB DG9020 30 40:1800113332 GRB DG9020 30 40 14/03/08 9:05 Page 45 I 4 • FUNZIONAMENTO DEL QUADRO COMANDI • Spia verde lampeggiante: riscaldamento caldaia. • Spia verde fissa: il vapore è pronto. • Spia rossa fissa: il serbatoio è vuoto. • La spia arancione "manutenzione caldaia" lampeggia : occorre sciacquare la caldaia. Attenzione: l'apparecchio deve essere freddo (vedere paragrafo 11).
1800113332 GRB DG9020 30 40:1800113332 GRB DG9020 30 40 14/03/08 9:05 Page 46 I Vi consigliamo : Al momento della prima utilizzazione o se non avete usato il vapore da un po' di tempo: premete più volte successivamente il pulsante vapore con il ferro lontano dai panni da stirare. Ciò permetterà l'eliminazione dell'acqua fredda dal circuito vapore.
1800113332 GRB DG9020 30 40:1800113332 GRB DG9020 30 40 14/03/08 9:05 Page 47 I 7 • PER TOGLIERE LE PIEGHE VERTICALMENTE 1. Regolate il pulsante di regolazione del ferro da stiro e la manopola di regolazione quantità di vapore che si trova sul pannello comandi sulla posizione maxi. 2. Appendete l’indumento sulla gruccia e tenete il tessuto leggermente teso con una mano. Dato che il vapore prodotto è molto caldo, non togliete mai le grinze di un abito su una persona, ma sempre su una gruccia. 3.
1800113332 GRB DG9020 30 40:1800113332 GRB DG9020 30 40 14/03/08 9:05 Page 48 I 10 • COME PROVVEDERE ALLA MANUTENZIONE DEL GENERATORE • Prima di qualsiasi manutenzione assicuratevi che l'apparecchio sia disinserito dalla presa e che la piastra del ferro da stiro e la piastra poggiaferro siano fredde. • Non usate nessun detersivo né prodotto anticalcare per pulire la piastra del ferro o la caldaia. • Non mettete mai il ferro da stiro o la caldaia sotto il getto d'acqua del rubinetto.
1800113332 GRB DG9020 30 40:1800113332 GRB DG9020 30 40 14/03/08 9:05 Page 49 I Prima di procedere allo scarico del generatore è necessario lasciarlo raffreddare per più di 2 ore, per evitare ogni rischio di scottatura. Se la spia arancione "risciacquo caldaia" lampeggia, potete continuare a stirare normalmente ma ricordatevi di sciacquare la caldaia prima dell’utilizzo successivo. 1. Verificate che il generatore sia freddo e disinserito. 2. Posate il generatore di vapore sul bordo del lavello. 3.
1800113332 GRB DG9020 30 40:1800113332 GRB DG9020 30 40 14/03/08 9:05 Page 50 I Se non vuoi o se non puoi utilizzare l’accessorio di scarico, leggi i nostri consigli nel paragrafo II qui di sotto : II - PER SCIACQUARE LA CALDAIA SENZA L’ACCESSORIO DI SCARICO Prima di procedere allo scarico del generatore è necessario lasciarlo raffreddare per più di 2 ore, per evitare ogni rischio di scottatura.
1800113332 GRB DG9020 30 40:1800113332 GRB DG9020 30 40 14/03/08 9:05 Page 51 I 13 • CONSIGLI DI SICUREZZA • Prima di utilizzare l’apparecchio, leggete attentamente le relative istruzioni d’uso : un uso non conforme alle norme prescritte manleverà ROWENTA da ogni responsabilità. • Per garantire la vostra sicurezza, l’apparecchio è conforme alle norme e ai regolamenti vigenti (direttive sulla bassa tensione, compatibilità elettromagnetica, materiali a contatto con gli alimenti, ambiente...).
1800113332 GRB DG9020 30 40:1800113332 GRB DG9020 30 40 14/03/08 9:05 Page 52 I 14 • UN PROBLEMA ? PROBLEMI POSSIBILI CAUSE SOLUZIONI • Il generatore non si accende. • La spia del termostato e il tasto on/off sono spenti. • L’elettrodomestico non è acceso. • Verificate che l’apparecchio sia correttamente collegato e premete sull’interruttore acceso/spento (situato sul lato della caldaia). • Alcune goccioline d'acqua passano attraverso l'ugello “Getto di Vapore Precision".
1800113332 GRB DG9020 30 40:1800113332 GRB DG9020 30 40 14/03/08 9:05 Page 53 E 1 • DESCUBRA SU GENERADOR DE VAPOR 1 2 3 4 5 14 12 11 10 9 7 6 18 17 16 15 13 8 1. Salida de “chorro de vapor de máxima precisión”. (según modelo) 2. Mando de “chorro de vapor de máxima precisión”. (según modelo) 3. Mando vapor húmedo (según modelo) 4. Mando vapor 5. Termostato de ajuste de temperatura de la suela 6. Indicador luminoso de la plancha 7. Calderín (en el interior de la base) 8.
1800113332 GRB DG9020 30 40:1800113332 GRB DG9020 30 40 14/03/08 9:05 Page 54 E 2 • PREPARE SU GENERADOR 1. 2. 3. 4. Coloque el generador sobre un emplazamiento estable y horizontal resistente al calor. Retire el depósito de agua extraíble estirando de las asas hacia arriba (1). Llene el depósito de agua sin rebasar el nivel máximo (2). Vuélvalo a instalar a fondo en su alojamiento (3). (1) (2) (3) ¿ Qué tipo de agua debe utilizar ? Su aparato fue diseñado para funcionar con agua del grifo.
1800113332 GRB DG9020 30 40:1800113332 GRB DG9020 30 40 14/03/08 9:05 Page 55 E 4 • FUNCIONAMIENTO DEL CUADRO DE MANDOS • Indicador luminoso verde parpadea : el calderín está calentándose. • Indicador luminoso verde fijo: el vapor está listo. • Indicador luminoso rojo fijo: el depósito está vacío. • Indicador luminoso naranja “vaciado del calderín” parpadea: debe enjuagar el calderín. Atención: el aparato debe estar frío (ver párrafo 11).
1800113332 GRB DG9020 30 40:1800113332 GRB DG9020 30 40 14/03/08 9:05 Page 56 E Nuestros consejos : En la primera utilización o si no ha utilizado el vapor desde hace algunos minutos, pulse varias veces seguidas el mando vapor fuera de su ropa. Esto permitirá eliminar el agua fría del circuito de vapor. • Ajuste del termostato de la plancha: - Comience primeramente por los tejidos que se planchan a baja temperatura (•) y termine por los que soportan una temperatura más elevada (••• o máximo).
1800113332 GRB DG9020 30 40:1800113332 GRB DG9020 30 40 14/03/08 9:05 Page 57 E 7 • PARA PLANCHAR VERTICALMENTE 1. Ajuste el botón de temperatura de la plancha y el botón de caudal vapor situado en el panel de mando en la posición máxima. 2. Cuelgue la ropa sobre una percha y tense ligeramente el tejido con una mano. El vapor que se produce es muy caliente, no desarrugue nunca la ropa sobre una persona vestida, utilice siempre una percha. 3.
1800113332 GRB DG9020 30 40:1800113332 GRB DG9020 30 40 14/03/08 9:05 Page 58 E 10 • MANTENIMIENTO DEL GENERADOR • Antes de cualquier mantenimiento, asegúrese que el aparato está desconectado y que la suela y la placa reposa plancha están frías. • No utilice ningún producto de mantenimiento ni descalicificadores para limpiar la suela o el calderín. • No coloque nunca la plancha o el calderín bajo el agua del grifo. • No coloque la plancha sobre un reposa-plancha metálico, esto podría dañarla.
1800113332 GRB DG9020 30 40:1800113332 GRB DG9020 30 40 14/03/08 9:05 Page 59 E Antes de proceder al vaciado del generador, debe dejarlo enfriar durante más de dos horas, para evitar cualquier riesgo de quemaduras. Si el indicador luminoso naranja “vaciado del calderín” parpadea, puede continuar su sesión de planchado con normalidad, pero tenga en cuenta que debe enjuagar el calderín antes de la siguiente utilización. 1.Verifique que el generador está frío y desconectado. 2.
1800113332 GRB DG9020 30 40:1800113332 GRB DG9020 30 40 14/03/08 9:05 Page 60 E Si no desea o si no puede utilizar el accessorio de vaciado, siga los consejos indicados en el párrafo II que se detalla a continuación : II - PARA LIMPIAR EL CALDERÍN SIN EL ACCESSORIO DE VACIADO Antes de proceder al vaciado del generador, debe dejarlo enfriar durante más de dos horas, para evitar cualquier riesgo de quemaduras.
1800113332 GRB DG9020 30 40:1800113332 GRB DG9020 30 40 14/03/08 9:05 Page 61 E 13 • CONSEJOS PARA SU SEGURIDAD Lea atentamente las instrucciones de uso, antes de utilizar el aparato por primera vez : un uso no conforme con dichas instrucciones liberaría a ROWENTA de toda responsabilidad. • Para su seguridad, este aparato es conforme a las normas y reglamentaciones aplicables (Directivas de Baja Tensión, Compatibilidad Electromagnética, Materiales en contacto con los alimentos, Medio ambiente...
1800113332 GRB DG9020 30 40:1800113332 GRB DG9020 30 40 14/03/08 9:05 Page 62 E 14 • COMO SOLUCIONAR LOS POSIBLES PROBLEMAS PROBLEMAS CAUSAS POSIBLES SOLUCIONES • El generador no se enciende. • El indicador luminoso de la plancha y el interruptor luminoso encendido / apagado no están encendidos. • El aparato no está conectado a la red. • Verifique que el aparato esté conectado y pulse el interruptor luminoso encendido / apagado (situado en un lado de la base).
1800113332 GRB DG9020 30 40:1800113332 GRB DG9020 30 40 14/03/08 9:05 Page 63 P 1 • DESCUBRA O SEU GERADOR DE VAPOR 1 2 3 4 5 14 12 11 10 9 7 6 18 17 16 15 13 8 1. Saída do “vapor frontal de precisão” (consoante o modelo) 2. Comando do “vapor frontal de precisão” (consoante o modelo) 3. Comando do vapor húmido (consoante o modelo) 4. Comando do vapor 5. Termóstato para regular a temperatura da base do ferro 6. Luz piloto do ferro 7. Caldeira (no interior do gerador de vapor) 8.
1800113332 GRB DG9020 30 40:1800113332 GRB DG9020 30 40 14/03/08 9:05 Page 64 P 2 • PREPARE O SEU GERADOR 1. 2. 3. 4. Coloque o gerador num local estável e horizontal, resistente ao calor. Retire o depósito de água amovível com a ajuda das pegas puxando para cima (1). Encha o depósito de água sem ultrapassar o nível máximo (2). Volte a colocá-lo encaixando-o bem no respectivo compartimento (3).
1800113332 GRB DG9020 30 40:1800113332 GRB DG9020 30 40 14/03/08 9:05 Page 65 P 4 • FUNCIONAMENTO DO PAINEL DE COMANDOS • Luz verde intermitente: a caldeira está em aquecimento. • Luz verde fixa: pode começar a utilizar o vapor. • Luz vermelha fixa: o depósito está vazio. • Luz laranja “esvaziamento da caldeira” intermitente: deve enxaguar a caldeira. Atenção. O aparelho tem de estar frio (ver capítulo 11).
1800113332 GRB DG9020 30 40:1800113332 GRB DG9020 30 40 14/03/08 9:05 Page 66 P Os nossos conselhos: • Aquando da primeira utilização ou se não tiver utilizado o vapor durante alguns minutos : afaste o ferro da peça de roupa e carregue repetidamente no comando do vapor de modo a eliminar a água fria no circuito de vapor.
1800113332 GRB DG9020 30 40:1800113332 GRB DG9020 30 40 14/03/08 9:05 Page 67 P 7 • PARA ENGOMAR NA VERTICAL 1. Regule o termóstato do ferro e o botão de débito do vapor, que se encontra nos comandos da caldeira, na posição máxima. 2. Pendure a peça de roupa num cabide e alise ligeiramente o tecido com a mão. Uma vez que o vapor produzido é muito quente, nunca passe a ferro roupa vestida numa pessoa, utilize sempre um cabide. 3.
1800113332 GRB DG9020 30 40:1800113332 GRB DG9020 30 40 14/03/08 9:05 Page 68 P 10 • PARA EFECTUAR A MANUTENÇÃO DO SEU GERADOR • Antes de efectuar qualquer tipo de manutenção, certifique-se de que o aparelho está desligado da corrente e que a base e a base p/repouso do ferro estão frias. • Não utilize nenhum produto de limpeza ou de descalcificação para limpar a base ou a caldeira. • Nunca passe o ferro por água da torneira. • Evite pousar o ferro num suporte metálico, correndo o risco de o danificar.
1800113332 GRB DG9020 30 40:1800113332 GRB DG9020 30 40 14/03/08 9:05 Page 69 P Antes de proceder ao esvaziamento da caldeira, mostra-se obrigatório deixá-lo arrefecer durante mais de 2 horas para evitar qualquer risco de queimadura. Se a luz laranja «esvaziamento da caldeira» ficar intermitente, pode continuar a engomar normalmente mas pense em enxaguar a caldeira antes da próxima utilização. 1. Certifique-se que o gerador está frio e desligado. 2. Coloque o gerador de vapor ao pé do lava-loiça. 3.
1800113332 GRB DG9020 30 40:1800113332 GRB DG9020 30 40 14/03/08 9:05 Page 70 P Se não desejar ou se não puder utilizar o acessório de esvaziamento, siga os conselhos indicados no parágrafo II abaixo : II - PARA LIMPAR A CALDEIRA SEM O ACESSÓRIO DE ESVAZIAMENTO Antes de proceder ao esvaziamento do gerador, mostra-se obrigatório deixá-lo arrefecer durante mais de 2 horas para evitar qualquer risco de queimadura.
1800113332 GRB DG9020 30 40:1800113332 GRB DG9020 30 40 14/03/08 9:05 Page 71 P 13 • CONSELHOS PARA A SUA SEGURANÇA Leia atentamente o manual de instruções antes da primeira utilização : uma utilização não conforme liberta a ROWENTA de qualquer responsabilidade. • Para sua segurança, este aparelho está em conformidade com as normas e regulamentações aplicáveis (Directivas de Baixa Tensão, compatibilidade electromagnética, materiais em contacto com os alimentos, ambiente...
1800113332 GRB DG9020 30 40:1800113332 GRB DG9020 30 40 14/03/08 9:05 Page 72 P 14 • O SEU GERADOR TEM ALGUM PROBLEMA ? PROBLEMAS CAUSAS POSSÍVEIS SOLUÇÕES • A luz piloto do gerador não acende. • A luz piloto do ferro e o interruptor on/off não acendem. • O aparelho não está ligado. • Certifique-se que o aparelho está ligado e carregue no botão on/off (situado na parte da frente da base da caldeira). • Gotas de água saiem pela saída de “vapor frontal de precisão”.
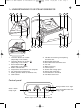
1800113332 GRB DG9020 30 40:1800113332 GRB DG9020 30 40 1 2 3 4 5 14 14/03/08 9:05 12 Page 73 11 10 9 7 6 18 8 17 16 15 13
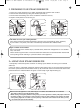
1800113332 GRB DG9020 30 40:1800113332 GRB DG9020 30 40 (1) (2) (3) (b) (a) (4) (5) 14/03/08 9:05 Page 74
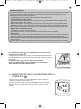
1800113332 GRB DG9020 30 40:1800113332 GRB DG9020 30 40 14/03/08 9:05 silk -w oo synthetics l to n- line n MIN co t (6) (7) Page 75
1800113332 GRB DG9020 30 40:1800113332 GRB DG9020 30 40 14/03/08 silk -w oo s y n t h et i c s l to n- line n MIN silk-wool t tics cott he on nt -li co n sy ne MI N cotton-linen si lk -w ool th N syn e (8) 9:05 Page 76 ti cs M I
1800113332 GRB DG9020 30 40:1800113332 GRB DG9020 30 40 14/03/08 (9) (10) (11) 9:05 Page 77
1800113332 GRB DG9020 30 40:1800113332 GRB DG9020 30 40 (12) 14/03/08 (13) (14) 9:05 Page 78
1800113332 GRB DG9020 30 40:1800113332 GRB DG9020 30 40 (15) (16) 14/03/08 (17) 9:05 Page 79
1800113332 GRB DG9020 30 40:1800113332 GRB DG9020 30 40 (18) 14/03/08 (19) (20) 9:05 Page 80
1800113332 GRB DG9020 30 40:1800113332 GRB DG9020 30 40 14/03/08 9:05 Page 81
1800113332 GRB DG9020 30 40:1800113332 GRB DG9020 30 40 14/03/08 9:05 Page 82
1800113332 GRB DG9020 30 40:1800113332 GRB DG9020 30 40 1800113332 - 10/08 14/03/08 9:05 Page 84