
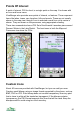
User manual

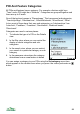
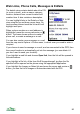

Editing POIs
There is a range of options for editing POIs. You can access these options by
selecting the POI in the Map view or in a list and then pressing the cursor pad
centre or button. On touch phones touch the item twice to see the context
menu:
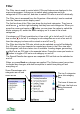
Details Show the Details panel. This shows a range of information
about the POI: name; co-ordinates; creation time; status;
description; image and note count. You can select links and
open them – they can be to files or to web pages. If you
select a phone number or e-mail address you can phone or
message it as appropriate.
View on map Pan the map to show the POI at the centre, swapping to the
Map view if necessary.
Panorama from
here
Move the panorama viewpoint to the location of this POI
and swap to the Panorama view.
Up to three variants are available – from the map centre,
from the selected point, or from the GPS position.
Navigate to Navigate to the POI – see the Navigation section on page
62.
Move Move the POI in the Map view using the cursor keys or by
touching and dragging. Press Done to finish.
Set position Set the position of the POI by typing in the co-ordinates.
Set category Set the category of the POI. For example you might set it to
be a Museum.
Show / Hide Hide the POI, or show it again.
Lock / Unlock Lock the POI so it cannot be edited.
Properties Show the Properties view in which you can edit the POI’s
name, icon and description.
Add image Select an image stored on the phone and add it to the POI’s
list of images.
Take photo & link Swap to the camera and take a photo. When you return to
ViewRanger by exiting the camera, the photo is added to
the POI’s list of images.
Delete Delete the POI.
84