
User manual
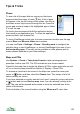


Panorama
If you are using ViewRanger to view panoramas outside on a bright day, switch
off land shading, as the outline display is easier to see. You can toggle shading
on and off using the 7 key. On touch phones using the shading button
You can also switch off shading to make rotation faster.
To see the panorama from a location on the map, swap to the select mode by
pressing 1 or on touch phones the button, as this will show a cross cursor in
the centre of the screen. Adjust your position, press the cursor pad centre or
and choose Panorama from map centre.
If you find a view that you want to see again later, then use GPS & location >
Add bookmark to add a bookmark, or go to the Map view and create a POI
using Create > Create POI
To see a more comprehensive Panorama view, use the jump option – press the
# key or choose Display > Jump. Return to eye level view using the * key. On
touch phones use the up and down arrow button.
Control the maximum distance that ViewRanger can see using Settings > View
> View Radius. The units are either miles or km depending on your Settings >
UI > Units Type selection. Smaller distances are faster to calculate and use
less memory.
ViewRanger contains a fairly detailed height map, but due to the limited storage
and computing power of the mobile phone it cannot contain every single detail.
Usually ViewRanger displays the correct view, or errs on the side of displaying
slightly more than you can really see. However, occasionally it will display less
than you can see. For example, you may be on top of a ridge, but the display
may appear as though you are a few metres down the side of the ridge – you
can see in some directions, but not all. To solve this the quickest thing to do is
to press the # key to jump the view – alternatively you can go to settings and
increase the eye height.
Creating routes
You can create and edit routes within ViewRanger. With a little practise and use
of the short cuts, this can be very effective.
If you have a keypad based phone there are two key tips:
1. When creating a route use the delete key C to delete the last placed
waypoint to undo a mistake.
2. Use the 4 and 6 keys to quickly select the previous and next waypoints,
both when reviewing and editing the route. This is a very quick way to
review a route. The delete key C can also be used when editing a route.
123