
User Guide
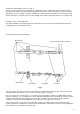
6
OPERATION
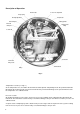
Mechanical Clock
To wind the mechanical clock first remove the chart as described below.
This exposes the clock key, which is permanently fitted in the front recess of the clock moulding.
To wind the clock turn the key clockwise. Do not overwind.
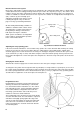
Fitting a Chart (Spider Clamp)
Unscrew the milled head on the centre of the clock
spindle until the spider retracts. Remove the chart. Fit
the new chart over the spider head onto the locating
boss. Rotate the chart until the pen tip coincides with the
correct time line and clamp by screwing down the milled
head. On a two-pen instrument the outer (red) pen,
should be set on the correct time line.
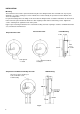
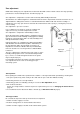
Fitting a Chart (Lever Clamp) – Fig 2(a)
Release the clamp as shown. Remove the old chart. Fit
the new chart on the spindle and rotate the chart until
the pen tip is on the correct time line. Lower the chart
clamp and press on it firmly to ensure that the locating
pips pierce the chart.
Set Pointer Adjustment
To set the desired alarm/control point slacken the
clamping knob at the right-hand end of the setting
pointer (Fig. 5), position the pointer on the desired value
and re-tighten the clamp.
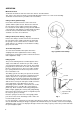
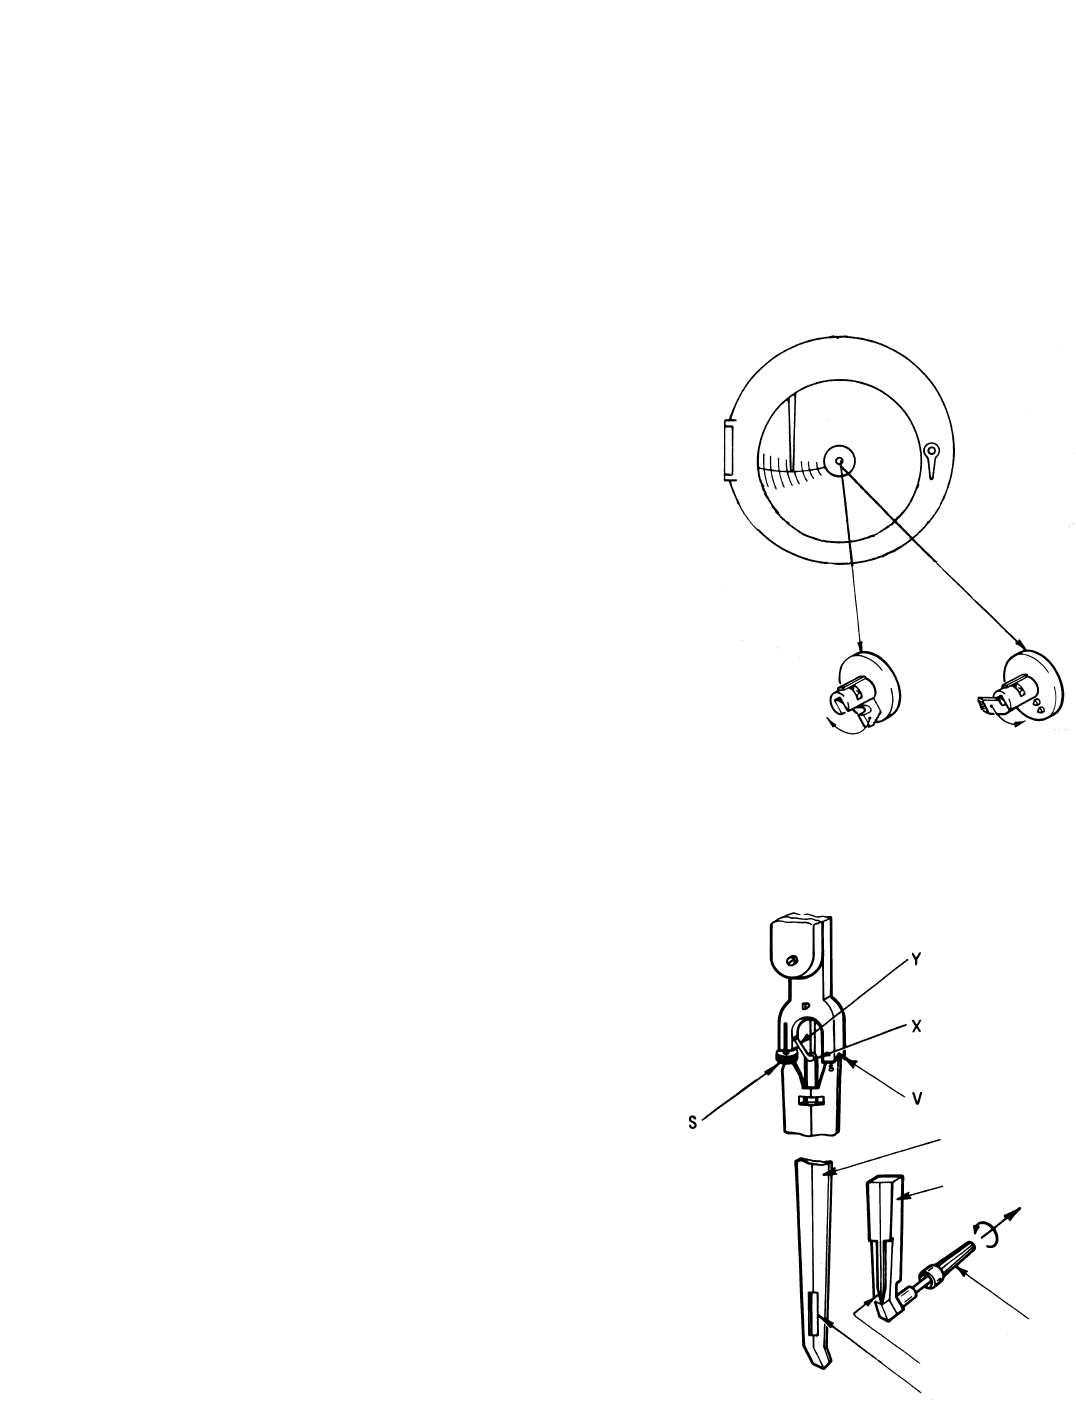
Inking System
The pen is tied during transit, but if dislodged it can be
simply reassembled as shown. The pen arm is forked,
one prong being pointed, the other curved. The pointed
prong fits into a conical hole in screw S and curved one
into the V shaped groove V. The pen is held in position
by a spring X and hook Y. On the rear pen the hook Y
faces towards the rear.
The writing system uses fibre pen capsules. A dovetail
on the capsule fits into a slot at the end of the pen arm
and the capsules are easily replaced when the ink is
exhausted. To fit a capsule, pull the pen arm gently clear
of its mountings S and V and unhook it from instrument.
Slide off the used capsule and replace it with a new one
of the appropriate colour. Where there are two
measuring systems, different coloured inks are used to
distinguish the traces. The fibre tip is protected by a
plastic cap, which should be removed by pulling in line
with its length, gripping the end only and gently twisting.
Do not bend. The front pen (red) has a long fibre tip and
the rear pen (green) a short tip.
Place the spring X over the hook Y and gently pull the
pen arm to locate it in its mountings S and V. Take care
not to bend the pen arm.
In some instruments, (supplied to special order only) fibre pen capsules are not used and each pen reservoir
must be filled with ink using the dropper supplied in the ink bottle. Each pen should be cleaned occasionally by
drawing the edge of a piece of stiff paper through it. If it becomes dirty or greasy remove the pen arm and wash
the pen methylated spirits.
Fig. 2(a) Chart Lever Clamp
Fig. 3
Release
Pen arm
Plastic cap
Capsule dovetail
Dovetail slot
Capsule
Pull and
twist
Clamp