
user manual


Table Of Contents
- Contents
- Important Safety Instructions
- 1: Controls and Connections
- 2: RR-1070 Remote Control
- 3: Connecting the Speakers
- 4: Connecting the TV
- 5: Connecting a Cable, Satellite, or HDTV set-top box
- 6: Connecting a VCR
- 7: Connecting a CD Player/CDR Recorder
- 8: Connecting an Analog Audio Tape Recorder
- 9: Connecting AM and FM antennae
- 10: Parental Lock Country Codes
- About Rotel
- Getting Started
- Features
- Audio Features
- Other Features
- Supplied Accessories
- A Few Precautions
- Placement
- CONNECTIONS
- Notes on connections
- Cable selection
- Video Connections
- Digital Audio
- Making Connections
- Connecting Speakers
- Connecting a Subwoofer
- Connecting the TV Monitor
- Setting the PAL/NTSC Switch
- Connecting a Cable, Satellite, or HDTV Set-top Box
- VCR or Digital Video Recorder
- CD Player/CDR Recorder
- Audio Tape Recorder
- AM Antenna
- FM Antenna
- AC Input
- OPERATING THE RSDX-02
- Front Panel Overview
- STANDBY Button
- DVD Drawer
- Input Buttons
- VOLUME Control
- DVD Audio LED
- INPUT AG/DG Button
- SURROUND ON/OFF Button
- SURROUND MODE Button
- LCD Display
- DVD Transport Buttons
- SETTING Button
- ADJUST button
- MEMORY Button
- CONTROL Buttons
- Remote Sensor
- Remote Control Overview
- Programming the RR-1070 MENU Button
- Using the RR-1070 ROTEL Button
- Changing Pages PAGE Buttons
- POWER Button
- VOLUME Buttons
- CHANNEL Buttons
- HOME Button
- MUTE Button
- Basic Operations
- Power On/Off
- SLEEP Timer
- Volume Adjustments
- Muting the Sound
- Changing Display Brightness
- Selecting Source Inputs
- Selecting an Input from the Front Panel
- Selecting an Input from the Remote
- Changing Input Name
- Selecting Digital or Analog Inputs
- Selecting the Digital Signal
- Attenuating Analog Inputs
- Activating Record Mode
- Surround Modes
- Dolby Surround Dolby Pro Logic II
- Dolby Digital
- DTS 5.1
- All-Channel Stereo
- DSP
- Surround Off
- Manually Selecting Surround Modes
- Surround Sound On/Off
- Selecting a Surround Sound Mode
- Tuner Controls
- Selecting FM/AM
- Tuning from the Front Panel
- Tuning from the Remote
- Storing/Tuning Station Presets from the Front Panel
- Storing/Tuning Station Presets from the Remote
- Changing the FM MODE
- DVD PLAYER
- About Discs
- Disc Formats
- DVD Region Codes
- Disc Structure
- Digital Audio Formats
- Playing DVDs
- Inserting a Disc
- Playing a Disc
- Stopping Disc Playback
- Pause/Still Frame
- Skip forward/back
- High Speed Play
- Slow Speed Play
- On-Screen Display (OSD)
- Time Display
- Advanced Features
- Progressive Scan (NTSC only)
- Zoom
- Selecting a Scene Angle
- Selecting Subtitles
- Selecting Audio Tracks
- Setting Video Picture Adjustments (VFP)
- Still Pictures on DVD-A Disc
- Playing Specific Selections
- Find Scenes from a DVD Menu
- Find a Scene from a Video CD/SVCD Menu
- Selecting a Title/Group
- Entering a Scene Number
- Find a Location with Time Search
- Repeat Play
- Random Play
- Program Play
- MP3 and JPEG files
- Control Menu
- Additional JPEG features
- SETUP
- Quick Setup
- Comprehensive Setup
- Setup Procedure
- Subwoofer Setting (SUBWFR)
- Speaker Settings (FRNT SP, CNTR SP, SURR SP)
- Delay Settings (FRNT D, CNTR D, SURR D)
- Crossover Frequency Setting (CROSS)
- LFE Attenuation Setting (LFE)
- Dynamic Range Compression (D.COMP)
- Digital Input Assignment (DGT)
- Automatic Surround Mode (AUTO SR)
- Quick Setup
- Video Output Mode (VOUT)
- Sound Adjustments
- Setup Procedure
- Front Speaker Balance (BAL)
- Tone Adjustments (BASS and TREBLE)
- Speaker Levels (SUBWFR, CENTER, SURR L, SURR R)
- DSP Effect LEVEL (EFFECT)
- Subwoofer Audio Position (AUDIO POS)
- CHOICE MENU SYSTEM
- Using the Choice Menus
- Language Menu
- Menu Language
- Audio Language
- Subtitle
- On Screen Language
- Picture Menu
- Monitor Type
- Picture Source
- Screen Saver
- MP3/JPEG
- Audio Menu
- L/R Balance
- Bass
- Treble
- LFE Attenuation
- Dynamic Range Compression
- Speaker Setting Menu
- Size
- Level
- Distance
- Crossover
- Return to Initial
- Others Menu
- Resume
- On-Screen Guide
- Auto Standby
- Parental Lock
- To Change Parental Lock Settings
- Playback with Parental Lock
- Specifications
37
English
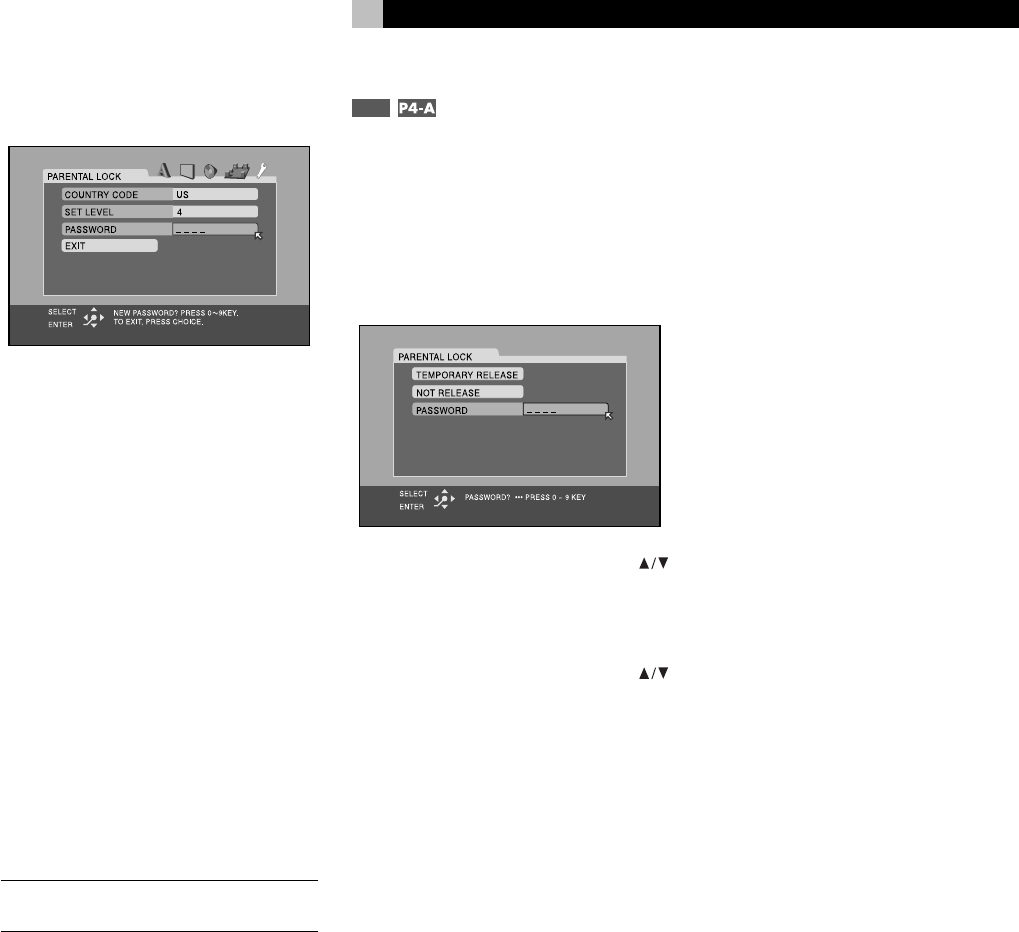
6. Press OK. The highlight cursor moves to
the PASSWORD field.
7. Enter a 4-digit password using the NU-
MERIC (0–9) buttons on the remote. If you
make a mistake, you can reenter a differ-
ent password. Write down your password
for safe keeping!
8. Press OK. The highlight cursor moves to
the EXIT field. Press ENTER again to exit
the Parental Lock screen and return to the
Others Menu.
To Change Parental Lock
Settings
Changing the Parental Lock settings follows
the same procedure, except that you must first
enter your 4-digit password before making any
changes on the Parental Lock sub-menu.
If you enter the wrong password, you can-
not proceed. If you enter it wrong more than
three times, the cursor jumps to EXIT field.
NOTE
: If you forget your password, enter the
master password “8888”.
Playback with Parental Lock
P1-D
When you play a disc that has a rating less
than or equal to your specified Level, playback
proceeds normally. If you attempt to play a
disc that is rated above your specified Level,
the following display appears on the TV screen
asking if you want to temporarily override the
Parental Lock and play the disc:
1. To eject the disc, use the CURSOR
buttons on Page 1 of the remote to high-
light the NOT RELEASE field, then press
the OK button. Eject the disc.
2. To play the disc, use the CURSOR
buttons to highlight the TEMPORARY RE-
LEASE field, then press the OK button.
3. Enter the 4-digit password using the NU-
MERIC buttons on Page 4 of the remote.
If you enter the wrong password three times,
playback is prohibited. If you enter the cor-
rect password, the parental lock is tempo-
rarily removed and playback begins.