
Manual

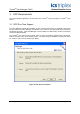


Table Of Contents
- 1. Description
- 2. System Requirements
- 3. OPC Requirements
- 4. Valve Manager Application
- 4.1. Installation
- 4.2. Running the Valve Manager application
- 4.3. Creating a Data Source
- 4.4. Creating a Project
- 4.5. Working with Multiple Projects
- 4.6. Editing a Project
- 4.7. Removing a Project
- 4.8. Adding, Removing, and Renaming Valves
- 4.9. Configuring a Valve Profile
- 4.10. Applying the Same Profile to Multiple Valves
- 4.11. Initiating a Test
- 4.12. Recording Automated Tests and External Events
- 4.13. Clearing Valve Test History
- 4.14. Controlling the Monitor
- 4.15. Project Tree
- 4.16. Main Window
Trusted
TM
Valve Manager T8031
Issue 2 Oct 05 PD-T8031 28
4.4.1. Project Name
The “Project Name” field is used to describe the project within the Valve Manager application.
Generally, the name of the Trusted
T
M
system’s application is used.
4.4.2. OPC Controller
The “OPC Controller” field specifies the OPC Server and the specific controller to use for this project.
Each project should specify a unique OPC controller. To select the OPC controller, click the “Browse”
button. This will bring up the “OPC Server” selection dialog box.
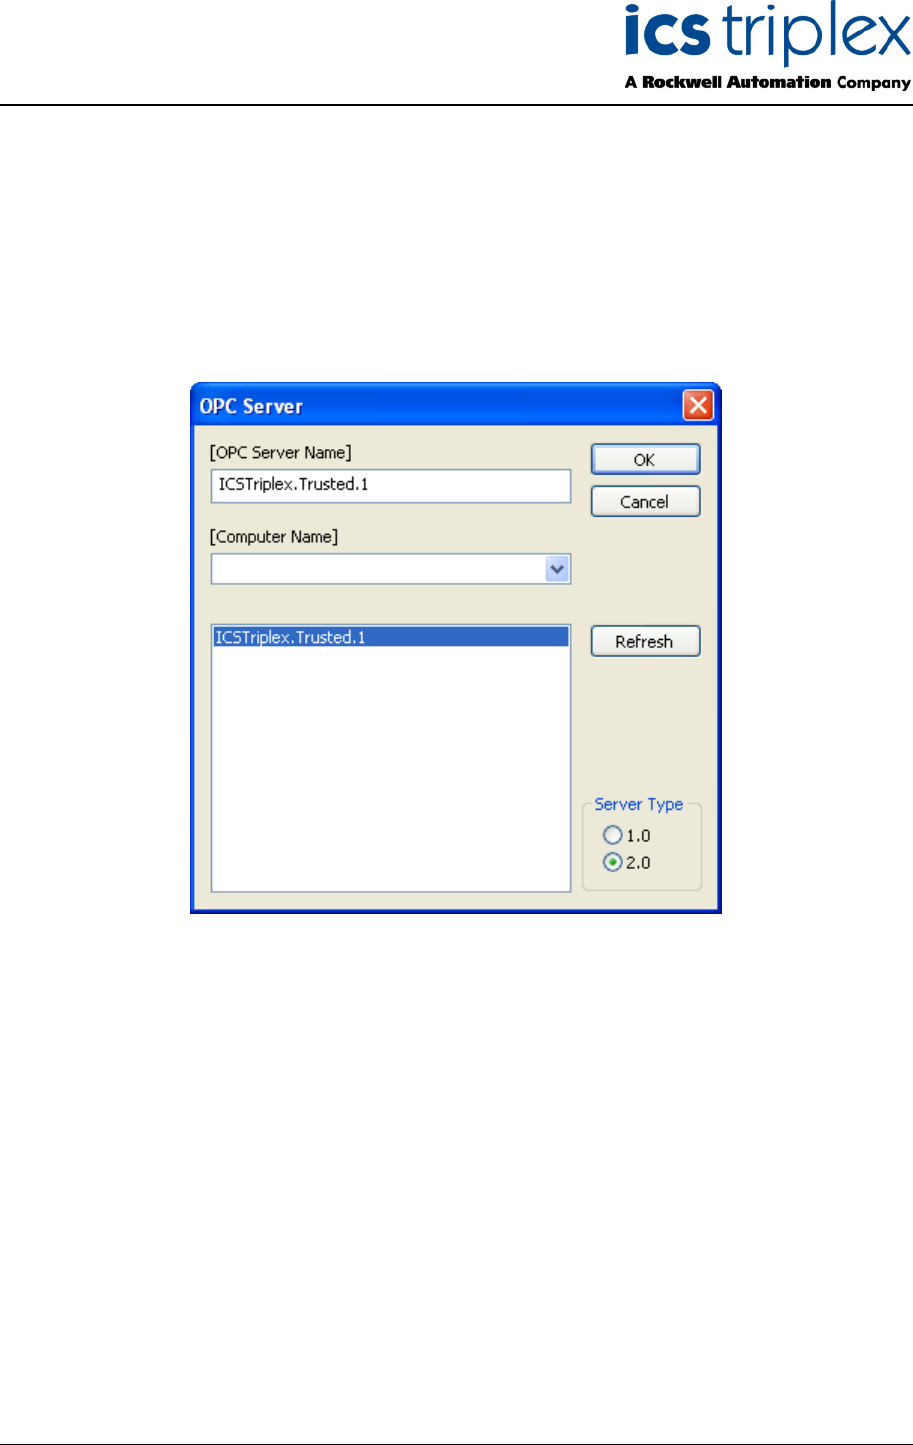
Figure 24 OPC Server Selection
The “OPC Server” selection dialog box will allow you to browse the available OPC servers in order to
select the one that contains the controller associated with the project. Once the correct OPC server
has been selected, click the “OK” button to bring up the “Browse Controllers” dialog box. If the OPC
server is not already running, clicking “OK” will automatically start the OPC server. In the above
example, the Trusted
TM
OPC Server is the only OPC server available, and it is installed on the same
machine as the Valve Manager application. To connect to an OPC server on a different machine,
enter the name of the machine in the “Computer Name” field, and then click on the “Refresh” button. It
is highly recommended that connectivity to the OPC server be verified prior to configuring a new
project.