Programming Manual Logix5000 Controllers Tasks, Programs, and Routines Catalog Numbers 1756 ControlLogix, 1756 GuardLogix, 1768 Compact GuardLogix, 1768 CompactLogix, 1769 CompactLogix, 1789 SoftLogix, PowerFlex with DriveLogix
Important user information Read this document and the documents listed in the additional resources section about installation, configuration, and operation of this equipment before you install, configure, operate, or maintain this product. Users are required to familiarize themselves with installation and wiring instructions in addition to requirements of all applicable codes, laws, and standards.
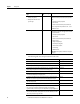
Summary of changes This manual contains new and updated information. There are a number of minor changes throughout this publication that were made to clarify existing information. The major changes are listed in the following table. Change Topic Updated screen shots for version 24. Throughout the manual. Updated GSV and SSV classes and attributes from all-capital letters to initial capitalization for version 24. Throughout the manual.
Table of contents Preface Studio 5000 environment ..................................................................................... 7 Additional resources............................................................................................... 8 Chapter 1 Manage tasks Introduction ............................................................................................................ 9 Select controller tasks ..................................................................................
Table of contents Additional considerations ............................................................................ 45 Motion group trigger ........................................................................................... 46 Checklist for a motion group task .............................................................. 48 Axis registration trigger ....................................................................................... 48 Checklist for an axis registration task ..............
Preface This manual details how to set up controller tasks and the programs and routines for the proper execution of these tasks. This manual is one of a set of related manuals that show common procedures for programming and operating Logix5000 controllers. For a complete list of common procedures manuals, refer to the Logix5000 Controllers Common Procedures Programming Manual, publication 1756PM001. The term Logix5000 controller refers to any controller that is based on the Logix5000 operating system.
Preface Additional resources These documents contain additional information concerning related Rockwell Automation products. Resource Description Industrial Automation Wiring and Grounding Guidelines, publication 1770-4.1 Provides general guidelines for installing a Rockwell Automation industrial system. Product Certifications webpage, available at http://ab.rockwellautomation.com Provides declarations of conformity, certificates, and other certification details.
Chapter 1 Manage tasks Introduction The default project provides a single task for all your logic. Although this is sufficient for many applications, some situations may require more than one task. Select controller tasks A Logix5000 controller supports multiple tasks to schedule and prioritize the running of your programs based on specific criteria. This balances the processing time of the controller. • The controller runs only one task at one time.
Chapter 1 Manage tasks If you want to run a section of your Then use this type of Description logic task • At a constant period (for example, every 100 ms) Periodic Task • Multiple times within the scan of your other logic A periodic task performs a function at a specific period. When the time for the periodic task expires, the periodic task: • Interrupts any lower priority tasks. • Runs one time. • Returns control to where the previous task left off. You can configure the time period from 0.
Manage tasks For this example situation Use this type of task In a production line, if any of the programs detect an unsafe condition the entire line must shut down. The shutdown procedure is the same regardless of the unsafe condition. Event task Chapter 1 The number of tasks supported depends on the controller.
Chapter 1 Manage tasks The number of priority levels depends on the controller. This Logix5000 controller Has this many priority levels CompactLogix 15 ControlLogix 15 DriveLogix 15 FlexLogix 15 SoftLogix5800 3 To assign a priority to a task, use the following guidelines. If you want Then Notes This task to interrupt another task Assign a priority number that is less than the priority number of the other task. • A higher priority task interrupts all lower priority tasks.
Chapter 1 Manage tasks System overhead System overhead is the time that the controller spends on unscheduled communication. • Unscheduled communication is any communication that you do not configure through the I/O configuration folder of the project, such as Message (MSG) instructions and communication with HMIs or workstations. • System overhead interrupts only the continuous task.
Chapter 1 Manage tasks Description Initially, the controller runs the motion planner and the I/O task (if one exists). After running the continuous task for 4 ms, the controller triggers the system overhead. The period for periodic task 1 expires (12 ms), so the task interrupts the continuous task. After running the continuous task again for 4 ms, the controller triggers the system overhead. The trigger occurs for event task 1. Event task 1 waits until the motion planner is done.
Manage tasks Chapter 1 The following guidelines generally leave enough time for unscheduled communication. Avoid overlaps • Adjust the period of the tasks as needed to get the best balance between running your logic and servicing unscheduled communication. • If your project has a continuous task, unscheduled communication occurs as a percentage of controller time (excluding the time for periodic or event tasks).
Chapter 1 Manage tasks Manually check for overlaps Follow these steps to manually see if overlaps are occurring for a task. 1. In the Controller Organizer, right-click MainTask and choose Properties.
Manage tasks Chapter 1 2. On the Task Properties dialog box, click the Monitor tab. The Task Overlap Count shows the number of overlaps since the counter was last reset. 3. Click OK. Programmatically check for overlaps When an overlap occurs, the controller: • Logs a minor fault to the FAULTLOG object. • Stores overlap information in the Task object for the task. To write logic to check for an overlap, use a Get System Value (GSV) instruction to monitor either of these objects.
Chapter 1 Manage tasks If you want to Then access the object and attribute Determine if an overlap occurred for any task Determine if an overlap occurred for a specific task Determine the number of times that an overlap occurred. Object Attribute Data Type Description FaultLog MinorFaultBits DINT Individual bits that indicate a minor fault: Task Task Status OverlapCount DINT DINT To determine if Examine this bit An instruction produced a minor fault.
Manage tasks Configure output processing for a task Chapter 1 At the end of a task, the controller performs overhead operations (output processing) for the I/O modules in your system. Although these operations are not the same as updating the modules, the output processing may affect the update of the I/O modules in your system. As an option, you can turn off this output processing for a specific task, which reduces the elapsed time of that task.
Chapter 1 Manage tasks Choose how to configure output processing for a task.
Manage tasks Chapter 1 Manually configure output processing Follow these steps to manually configure output processing. 1. In the Controller Organizer, right-click MainTask and choose Properties. 2. On the Task Properties dialog box, click the Configuration tab.
Chapter 1 Manage tasks 4. Configure output processing for the task. If you want to Then Enable the processing of outputs at the end of the task Clear Disable Automatic Output Processing To Reduce Task Overhead (default). Disable the processing of outputs at the Check Disable Automatic Output Processing To Reduce Task end of the task Overhead. 5. Click OK. Programmatically configure output processing To write logic to configure output processing for a task, use a Set System Value (SSV) instruction.
Manage tasks Chapter 1 If Condition_1 = 1 then do not let Task_2 process outputs when it is done. 1. The ONS instruction limits the true run of the SSV instruction to one scan. 2. The SSV instruction sets the DisableUpdateOutputs attribute of Task_2 = 1. This prevents the task from automatically processing outputs when it finishes its run. Inhibit a task By default, each task runs based on its trigger (event, periodic, or continuous).
Chapter 1 Manage tasks Manually inhibit or uninhibit a task Follow these steps to manually inhibit or uninhibit the running of a task. 1. In the Controller Organizer, right-click MainTask and choose Properties. 2. On the Task Properties dialog box, click the Configuration tab.
Manage tasks Chapter 1 3. Do one of these steps to inhibit or uninhibit the task. If You Want to Then Let the task run when its trigger occurs Clear Inhibit Task (default). Prevent the task from running when its trigger occurs Check Inhibit Task. 4. Click OK. Programmatically inhibit or uninhibit a task To write logic to inhibit or uninhibit a task, use a Set System Value (SSV) instruction to access the attribute of the Task object for the task.
Chapter 1 Manage tasks EXAMPLE If Condition_1 = 0 then let Task_2 run. 1. The ONS instruction limits the true run of the SSV instruction to one scan. 2. The SSV instruction sets the InhibitTask attribute of Task_2 = 0. This uninhibits the task. If Condition_1 = 1 then do not let Task_2 run. 1. The ONS instruction limits the true run of the SSV instruction to one scan. 2. The SSV instruction sets the InhibitTask attribute of Task_2 = 1. This inhibits the task.
Manage tasks Chapter 1 2. Enter task information in the New Task dialog box. Topic Description Name Type a name for the task. Description Type an optional description for the task. Type Choose Event for the task type. Trigger Choose a trigger for the task. Tag Choose a tag if the field is active for the selected trigger. Execute Task If No Event Occurs Within Select the check box and type a time period that must elapse before a task can run. Priority Enter the task priority value.
Chapter 1 Manage tasks 1. In the Controller Organizer, right-click the MainTask folder and choose Properties. 2. On the Task Properties dialog box, click the Configuration tab.
Manage tasks Chapter 1 3. Enter the following information in the Task Properties dialog box. Topic Description Type Choose Periodic (default) for the type of task. Period Type a value for when (or at what time interval) you want the task to run. Priority Enter the task priority value. Watchdog Type the watchdog time for the task. 4. Click OK.
Chapter 1 Manage tasks Adjust the system-overhead time slice A Logix5000 controller communicates with other devices, I/O modules, controllers, HMI terminals, and so forth, at either a specified rate (scheduled) or when there is processing time available to service the communication (unscheduled).
Manage tasks Chapter 1 The same applies for 66% and higher, except that there are multiple 1 ms intervals. For example, at 66% there are two 1 ms intervals of consecutive time and at 90% there are nine 1 ms intervals of consecutive time. Configure the system-overhead time slice Follow these steps to configure the system-overhead time slice. 1. On the Online toolbar, click the controller properties icon. 2. On the Controller Properties dialog box, click the Advanced tab. 3.
Chapter 1 Manage tasks 4. Use either Run Continuous Task (default) or Reserve for System Tasks. • Select the Run Continuous Task radio button when there are no communication or background tasks to process; the controller immediately returns to the continuous task. • Select the Reserve for System Task radio button to allocate the entire 1 ms of the system-overhead time slice when the controller has communication or background tasks to perform before returning to the continuous task.
Manage tasks Chapter 1 Adjust the watchdog timer for a task Follow these steps to change the watchdog time of a task. 1. In the Controller Organizer, right-click Main Task and choose Properties.
Chapter 1 Manage tasks 2. On the Task Properties dialog box, click the Configuration tab. 3. In the Watchdog box, type a numeric value for the watchdog timeout for the task. 4. Click OK.
Chapter 2 Manage event tasks Introduction An event task, if configured correctly, interrupts all other tasks for the minimum amount of time required to respond to the event. This section describes how to set up event tasks and lists considerations, such as a higher priority task, that can affect the execution of an event task. Choose the trigger for an event task To trigger an event task when Digital input turns On or Off Each event task requires a specific trigger that defines when the task is to run.
Chapter 2 Manage event tasks To trigger an event task when Motion planner completes its execution Use this trigger With these considerations Motion Group Execution • The base update period for the motion group triggers both the motion planner and the event task. • Because the motion planner interrupts all other tasks, it runs first. If you assign the event task as the highest priority task, it runs after the motion planner.
Manage event tasks Module Input Data State Change trigger Chapter 2 To trigger an event task based on data from an input module, use the Module Input Data State Change trigger. Let an event trigger this task. Let data from an input module trigger the task. Let this input tag trigger the task. When the task is done, do not update digital outputs in the local chassis. How an I/O module triggers an event task The following terms apply to the operation of an input module.
Chapter 2 Manage event tasks Term Definition • The RPI specifies when the module multicasts the current contents of the input data buffer without scanning (updating) the channels. • The module resets the RPI timer each time an RTS transfer occurs. Change of state (COS) The COS parameter instructs a digital input module to multicast data whenever a specified input point transitions from On → Off or Off → On. • You enable COS on a per-point basis.
Manage event tasks Chapter 2 COS and RTS Configuration Examples If you want this Then configure the input module like this (Point 0 is an example) Rockwell Automation Publication 1756-PM005-EN-P - October 2014 39
Chapter 2 Manage event tasks Make sure your module can trigger an event task To use an input module to trigger an event task, the module must support event task triggering. If the module is in a remote location, the associated communication modules must also support event triggering. The following table lists Rockwell Automation modules that have been tested for event task triggering. Some third-party modules may also support event task triggering.
Manage event tasks 4. Change of state (COS) Chapter 2 If a digital device triggers the event, enable COS for only the point that triggers the event task. • Enable change of state for the type of transition that triggers the task, either Off → On, On → Off, or both. • If you configure COS for both Off → On and On → Off, the point triggers an event task whenever the point turns on or off. Make sure the duration of the input is longer than the scan time of the task. Otherwise an overlap could occur.
Chapter 2 Manage event tasks Example – Input Event Task As parts move past a diverter location, the controller logic determines whether to turn on the diverter. Once the diverter is on, the controller must also turn it off before the next part is in that position. Because of the speed of the line, an event task controls the diverter. A photoeye at the diverter position indicates when a part is in the diverter position. In this example the input is wired to the module in slot 4 of the local chassis.
Manage event tasks Chapter 2 The event task uses the following logic to control the diverter. If Diverter_Photoeye = 1 (part is in the diverter position) and Divert_Part = 1 (divert this part) then Diverter = 1 (turn on the diverter) otherwise Diverter = 0 (turn off the diverter) Immediately send the output values to the output module in slot 5. Estimate throughput To estimate the throughput time from input to output (screw to screw), use the following worksheet. Consideration 1.
Chapter 2 Manage event tasks The following table lists nominal hardware response times for 1756 I/O modules with event tasks. Cat. No.
Manage event tasks Consideration 1. Chapter 2 Value 0 µs What is the input filter time of the module that triggers the event task? This is typically shown in milliseconds. Convert it to microseconds (µs). 2. 330 µs What is the hardware response time for the input module that triggers the event task? Make sure you use the appropriate type of transition (Off → On or On → Off).
Chapter 2 Manage event tasks Motion group trigger To couple the running of an event task with the running of the motion planner, use the Motion Group Execution trigger. Let an event trigger this task. Let the motion planner trigger the task. This is the name of the motion group tag. Interrupt all other tasks. When the task is done, do not update digital outputs in the local chassis.
Manage event tasks Chapter 2 The Motion Group Execution trigger works as follows: • The base update period for the motion group triggers the running of both the motion planner and the event task. • Because the motion planner interrupts all other tasks, it runs first. If you assign the event task as the highest priority task, it runs immediately after the motion planner. This timing diagram shows the relationship between the motion planner and the event task.
Chapter 2 Manage event tasks Checklist for a motion group task For This Make Sure You 1. Scan time Make sure the scan time of the event task is significantly less than the base update period of the motion group. Otherwise, a task overlap could occur. 2. Task priority Configure the event task as the highest priority task. If a periodic task has a higher priority, the event task may have to wait until the periodic task is finished. 3. Number of event tasks Limit the number of event tasks.
Manage event tasks Chapter 2 • In the configuration of the event task, specify which registration input you want to trigger the task. Choose either Axis Registration 1 or Axis Registration 2. • You must first arm the registration input using a Motion Arm Registration (MAR) instruction. • In the MAR instruction, the Trigger Condition operand defines which transition of the registration input (Off → On or On → Off) triggers the event task.
Chapter 2 Manage event tasks Example – axis registration trigger In a line that packages candy bars, you have to make sure that the perforation occurs in the correct location on each bar. • Each time the registration sensor detects the registration mark, check the accuracy of an axis and perform any required adjustment. • Due to the speed of the line, you have to arm the registration input within the event task. A registration sensor is wired as registration input 1… …for the axis named Axis_1.
Manage event tasks Chapter 2 Task_1 (event task) The GSV instruction sets Task_Status (DINT tag) = Status attribute for the event task. In the Instance Name attribute, THIS means the TASK object for the task that the instruction is in (that is, Task_1). If Task_Status.0 = 1 then an EVENT instruction triggered the event task. In the continuous task, the EVENT runs to arm registration for the first time. The JMP instruction causes the controller to jump to the Arm LBL instruction.
Chapter 2 Manage event tasks Axis watch trigger To configure the watch position of an axis to trigger an event task, use the Axis Watch trigger. Let an event trigger this task. Let the watch position…. …of this axis trigger the task. Interrupt all other tasks. When the task is done, do not update digital outputs in the local chassis.
Manage event tasks Chapter 2 When the axis reaches the position that is specified as the watch position, it triggers the event task. • You must first arm the axis for the watch position by using a Motion Arm Watch (MAW) instruction. • In the MAW instruction, the Trigger Condition operand defines the direction in which the axis must be moving to trigger the event task. • Once the axis reaches the watch position and triggers the event task, you have to re-arm the axis for the next watch position.
Chapter 2 Manage event tasks Example – axis watch trigger At the labeling station of a bottling line, you want to check the position of the label on the bottle. • When the axis reaches the position that is defined as the watch point, check the label and perform any required adjustment. • Due to the speed of the line, you have to arm axis for the watch position within the event task. Let the watch position… …for the axis named Axis_1 trigger the event task.. This event task interrupts all other tasks.
Manage event tasks Chapter 2 The GSV instruction sets Task_Status (DINT tag) = Status attribute for the event task. In the Instance Name attribute, THIS means the Task object for the task that the instruction is in (that is, Task_1). If Task_Status.0 = 1 then an EVENT instruction triggered the event task. In the continuous task, the EVENT runs to set up the watch position for the first time. The JMP instruction causes the controller to jump to the Arm LBL instruction.
Chapter 2 Manage event tasks Consumed tag trigger To trigger an event task based on data from a consumed tag, use the Consumed Tag trigger. Let an event trigger this task. Let a consumed tag trigger the task. Let this consumed tag trigger the task. A produced/consumed tag relationship can pass an event trigger along with data to a consumer controller. Typically, you use an Immediate Output (IOT) instruction to send the event trigger to the consumer controller.
Manage event tasks Chapter 2 Description In Controller A, logic updates the values of a produced tag. Once the update is complete, the Controller A runs an IOT instruction to send the data and an event trigger to Controller B. Controller B consumes the new data. After Controller B updates the consumed tag, it runs the event task. The type of network between the controllers determines when the consuming controller receives the new data and event trigger through the IOT instruction.
Chapter 2 Manage event tasks Maintain the integrity of data An event task with a consumed tag trigger provides a simple mechanism to pass data to a controller and make sure that the controller does not use the data while the data is changing. Description RPI occurs for the produced tag. The produced tag transfers old data to the consuming controller. The producer controller starts to update the values of the produced tag. RPI occurs again for the produced tag.
Manage event tasks Chapter 2 Synchronize multiple controllers You can also use the produced/consumed tag relationship to synchronize controllers. In this case, the produced/consumed tag serves only as a triggering mechanism. Description The first controller runs an action with which other controllers need to stay synchronized. When the action is done, the controller runs an IOT instruction. The IOT instruction uses a produced tag as its target.
Chapter 2 2. Manage event tasks Produced tag properties On the New Tag dialog box for the produced tag, click Connection to open the Produced Tag Connection dialog box. Check Send Data State Change Event to Consumer(s). If you leave this check box cleared (unchecked), the producing controller triggers the event task at the end of any task that automatically updates local outputs. In other words, the task scan triggers the event in addition to the IOT instruction. 3.
Manage event tasks Chapter 2 Example – producer controller and consumer controller As parts move along a production line, each station requires production specifications for the part at its station. To make sure that a station doesn’t act on old data, an event task signals the arrival of new data for the next part. Producer controller This controller controls station 24 and produces data for the next station (station 25).
Chapter 2 Manage event tasks The CPS instruction sets Produced_Tag_1 = Source_Tag_1. The IOT instruction updates Produced_Tag_1 and sends this update to the consuming controller (station 25). When the consuming controller receives this update, it triggers the associated event task in that controller. Consumer controller The controller at station 25 uses the data produced by station 24. To determine when new data has arrived, the controller uses an event task.
Manage event tasks EVENT Instruction trigger Chapter 2 To trigger an event task based on conditions in your logic, use the EVENT Instruction Only trigger. Let an event trigger this task. Let an EVENT instruction trigger the task. No tag is required. The EVENT Instruction Only trigger requires that you use a Trigger Event Task (EVENT) instruction to trigger the task. You can use an EVENT instruction from multiple points in your project.
Chapter 2 Manage event tasks Description Program A runs an EVENT instruction. The event task that is specified by the EVENT instruction runs one time. Program B runs an EVENT instruction. The event task that is specified by the EVENT instruction runs one time. Programmatically determine if EVENT Instruction triggered task To determine if an EVENT instruction triggered an event task, use a Get System Value (GSV) instruction to monitor the Status attribute of the task.
Manage event tasks Chapter 2 Example – EVENT Instruction trigger A controller uses multiple programs except for a common shut down procedure. Each program uses a program-scoped tag named Shut_Down_Line that turns on if the program detects a condition that requires a shut down. Event Task Properties Let an event trigger this task. Let an EVENT instruction trigger the task. No tag is required. Interrupt all other tasks.
Chapter 2 Manage event tasks Ladder Diagram in Program_B If Shut_Down_Line = on (conditions require a shut down) then run the Shut_Down task one time. Define a timeout value for an event task If you want your event task to run automatically, if the trigger fails to occur within a certain time, assign a timeout value to the task. When the event task is finished, the timeout timer begins to increment.
Manage event tasks Chapter 2 Assign a timeout value to an event task Follow these steps to assign a timeout value to an event task. 1. In the Controller Organizer, right-click Main Task > Properties. 2. On the Task Properties dialog box, click the Configuration tab. 3. From the Type menu, select Event. 4. Select Execute Task If No Event Occurs Within and type the timeout value. 5. Click OK.
Chapter 2 Manage event tasks Programmatically configure a timeout To programmatically configure a timeout, use a Get System Value (GSV) instruction to access the attributes of the task. The following table lists the status attribute for the TASK object. Attribute Data Type Instruction Description Rate DINT GSV SSV If the task type is Then the Rate attribute specifies the Periodic Period for the task. Time is in microseconds. Event The timeout value for the task. Time is in microseconds.
Manage event tasks Chapter 2 Attribute Data Type Instruction Description Status DINT GSV SSV Provides status information about the task. Once the controller sets a bit, you must manually clear the bit to determine if another fault of that type occurred. Example To determine if Examine this bit An EVENT instruction triggered the task (event task only). 0 A timeout triggered the task (event task only). 1 An overlap occurred for this task.
Index C change of state configure for I/O module 40 communication impact on execution 14 configure output processing for a task 21 consumed tag maintain data integrity 61 synchronize controllers 62 controller number of tasks 11 synchronize 62 COS.
Index T tag trigger event task 58 task avoid overlap 17 choose event trigger 37 create periodic 29 define timeout 70 inhibit 25 manually check for overlap 18 manually configure output processing 22 monitor 18, 19 number supported 11 output processing 21 overlap 17 programmatically check for overlap 19 programmatically configure output processing 24 trigger via EVENT instruction 66 throughput estimate for event task 45 timeout define for event task 70 trigger axis registration 51 axis watch 54 choose for ev
Rockwell Automation support Rockwell Automation provides technical information on the web to assist you in using its products. At http://www.rockwellautomation.com/support you can find technical and application notes, sample code, and links to software service packs. You can also visit our Support Center at https://rockwellautomation.custhelp.com for software updates, support chats and forums, technical information, FAQs, and to sign up for product notification updates.