Programming Manual Logix5000 Controllers Security Catalog Numbers 1756 ControlLogix, 1769 CompactLogix, 1789 SoftLogix, PowerFlex 700S with DriveLogix
Important user information Read this document and the documents listed in the additional resources section about installation, configuration, and operation of this equipment before you install, configure, operate, or maintain this product. Users are required to familiarize themselves with installation and wiring instructions in addition to requirements of all applicable codes, laws, and standards.
Summary of changes This manual contains new and updated information. Changes to this manual are documented in the following table.
Table of contents Preface Studio 5000 environment ..................................................................................... 7 Additional resources............................................................................................... 8 Chapter 1 Security Introduction ............................................................................................................ 9 FactoryTalk Security .........................................................................................
Table of Contents Chapter 5 Securing a ControlLogix controller Introduction .......................................................................................................... 49 Installing the Logix CPU Security Tool ........................................................... 49 Securing a ControlLogix controller with Logix CPU Security Tool .......... 49 Accessing a secured controller .....................................................................
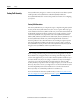
Preface This manual explains how to configure security for Logix Designer application. It also explains how to set up source protection for your logic and projects. This manual is one of a set of related manuals that show common procedures for programming and operating Logix5000 controllers. For a complete list of common procedures manuals, refer to the Logix5000 Controllers Common Procedures Programming Manual, publication 1756-PM001.
Preface Additional resources These documents contain additional information concerning related Rockwell Automation products. Resource Description Industrial Automation Wiring and Grounding Guidelines, publication 1770-4.1 Provides general guidelines for installing a Rockwell Automation industrial system. FactoryTalk Security System Configuration Guide, publication FTSEC-QS001 Provides additional information on FactoryTalk security. Product Certifications webpage, available at http://ab.
Chapter 1 Security Introduction This chapter discusses security related features available in the Logix Designer application. In version 20 or later of the application, security enhancements provide: • Security Server Validation—When enabled, and a user attempts to access a secured controller or project file, the application makes sure that the user is authorized by a FactoryTalk Directory trusted by that controller or project file.
Chapter 1 Security FactoryTalk Security FactoryTalk Security integrates a common security model across all FactoryTalk enabled products. FactoryTalk Services Platform (FTSP) includes the FactoryTalk Administration Console that provides the interface for configuring your system. FactoryTalk Directories The FactoryTalk Directory is an important aspect to implementing FactoryTalk Security. In the FactoryTalk architecture, there are two separate Directory types, Local and Network.
Chapter 2 Configuring FactoryTalk Security with Logix Designer application Introduction FactoryTalk Services Platform (FTSP) software is installed during the installation of the Logix Designer application. Installing the Rockwell Software Security Emulator RSLogix 5000 software version 19 or earlier uses the Rockwell Software Security Emulator to communicate with FactoryTalk Security.
Chapter 2 Configuring FactoryTalk Security with Logix Designer application In Windows Explorer, browse to and then expand the Program Files folder, then expand Rockwell Software, then expand RSLogix 5000, then expand ENU, then expand vxx, then expand Security, and then double-click the SetSecKeys.exe file. For this example, we are using RSLogix 5000 version 16. 2. If prompted to locate the project file, in the Locate Project File dialog box, select the RS5000Keys.ini file and click Open.
Configuring FactoryTalk Security with Logix Designer application Tip: Chapter 2 If you cannot log on to FactoryTalk, see "I cannot log on to the FactoryTalk Directory" in FactoryTalk Help. 6. Open the RSLogix 5000 Feature Security Properties dialog box: a. In Windows Explorer, browse to System, then go to Policies, then go to Product Policies, and then go to RSLogix 5000. b. Right-click Feature Security and then click Properties. 7. Secure the RSLogix 5000 controller: a.
Chapter 2 Configuring FactoryTalk Security with Logix Designer application Securing a Logix Designer application project file Once you have configured the Logix Designer application to be security aware, the next step is to enable security in a project file. Follow these steps to secure a project file. 1. Open Logix Designer. a. Click the Start button, then click All Programs, then click Rockwell Software, and then click Studio 5000. b.
Configuring FactoryTalk Security with Logix Designer application Chapter 2 3. On the menu bar, click Edit, and then click Controller Properties. 4. Click the General tab to find the controller name. Write down the name that appears in the Name field. By default, this is the name of the ACD file that you use later when applying security to a controller resource on page 20 in the FactoryTalk Administration Console.
Chapter 2 Configuring FactoryTalk Security with Logix Designer application In this example, the name is DayOfWeek. 5. Click the Security tab or the Advanced tab, depending on the version of the application, to configure the security settings. • 16 Click the Security tab if it appears in the Controller Properties dialog box.
Configuring FactoryTalk Security with Logix Designer application a. Chapter 2 In the Security Authority list, select FactoryTalk Security. Important: When you select a security authority for a project, you can only access the project and any controller that contains it when you have been granted access in FactoryTalk Security. b. To associate the project with a specific authority, select the Use only the selected Security Authority for Authentication and Authorization check box.
Chapter 2 Configuring FactoryTalk Security with Logix Designer application • Click the Advanced tab if the Security tab does not appear in the Controller Properties dialog box. In the Security box, select FactoryTalk Security. 6. Click OK. If prompted to confirm whether to confirm the controller settings, click Yes. Important: When you select a security authority for a project, you can only access the project and any controller that contains it when you have been granted access in FactoryTalk Security.
Configuring FactoryTalk Security with Logix Designer application Chapter 2 8. On the menu bar, click Communications, and then click Who Active to download the project file to the controller. 9. In the Who Active window, locate and click the controller resource. 10. Click Download to continue.
Chapter 2 Configuring FactoryTalk Security with Logix Designer application 11. When the download is complete, close the application. If prompted, save changes. Applying security to a controller resource The following steps show configuring a single controller for security.
Configuring FactoryTalk Security with Logix Designer application Chapter 2 In the example below, the FactoryTalk Directory (FTD) was configured with an account called FTADMIN. 4. Go to the controller resource the secured project file was downloaded to. From the Explorer window, expand Networks and Devices to find the controller you want to configure.
Chapter 2 Configuring FactoryTalk Security with Logix Designer application 5. Right-click the controller resource and then click Properties. Example: If you want the security settings to be inherited by all controllers, right click Networks and Devices, then click Security. From the Security Settings dialog box, you can configure security settings that are inherited by all secured projects. You can still configure unique permissions on a particular device, if needed.
Configuring FactoryTalk Security with Logix Designer application Important: Tip: Chapter 2 Security settings can be applied to a Logical Name. The Logical Name is the same as the Name shown on the Controller Properties dialog box. Security settings for a Logical Name apply to the offline project, as well as when the project is downloaded to the controller.
Chapter 2 Configuring FactoryTalk Security with Logix Designer application 9. In the Security Settings dialog box, you can configure security permissions for a particular user or user group and computer names. This completes the FactoryTalk Security configuration for a controller resource. For more FactoryTalk Security information, refer to the FactoryTalk Security System Configuration Guide, publication FTSEC-QS001.
Chapter 3 Migrating from a security server database to a FactoryTalk server Introduction To migrate to a FactoryTalk Security server, you must first export the security server database and then import the database into FactoryTalk. Importing a security server database Follow these steps to import a security server database into FactoryTalk Security. 1.
Chapter 3 Migrating from a security server database to a FactoryTalk server 3. Click Yes for the FactoryTalk Security Import warning message. 4. In the Log on to Factory Talk dialog box, type your User name and Password and then click OK. A progress bar indicates the status of the import.
Migrating from a security server database to a FactoryTalk server Chapter 3 5. In the RSSecurity Migration Utility dialog box, select how you want action and resource groups to be imported into FactoryTalk and then click OK. 6. In the Import Issue Resolution dialog box, resolve any issues that occurred during the import, and then click Continue.
Chapter 3 Migrating from a security server database to a FactoryTalk server 7. In the FactoryTalk Security Resource Group Import dialog box, right-click the group you want to import and then click Add Area. 8. Browse to the resource location and click OK. 9. Click OK. The import succeeded message appears. 10. Click OK.
Migrating from a security server database to a FactoryTalk server Chapter 3 Importing Status text file This image shows an example of the Import Status text file that is created when an import is completed.
Chapter 3 Migrating from a security server database to a FactoryTalk server Organizer import result This graphic shows the results of the import process in the Explorer. Resource Editor This image shows the results of the import in the Resources Editor.
Chapter 4 Configuring source protection in the Logix Designer application Introduction This chapter describes how to enable and apply source protection for your Logix Designer components such as routines and Add-On Instructions. Enabling source protection Follow these steps to enable Logix Designer source protection. 1. On the Logix Designer installation CD, browse to the D:\ENU\Tools\Source Protection Tool folder and double-click the RS5KSrcPtc.exe file. A dialog box appears. 2. Click Yes.
Chapter 4 Configuring source protection in the Logix Designer application Specifying a source key file Follow these steps to configure a source key file location. 1. Open an offline project file. 2. On the menu bar, click Tools, then click Security, and then click Configure Source Protection. Tip: This option is not available until you have run RS5KSrcPtc.exe on your workstation. See Enabling source protection on page 31.
Configuring source protection in the Logix Designer application Chapter 4 5. In the Browse for Folder dialog box, click the folder to store the key file. You can save the key file in any accessible folder. In this example the path to the key file folder is C:\RSLogix 5000\Projects folder. Click OK. 6. In the Specify Source Key File Location dialog box, click OK. The location you selected appears in the Source Protection Configuration dialog box under Source Key Provider.
Chapter 4 Configuring source protection in the Logix Designer application Protecting components The Source Protection Configuration dialog box lists all Program Routines, Add-On Instructions, and Equipment Phase State Routines in the project file. You protect these components by applying source keys. Source keys are user-generated passwords used to lock components. Users that do not have the source key for a component are not able to modify the component and may not be able to view the component.
Configuring source protection in the Logix Designer application Chapter 4 Use descriptive names to help identify the purpose of the source. For instance, a source key used to secure components that field engineers require access might be named, Field Engineer.
Chapter 4 Configuring source protection in the Logix Designer application The Apply Source Key dialog box appears. For version 19 and later of the application, the entered source keys on the Apply Source Key dialog box are masked by default, but you see the source key by selecting the Show Source Key check box. If you have version 18 and earlier of RSLogix 5000 software, your source keys are in clear text. 4. Complete the Apply Source Key dialog box to designate a new source key.
Configuring source protection in the Logix Designer application Chapter 4 5. Click OK. The Source Protection Configuration dialog box reappears. For version 19 and later of the application, source keys may have names. If the source key has a name, the name appears instead of the source key. In this example, the name Field Engineer is displayed instead of the source key. Important: Source key names cannot be added to existing source keys through the Logix Designer application.
Chapter 4 Configuring source protection in the Logix Designer application Text must be in first line. ------> Follow these steps to assign a name to an existing source key. 1. Close the Logix Designer application. 2. Locate the sk.dat file on your workstation. 3. Open the file with a text editor, such as Notepad. 4. Click the mouse at the end of an existing source key and press Enter. Note that source keys are case sensitive and may use special characters such as @#$%(){}[]. 5.
Configuring source protection in the Logix Designer application Chapter 4 One or more spaces are required to associate the name with the source key. Source keys always begin in the first column of the line in the text editor. A source key name must be on the line immediately following the source key that it is associated with, preceded on the line by at least one space. Subsequent lines after the source key that are preceded with spaces are ignored by the application, and can be used for comments. 6.
Chapter 4 Configuring source protection in the Logix Designer application The Apply Source Key dialog box displays. 10. In the Source Key to Apply to Select Component(s) box, select the source key name. The masked source key name appear. 11. Click OK. Viewing components without a key This procedure lets you select source-protected components to be available in a read-only format on a system that does not have the source keys.
Configuring source protection in the Logix Designer application Chapter 4 1. In the Apply Source Key dialog box, in the Source Key to Apply to Selected Components box, type a source key. 2. In the Confirm New Source Key box, re-type the source key. 3. (optional) In the Source Key Name box, type a name for the source key 4. Select the Allow viewing of components check box. 5. Click OK.
Chapter 4 Configuring source protection in the Logix Designer application Routines or Add-On Instructions that are protected, but are not configured as viewable, cannot be opened. The DayofWeek routine cannot be opened on a system that does not have the key used to protect the routine. In the example, the icon for the routine is unavailable, indicating the routine cannot be opened. Inactive icons are unavailable.
Configuring source protection in the Logix Designer application Chapter 4 This example shows the Add-On Instruction, MyValveAOI, viewed from a system that has the source key used to secure the instruction. Tip: Verifying source protection on a component For source-protected export options, see the Logix5000 Controllers Import/Export Reference Manual, publication 1756-RM084. Source-protected content cannot be copied from version 19 of RSLogix 5000 software and pasted into earlier software versions.
Chapter 4 Configuring source protection in the Logix Designer application 1. In the Source Protection Configuration dialog box, click Specify. 2. In the Specify Source Key File Location dialog box, select a directory that does not contain an sk.dat file. For example, the path C:\RSLogix 5000\Projects\Empty. 3. When the message appears and asks if you want to create a new file, click Yes. 4. When the message appears and asks if you want to create a new directory, click Yes.
Configuring source protection in the Logix Designer application Chapter 4 Advantage Keeping an empty source key file makes it easy to quickly switch back and forth between sk.dat files for testing. Disadvantage You must be careful to use the correct sk.dat file when creating new source keys. Use the Clear button In the Source Protection Configuration dialog box, the Clear button clears the location bar and gives you the option to delete your sk.dat file.
Chapter 4 Configuring source protection in the Logix Designer application If you delete the sk.dat file without making a backup copy, you lose the source keys. Using the Disable Ability to Configure Source Protection button In the Source Protection Configuration dialog box, the Disable Ability to Configure Source Protection button deletes your sk.dat file. See the steps under Disabling routine source protection on page 47. Important: Write down the source keys or make a copy of the sk.
Configuring source protection in the Logix Designer application Chapter 4 3. In the Source Protection Configuration dialog box, click Clear. A dialog box asks for confirmation that you want to delete the source key file (sk.dat). 4. Select Yes to remove the source key file from the workstation. Disabling routine source protection You can disable a source key file (sk.dat) on a workstation. Important: Write down the source keys or make a copy of the sk.
Chapter 4 Configuring source protection in the Logix Designer application 3. In the Source Protection Configuration dialog box, click the Disable Ability To Configure Protection button. A dialog box prompts you to confirm the action. 4. Click Yes. A dialog box asks if you want to delete the source key file (sk.dat). 5. Select Yes to remove the source key file from the computer or select No to keep the source key file.
Chapter 5 Securing a ControlLogix controller Introduction This chapter describes how to use the Logix CPU Security Tool to lock a controller. When a controller is locked, no one can access it until it is unlocked. Installing the Logix CPU Security Tool The Logix CPU Security Tool is automatically installed when you install version 17 or later of the application. If you find that it is not installed, follow these installation instructions. The installation file is on the installation CD.
Chapter 5 Securing a ControlLogix controller 2. In the Logix CPU Security dialog box, click the RSWho button to specify a path to the controller. 3. Select the controller that you want to secure and click OK.
Securing a ControlLogix controller Chapter 5 The Logix CPU Security Tool displays the current status of the controller. Notice that the controller in the following image is currently unsecured and there is no password set in the controller. 4. Click Change Password. 5. In the Change Password dialog box, in the New Password box type a password, and then in the Confirm New Password box, retype the password. Click OK.
Chapter 5 Securing a ControlLogix controller The Password Status for the controller changes to indicate a Password exists in the controller, but the controller is not secured yet. 6. Click Secure Controller. 7. In the Secure Controller dialog box, in the Password box, type the password for the controller and then click Secure. 8.
Securing a ControlLogix controller Chapter 5 The Controller Security Status for the controller changes to indicate that it is secured. Accessing a secured controller When you try to access a controller that has been secured with the Logix 5000 CPU Security Tool and you do not have a local copy of the project file on your computer, the application prompts you to select the proper file. To access a secured controller, do the following. 1. On the menu bar, click Communication, and then click Who Active.
Chapter 5 Securing a ControlLogix controller 2. In the Who Active dialog box, click the secured controller and click Go Online. If you do not have a local copy of the project file on your computer, the application prompts you to select a file. 3. Click Select file to find the project file.
Securing a ControlLogix controller Chapter 5 4. In the Enter New or Select Existing File dialog box, click the project file and then click Select. 5. Click Yes to create and upload the project. An unspecified communications dialog box appears indicating that the application is now offline. 6. Click OK to continue.
Chapter 5 Securing a ControlLogix controller If the project file already exists on your system, an error message appears that indicates that the controller is secured and you cannot go online. Removing security from a controller with the CPU Security Tool To remove security from a controller, do the following. 1. Start the Logix CPU Security Tool. Click the Start button, then click All Programs, then click Rockwell Software, and then click Logix CPU Security Tool. 2.
Securing a ControlLogix controller Chapter 5 3. In the Browse for controllers to Secure/Unsecure dialog box, click the controller that you want to be unsecured and then click OK. 4. In the Logix CPU Security - project_name dialog box, click Unsecure Controller. 5. In the Unsecure Controller dialog box, in the Password box, type the password for the controller and then click Unsecure. The controller is now unsecured, but the controller still recognizes the password. 6. Select Exit.
Chapter 5 Securing a ControlLogix controller 7. Click Yes. A message appears. Click Yes to save the change. You can now go online with the controller. Removing a password Follow these steps to remove a password. 1. In the Logix CPU Security - DayOfWeek dialog box, click Change Password. 2. In the Change Password dialog box, remove the '****' empty string and click OK.
Securing a ControlLogix controller Chapter 5 The controller status is now UNSECURED.
Index A access locked controller 53 Add-On Instructions source protection 31 C controller accessing locked files 53 locked 49 organizer import 30 remove security 56 controller resource apply security 20 CPU Security Tool install 49 D delete source key file 46 directory FactoryTalk 10 disable source protection 47 E emulator install 11 enable security RSLogix 5000 11 F FactoryTalk directory 10 security 10 Service Platform software 13 file sk.
Index S secure RSLogix 5000 project 14 security controller resource 20 FactoryTalk 10 import server database 25 technical support 11 sk.
Rockwell Automation support Rockwell Automation provides technical information on the web to assist you in using its products. At http://www.rockwellautomation.com/support you can find technical and application notes, sample code, and links to software service packs. You can also visit our Support Center at https://rockwellautomation.custhelp.com for software updates, support chats and forums, technical information, FAQs, and to sign up for product notification updates.