
User Manual Instruction Manual

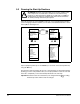

Starting Up the Drive Using the LCD OIM
9-3
9.3 Starting Up the Drive for Volts/Hertz Regulation
To start-up in Voltz/Hertz regulation, perform the following steps in the Start-Up
menus:
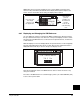
Step 1. Enter the Quickstart menu. (Enter from either the Welcome screen or from
the Start-Up menu.)
a. Select “Linear V/Hz” at the Drive Control Type prompt.
b. Complete the remaining questions in the Quickstart menu.
Step 2. Select “Motor Data” routine from the Start-Up menu. (You will be returned to
the Start-Up menu upon completion of the Quickstart menu.) You will be
asked to provide information on the following:
a. Motor Nameplate Data
b. Application Stop Mode
c. Dynamic Braking Resistor
d. S-curve Ramp
Step 3. Select “Motor Tests” routine from the Start-Up menu. (You will be returned to
the Start-Up menu upon completion of the “Motor Data” routine.)
a. Disable Slip Compensation.
b. Select the correct direction mode for your application.
c. Perform direction tests to verify proper motor rotation.
d. Select “Done” to leave the “Motor Tests” routine.
Step 4. Select other routines (as needed) from the Start-Up menu to complete your
configuration of the GV6000 drive. (You will be returned to the Start-Up
menu upon completion of the “Motor Tests” routine.) Other routines include
“Reference Set-up,” “Configure I/O,” etc.
Note: For pump or fan applications, you can further enhance the start-up of the drive
by selecting “Pump/Fan” from the “Applications” routine in the Start-Up menu.
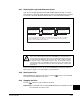
!
ATTENTION:Rotation of the motor in an undesired direction can occur
during the direction test portion of this procedure. To guard against
possible injury and/or equipment damage, ensure that motor rotation in
either direction will not cause injury and/or equipment damage.