Hardware Reference, Installation, and Troubleshooting Manual D2-3388-5 GV3000/SE AC Drive 1 - 20 HP, 230V AC Version 6.
Important User Information Solid-state equipment has operational characteristics differing from those of electromechanical equipment. Safety Guidelines for the Application, Installation and Maintenance of Solid State Controls (publication SGI-1.1 available from your local Rockwell Automation sales office or online at http://www.rockwellautomation.com/literature/) describes some important differences between solid-state equipment and hard-wired electromechanical devices.
Document Update Document Update Electronic Motor Overload Protection This product does not offer speed-sensitive overload protection, thermal memory retention or provisions to act upon motor over-temperature sensing in motors. If such protection is needed in the end-use product, it needs to be provided by additional means.
Document Update Notes: 2
Summary of Changes The information below summarizes the changes made to this manual since its last release (August 1999). Description of Changes Page Added Document Update. After manual front cover Deleted the following statement: ‘The Motor Overload Enable parameter (P.040) can be used in place of the electronic thermal overload relays in single motor applications’.
soc-ii Notes: Summary of Changes
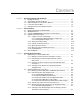
CONTENTS Chapter 1 Chapter 2 Chapter 3 Table of Contents Becoming Familiar with the Manual 1.1 Finding Information ................................................................................... 1.2 Assumptions About the Audience ............................................................. 1.3 Understanding Terms Used in this Manual .............................................. 1.4 If You Want to Know More ........................................................................ 1.
Chapter 4 Chapter 5 Chapter 6 Chapter 7 Chapter 8 Chapter 9 Mounting the Drive, Grounding, and Finding Wire Routing Locations 4.1 Mounting the Drive .................................................................................... 4.1.1 Verifying the Drive's Watts Loss Rating ...................................... 4.2 Routing Input, Motor Output, Ground, and Control Wiring for the Drive .. 4.3 Grounding the Drive ..................................................................................
List of Figures Table of Contents Figure 2.1 – Identifying the Drive Model Number ............................................. 2-1 Figure 2.2 – 1 to 5 HP Drive Components and Locations ................................ 2-3 Figure 2.3 – 7.5 and 10 HP Drive Components and Locations ........................ 2-4 Figure 2.4 – 15 and 20 HP Drive Components and Locations ......................... 2-5 Figure 2.5 – Regulator Board Components and Locations .............................. 2-7 Figure 2.
IV GV3000/SE 230 VAC 1-20 HP Drive, Hardware Reference Version 6.
List of Tables Table 2.1 – Power Ratings .............................................................................. 2-2 Table 2.2 – Available Kits and Options ........................................................... 2-13 Table 3.1 – Ambient Conditions ...................................................................... 3-2 Table 3.2 – Drive Dimensions and Weights .................................................... 3-2 Table 3.3 – Recommended Power Wire Sizes for 1 to 5 HP Drives ..........
VI GV3000/SE 230 VAC 1-20 HP Drive, Hardware Reference Version 6.
CHAPTER 1 Becoming Familiar with the Manual This chapter provides help in finding information in the manual and describes the intended audience. Also included are references to related publications and instructions on receiving assistance from Reliance Electric. 1.1 Finding Information This instruction manual describes the GV3000/SE drive's Power Module and regulator hardware. It does not cover the GV3000/SE software.
• 1.2 Appendix A - Technical Specifications Lists drive specifications in table form. Assumptions About the Audience This manual is intended for qualified electrical personnel. It is task-oriented and is organized according to a logical progression of steps to be followed to install and troubleshoot the drive. 1.3 Understanding Terms Used in this Manual The following terms are defined according to the way they are used in this manual: 1.
CHAPTER 2 About the Drive This chapter describes how to identify the drive using the model number matrix and illustrates the differences between the NEMA enclosures. Major components of each drive group are also shown. The GV3000/SE AC drive is a PWM (Pulse-Width-Modulation) drive that provides vector and general purpose regulation for a wide range of applications.
Table 2.1 – Power Ratings (1) Model Number Input Volts (AC) NEMA Rating Input KVA Input Amps (Maximum) Output Amps (Maximum) (1) Power Loss Watts (Full Load) 1V2160 1V2460 200-230 VAC +/– 10% 1 4X/12 2.4 6.1 A 5.1 A 60 2V2160 2V2460 200-230 VAC +/– 10% 1 4X/12 3.7 9.4 A 8.5 A 100 3V2160 3V2460 200-230 VAC +/– 10% 1 4X/12 5.5 13.8 A 12.3 A 140 5V2160 5V2460 200-230 VAC +/– 10% 1 4X/12 9.6 24.2 A 21.0 A 180 7V2160 7V2260 200-230 VAC +/– 10% 1 12 12.7 31.9 A 26.
2.3 1-20 HP GV3000/SE Drive Components and Locations The 1-20 HP GV3000/SE drives have the following main components. The identification numbers provided correspond to the number used in figures 2.2 to 2.4. Replacement parts are listed in chapter 9. 1. Fan Assembly 2. Membrane Switch (Keypad/Bracket) 3. Regulator Printed Circuit Board 4. Base Board (PISC Board) 5. Base Board (GVPB Board) 6. Internal Fan Assembly.
1 FAN ASSEMBLY 2 4 BASE BOARD (PISC-10) STOP RESET 6 AUTO Forward RUNNING MAN Reverse REMOTE JOG RUN PROGRAM AUTO JOG FORWARD REVERSE PROGRAM ENTER SPEED VOLTS AMPS Hz Kw TORQUE Password START MEMBRANE SWITCH (KEYPAD)/BRACKET FAN ASSEMBLY (INTERNAL) . . . . 3 M/N 7V21XX 7V22XX 10V21XX 10V22XX 1 2 3 4 5 6 7 8 9 10 11 12 13 14 15 16 17 18 19 20 21 22 23 24 25 26 27 28 29 30 31 REGULATOR BOARD Figure 2.3 – 7.
4 1 FAN ASSEMBLY BASE BOARD (PISC-20) 5 BASE BOARD (GVPB-20) 2 AUTO Forward RUNNING MAN Reverse REMOTE JOG RUN PROGRAM AUTO JOG FORWARD REVERSE PROGRAM ENTER SPEED VOLTS AMPS Hz Kw TORQUE Password STOP RESET 6 START MEMBRANE SWITCH (KEYPAD)/BRACKET FAN ASSEMBLY (INTERNAL) . . . . 3 M/N 15V21XX 15V22XX 20V21XX 20V22XX 1 2 3 4 5 6 7 8 9 10 11 12 13 14 15 16 17 18 19 20 21 22 23 24 25 26 27 28 29 30 31 REGULATOR BOARD Figure 2.
2.4 Regulator Board Description GV3000/SE drive regulation is performed by a microprocessor on the Regulator board. See figure 2.5. Drive operation is adjusted by the parameters entered through the keypad. The Regulator board accepts power circuit feedback signals and an external speed reference signal, as well as data from an encoder that is attached to the motor when set up for FVC regulation.
USER DISPLAY J5 26-Pin Ribbon Cable 34-Pin Ribbon Cable J3 J9 J7 J8 J17 1 2 3 4 J3 J4 J5 J7 5 - 6 7 8 J4 USER I/O TERMINAL STRIP 9 10 11 12 13 14 15 16 17 18 19 20 21 22 23 24 25 26 27 28 29 30 31 Option Board Connector Analog Input Jumper Power Module Feedback Cable OIM (optional) Connector J8 - RS232C Port J9 - Keypad/Display Connector J17 - Analog Output Jumper Figure 2.
2.4.1 Jumper Locations and Settings Jumpers J4 and J17 on the Regulator board are factory-set for voltage in and voltage out signals. Refer to figure 2.5 for their locations on the Regulator board. If you need to change the jumpers' settings, use the following procedures. ! ATTENTION: Do not alter the setting of any jumper not described in this instruction manual. Failure to observe this precaution could result in damage to, or destruction of, the equipment. 2.4.1.
Voltage Input Option Pins 2-3 Current Input Option Pins 1-2 10 VDC 0-20 mA J4 J4 (default) Figure 2.6 – Jumper J4 Settings for Analog Input Speed Reference 2.4.1.2 Analog Output Jumper (J17) Jumper J17 is the analog output jumper. This jumper selects either a 0-10 VDC or 4-20 mA scaled signal output that is programmable for either speed or torque, parameter P.012. The jumper only selects a 0-10 VDC source voltage or 4-20 mA sink current to represent speed or torque.
Voltage Output Option Pins 2-3 Current Output Option Pins 1-2 10 VDC 4-20 mA J17 J17 (default) Figure 2.7 – Jumper J17 Settings for Analog Outputs 2.4.2 Wiring the Terminal Strip The terminal strip on the Regulator board provides terminals for connecting customer I/O devices. See figures 2.5 and 2.8.
16 N.O. RELAY COMMON N.O. RELAY CONTACT N.C. RELAY COMMON N.C.
2.4.6 Keypad/Display The front panel keypad/display is used to program and operate the GV3000/SE drive. See figure 2.9. Refer to the GV3000/SE Software Start-Up and Reference manual for more information. Drive Status LEDs Display . Monitor Mode LEDs Password LED SPEED VOLTS AMPS Hz Kw TORQUE Password STOP RESET Stop/Reset Key Keypad £ ¥ AUTO Forward RUNNING MAN Reverse REMOTE JOG RUN PROGRAM AUTO JOG FORWARD REVERSE PROGRAM ENTER START Start Key Figure 2.
2.5 Drive Kit Options Table 2.2 provides a listing of the available GV3000/SE kit options. Table 2.
2-14 GV3000/SE 230 VAC 1-20 HP Drive, Hardware Reference Version 6.
CHAPTER 3 Planning Before Installing This chapter provides information that must be considered when planning a GV3000/SE drive installation. Installation site requirements, drive requirements, and wiring requirements are presented. ! ATTENTION: Only qualified electrical personnel familiar with the construction and operation of this equipment and the hazards involved should install, adjust, operate, or service this equipment.
• Be sure that drives are away from oil, coolants, or other airborne contaminants. • Do not install the drive above 1000 meters (3300 feet) without derating output power. For every 91.4 meters (300 feet) above 1000 meters (3300 feet), derate the output current 1%. • Verify that the drive location will meet the environmental conditions specified in table 3.1. Table 3.
A C E . . . . STOP RESET AUTO Forward RUNNING MAN Reverse REMOTE JOG RUN PROGRAM AUTO JOG FORWARD REVERSE PROGRAM ENTER D START B SPEED VOLTS AMPS Hz Kw TORQUE Password GV3000 AC DRIVE Figure 3.1 – Drive Dimensions 3.1.3 Verifying the Site Provides for Recommended Air Flow Clearances Be sure there is adequate clearance for air ventilation around the drive. For best air movement, do not mount GV3000/SE drives directly above each other. Note that no devices are to be mounted behind the drive.
3.1.4 Verifying Power Module AC Input Ratings Match Supplied Power It is important to verify that plant power will meet the input power requirements of the GV3000/SE drive's Power Module circuitry. Refer to table 2.1 for input power rating specifications. Be sure input power to the drive corresponds to the drive nameplate voltage and frequency. 3.2 Wiring Requirements for the Drive Certain drive requirements should be checked before continuing with the drive installation.
Table 3.4 – Recommended Power Wire Sizes for 7.5 and 10 HP Drives Type of Wiring Terminals AC Input Power R/L1, S/L2, T/L3 Output Power U/T1, V/T2, W/T3 DC Input Power +, – Size of Wire (Maximum) 10 to 8 AWG (or 5.5 to 8 mm2) Ground Table 3.5 – Recommended Power Wire Sizes for 15 and 20 HP Drives Type of Wiring Terminals AC Input Power R/L1, S/L2, T/L3 Output Power U/T1, V/T2, W/T3 DC Input Power +, – Size of Wire (Maximum) 6 to 3 AWG (or 14 to 22 mm2) Ground 3.2.2.
GV3000/SE Drive GV3000/SE Drive GV3000/SE Drive GV3000/SE Drive 15 m (50') 38 m (125') 61 m (200') 38 m (125') Motor 76 m (250') 61 m (200') Motor Motor 8 m (25') Motor 8 m (25') Motor Motor Motor All examples represent 76 m (250') of motor lead length. Figure 3.3 – How to Measure Motor Lead Lengths Table 3.
3.2.2.5 Recommended Serial Communication Cable Lengths Connector J8 on the Regulator boards is an RS-232 serial communication port. This connector allows the GV3000/SE drive to communicate with external devices such as a personal computer using RS-232 protocol. See table A.5. Two RS-232 cables are available from Reliance: a 3 meter (10 feet) D-shell 9-pin to 9-pin cable (M/N 2CA3000) and a 0.3 meter (1 foot) D-shell 9-pin to 25-pin adapter cable (M/N 2CA3001).
Table 3.9 – AC Input Line Fuse Selection Values Horsepower Rating Input AC Fuse Rating (1) 1V2160 1V2460 1 HP 12 A 2V2160 2V2460 2 HP 15 A 3V2160 3V2460 3 HP 20 A 5V2160 5V2460 5 HP 40 A 7V2160 7V2260 7.5 HP 50 A 10V2160 10V2260 10 HP 70 A 15V2160 15V2260 15 HP 100 A 20V2160 20V2260 20 HP 125 A Model Number (1) Recommended fuse type: UL Class J, 600V, time-delay, or equivalent. 3.2.
CHAPTER 4 Mounting the Drive, Grounding, and Finding Wire Routing Locations This chapter shows how to mount the drive and properly ground it. Also shown are the conduit entry areas where wiring is to be routed in and out of the drive. 4.1 Mounting the Drive Attach the drive to the vertical surface selected using the four (4) mounting holes provided. In order to maintain a flat mounting surface and to ensure that bolt tightness is maintained, use washers under the bolt heads. Refer to figure 3.
Do not route more than three sets of motor leads through a single conduit. This will minimize cross-talk that could reduce the effectiveness of noise reduction methods. If more than three drive/motor connections per conduit are required, shielded cable must be used. If possible, each conduit should contain only one set of motor leads. ! 4.3 ATTENTION: Unused wires in conduit must be grounded at both ends to avoid a possible shock hazard caused by induced voltages.
. . . . SPEED VOLTS AMPS Hz Kw TORQUE Password STOP RESET AUTO Forward RUNNING MAN Reverse REMOTE JOG RUN PROGRAM AUTO JOG FORWARD REVERSE PROGRAM ENTER START REGULATOR TERMINAL STRIP 16 20 POWER TERMINAL STRIP GROUND TERMINAL SIGNAL CONTROL (TERMINAL STRIP) SIGNAL CONTROL - OR SNUBBER RESISTOR BRAKING INPUT POWER AND MOTOR LEADS USER WIRE ROUTING COVER BASE (3) 1/2" NPT CONDUIT HUBS (NEMA 4X/12). -OR(3) 0.875 [22.2 mm] DIA. HOLES (NEMA 1). Bottom View Figure 4.
. . . . AUTO Forward RUNNING MAN Reverse REMOTE JOG RUN PROGRAM AUTO JOG FORWARD REVERSE PROGRAM ENTER SPEED VOLTS AMPS Hz Kw TORQUE Password STOP RESET 16 START REGULATOR TERMINAL STRIP 20 POWER TERMINAL STRIP GROUND TERMINALS SIGNAL CONTROL INPUT POWER (TERMINAL STRIP) - OR SNUBBER RESISTOR BRAKING MOTOR LEADS - OR INPUT POWER AND MOTOR LEADS USER WIRE ROUTING (1) 1/2" NPT CONDUIT HUB (NEMA 12) -OR(1) 0.875 [22.2 mm] DIA. HOLES (NEMA 1). COVER BASE (3) 3/4" NPT CONDUIT HUBS (NEMA 12).
. . . . SPEED VOLTS AMPS Hz Kw TORQUE Password STOP RESET AUTO Forward RUNNING MAN Reverse REMOTE JOG RUN PROGRAM AUTO JOG FORWARD REVERSE PROGRAM ENTER START 16 REGULATOR TERMINAL STRIP 20 POWER TERMINAL STRIP GROUND TERMINALS SIGNAL CONTROL (TERMINAL STRIP) MOTOR LEADS INPUT POWER - OR - OR INPUT POWER SNUBBER RESISTOR AND MOTOR LEADS BRAKING USER WIRE ROUTING (1) 1/2" NPT CONDUIT HUBS (NEMA 12). -OR(1) 0.875 [22.2 mm] DIA. HOLES (NEMA 1).
4-6 GV3000/SE 230 VAC 1-20 HP Drive, Hardware Reference Version 6.
CHAPTER 5 Installing Input Power Wiring This chapter describes incoming line components and how to install them. 5.1 Installing Transformers and Reactors (Optional) Input isolation transformers might be needed to help eliminate the following: • Damaging line voltage transients from reaching the drive. • Line noise from the drive back to the incoming power source. • Damaging currents that could develop if a point inside the drive becomes grounded.
Table 5.1 – AC Line Reactors 5.2 GV3000/SE Drive Line Reactor Inductance (+/–10%) 1 HP 1.68 mH 2 HP 1.08 mH 3 HP 720 µH 5 HP 432 µH 7.5 HP 360 µH 10 HP 270 µH 15 HP 180 µH 20 HP 135 µH Installing Fuses for Branch Circuit Protection Install the required, user-supplied branch circuit protection fuses according to the applicable local, national, and international codes (e.g., NEC/CEC). The fuses must be installed in the line before the drive input terminals. See figures 5.1 and 5.2.
3-Phase AC Input Voltage 230 V 181 182 183 GND Manual Disconnect Fuse User-Supplied AC Reactor R 1L1 S 1L2 GND (PE) ‘ – – U User-Supplied T IL3 ‘ V GV3000/SE Power Module W GND Motor Overload Relay (Optional if Electronic Overload is Used) M Figure 5.
DC Input Voltage 310 V Nominal Manual Disconnect DC Fuse User-Supplied R 1L1 S 1L2 T IL3 GND (PE) ‘ – 47 45 – U User-Supplied ‘ V W GV3000/SE Power Module GND Motor Overload Relay (Optional if Electronic Overload is Used) M Figure 5.2 – Typical DC Bus Electrical Connections 5-4 GV3000/SE 230 VAC 1-20 HP Drive, Hardware Reference Version 6.
5.4 Installing Power Wiring from the AC Input Line to the Drive's Power Terminals Use the following steps to connect AC input power to the drive: Step 1. Wire the AC input power leads by routing them according to drive type. Refer to figures 4.1 to 4.3. Tables 3.3 to 3.5 contain the recommended power wiring sizes. On 1 to 5 HP drives, route the power leads through the bottom right opening of the drive base. On 7.
! ATTENTION: Do not route signal and control wiring in the same conduit with power wiring. This can cause interference with drive operation. Failure to observe this precaution could result in damage to, or destruction of, the equipment. ATTENTION: If the GV3000/SE drive is connected to an external DC bus, the user is responsible for DC bus short-circuit protection. Failure to observe this precaution could result in damage to, or destruction of, the equipment. Step 2.
CHAPTER 6 Installing Output Power Wiring This chapter provides instructions on wiring output contactors, motor overload protection, and output wiring to the motor. 6.1 Installing Output Contactors (Optional) Output contactors provide a positive means of disconnecting the motor from the drive. If the application requires the use of output contactors, contact Reliance Electric for assistance. 6.
! ATTENTION: Do not route signal and control wiring with power wiring in the same conduit. This can cause interference with drive operation. Failure to observe this precaution could result in damage to, or destruction of, the equipment. ATTENTION: Unused wires in conduit must be grounded at both ends to avoid a possible shock hazard caused by induced voltages.
CHAPTER 7 Wiring the Regulator Board Terminal Strip This chapter describes how to wire the Regulator board terminal strip for stop, encoder feedback, and remote control signals. The signals available through the terminal strip are shown in tables 7.1 to 7.7 and figures 7.1 and 7.2. Table 7.8 provides additional information. Note that when the Control Source parameter (P.000) is set to remote (rE), the drive will be controlled by the signals connected to the terminal strip.
Table 7.3 – Analog Output Connections (Terminals 10 and 11) Signal Terminal # 10 Analog Meter Output 11 Regulator Common Notes: The output of this terminal is either 0-10 VDC or 4-20 mA as determined by the setting of jumper J17 on the Regulator board. The analog output must also be programmed via parameter P.012 for an indication of speed and direction or percent of torque. Table 7.
Table 7.6 – Snubber Resistor Braking Connections (Terminals 26 and 27) Terminal # Signal 26 Snubber Resistor Braking Signal 27 +24 VDC Common Notes: These terminals are used with older Snubber Resistor Braking kits that require a gate turn-on signal from the drive (for example, the M/N 2DB2010 series). Table 7.7 – Status Relay Connections (Terminals 28-31) Terminal # Signal 28 N.C. Relay Contact 29 N.C. Relay Common 30 N.O. Relay Contact 31 N.O.
7-4 RX REGULATOR COMMON +15 VDC PHASE A PHASE A NOT PHASE B PHASE B NOT REGULATOR COMMON ANALOG METER OUTPUT 2 3 4 5 6 7 8 9 10 11 12 13 14 15 16 Remote 4-20 mA Speed/Torque Reference + – +20 mA IMPORTANT : A maintained function loss switch should be used if P.054 (Level Sense Start Enable) = ON and P.026 (Function Loss Response) = 1. 17 18 19 N.O. RELAY COMMON N.O. RELAY CONTACT N.C. RELAY COMMON N.C.
RX REGULATOR COMMON +15 VDC PHASE A PHASE A NOT PHASE B PHASE B NOT REGULATOR COMMON ANALOG METER OUTPUT 2 3 4 5 6 7 8 9 10 11 12 13 14 15 16 Remote 4-20 mA Speed/Torque Reference Wiring the Regulator Board Terminal Strip + – +20 mA IMPORTANT : A maintained function loss switch should be used if P.054 (Level Sense Start Enable) = ON and P.026 (Function Loss Response) = 1. 17 18 19 N.O. RELAY COMMON N.O. RELAY CONTACT N.C. RELAY COMMON N.C.
7.1 Stopping the Drive ! ATTENTION: The user must provide an external, hardwired emergency stop circuit outside of the drive circuitry. This circuit must disable the system in case of improper operation. Uncontrolled machine operation may result if this procedure is not followed. Failure to observe this precaution could result in bodily injury.
• Terminal 4: Encoder Supply +15 VDC (250 mA capacity) • Terminal 5: Encoder Phase A Differential Input • Terminal 6: Encoder Phase A Not Differential Input • Terminal 7: Encoder Phase B Differential Input • Terminal 8: Encoder Phase B Not Differential Input • Terminal 9: Encoder/Regulator Common Use the following procedure to connect an encoder to the regulator's terminal strip: Step 1. Connect the encoder's wires to terminals 4 through 9 of the terminal strip. See figure 7.3. See table A.
REAR OF ENCODER CONNECTOR Tamagawa FA Style (M/N 2TC4025 and 2TC4075) 1 5 2 6 3 7 10 11 Regulator Terminal Strip Terminal 6 Terminal 5 Terminal 4 Terminal 9 Terminal 8 Terminal 7 14 15 Connector/Cable End WHITE/ORANGE ORANGE BROWN WHITE/BROWN WHITE/GREEN GREEN Pin 1 Phase A Pin 2 Phase A Not Pin 6 0 VDC Pin 12 +15 VDC Pin 8 Phase B Pin 9 Phase B Not REAR OF ENCODER CONNECTOR Dynapar H20 Style (M/N 2TC3025 and 2TC3075) Regulator Terminal Strip Terminal 6 Terminal 5 Terminal 4 Terminal 9
7.3 Wiring the Signal and Control I/O Wire the drive's signal and control I/O to the terminal strip as shown in table 7.8. Table 7.8 – Wiring Signal and Control I/O to the Terminal Strip Terminal Number Description Parameters/Wiring Connections Wiring RS-232 Signals 1 RS-232 Transmit 2 RS-232 Receive 3 RS-232 Signal/Regulator Common Note that RS-232 communication between the GV3000/SE drive and a personal computer requires the use of the Control and Configuration software.
Table 7.8 – Wiring Signal and Control I/O to the Terminal Strip (Continued) Terminal Number Description Parameters/Wiring Connections Wiring Analog Outputs 10 0-10 VDC or 4-20 mA Analog Output Reference 11 Regulator Common The setting of parameter P.012 selects the terminal strip analog output source (either speed or torque). Jumper J17 must also be set. See figure 2.7. The 4-20 mA current selection requires a power supply for operation.
Table 7.8 – Wiring Signal and Control I/O to the Terminal Strip (Continued) Terminal Number Description Parameters/Wiring Connections Wiring Analog Speed Reference Inputs 12 Isolated Reference Voltage (+10 VDC) 13 Analog Speed/Torque Reference Input Voltage (+/– 10 VDC) 14 Analog Speed/Torque Reference Input Current (0-20 mA) 15 Isolated Speed/Torque Reference Common (Voltage/Current) Related parameters: P.000: P.009: P.010: P.
Table 7.8 – Wiring Signal and Control I/O to the Terminal Strip (Continued) Terminal Number Description Parameters/Wiring Connections Wiring a Remote/Local Input 16 +24 VDC Power Supply Current limited for remote input logic use only. 17 Digital Input 8 (Default - Remote/Local) Digital input 8 is control function programmable through parameter P.007.
Table 7.8 – Wiring Signal and Control I/O to the Terminal Strip (Continued) Terminal Number Description Parameters/Wiring Connections Wiring an Additional Ramp Input 18 Digital Input 7 (Default - Ramp 1/Ramp 2) Digital input 7 is control function programmable through parameter P.007. The following parameters must be set: P.000: P.001: P.002: P.006: P.
Table 7.8 – Wiring Signal and Control I/O to the Terminal Strip (Continued) Terminal Number Description Parameters/Wiring Connections Wiring a Forward/Reverse Input 19 Digital Input 6 (Default - Forward/Reverse) Digital input 6 is control function programmable through parameter P.007. The following parameters must be set: P.000: Control Source P.006: Second Menu Password P.007: Terminal Strip Digital Inputs Configure (Selects and assigns a control function to digital inputs 6 to 8). P.
Table 7.8 – Wiring Signal and Control I/O to the Terminal Strip (Continued) Terminal Number Description Parameters/Wiring Connections Wiring a Function Loss Input 20 Digital Input 5 (Function Loss) The following parameters must be set: P.026: Function Loss Response A signal must be present at terminal 20 for the drive to be able to start. See figures 7.1 and 7.2 The drive is shipped from the factory with a jumper between terminals 16 and 20 which provides the signal.
Table 7.8 – Wiring Signal and Control I/O to the Terminal Strip (Continued) Terminal Number Parameters/Wiring Connections Description Wiring the Reset Input 22 Digital Input 3 (Reset) The following parameter must be set: P.000: Control Source 16 22 RESET Terminal 22 On = Reset Wiring the Stop/Start Inputs 23 Digital Input 2 (Stop) 24 Digital Input 1 (Start) The following parameters must be set: P.000: Control Source P.
Table 7.8 – Wiring Signal and Control I/O to the Terminal Strip (Continued) Terminal Number Description Parameters/Wiring Connections Wiring the Output Status Relays 28 Normally-Closed Contact (Form B) Both Form A and Form B contacts are rated for 250 VAC/30 VDC at 5 amps resistive or 2 amps inductive load. 29 Normally-Closed Contact Common (Form B) The following parameter must be set: 30 Normally-Open Contact (Form A) 31 Normally-Open Contact Common (Form A) P.
7-18 GV3000/SE 230 VAC 1-20 HP Drive, Hardware Reference Version 6.
CHAPTER 8 Completing the Installation This chapter provides instructions on how to perform a final check of the installation before power is applied to the drive. ! 8.1 ATTENTION: Only qualified electrical personnel familiar with the construction and operation of this equipment and the hazards involved should start and adjust it. Read and understand this manual in its entirety before proceeding. Failure to observe this precaution could result in severe bodily injury or loss of life.
Step 10. Check the motor installation and length of motor leads. Step 11. Disconnect any power correction capacitors connected between the drive and the motor. Step 12. Check that the rating of the transformer (if used) matches the drive requirements and is connected properly. Step 13. Verify that a properly-sized ground wire is installed and a suitable earth ground is used. Check for and eliminate any grounds between the motor frame and the motor power leads. Verify that all ground leads are unbroken.
CHAPTER 9 Troubleshooting the Drive This chapter describes how to troubleshoot the drive and the equipment that is needed to do so. Also provided are replacement part lists and information on clearing faults. 9.1 Test Equipment Needed to Troubleshoot An isolated multimeter will be needed to measure DC bus voltage and to make resistance checks. Note that dedicated troubleshooting test points are not provided. 9.
Step 3. Verify that there is no voltage at the drive's input power terminals. Step 4. Measure the DC bus potential with a voltmeter at the DC bus power terminals while standing on a non-conductive surface and wearing insulated groves (600 V). See figure 9.1. Step 5. Once the drive has been serviced, reattach the drive's cover. Step 6. Reapply AC input power. R S T + – U V W (L1) (L2) (L3) + – (T1) (T2) (T3) DC BUS VOLTS Figure 9.1 – DC Bus Voltage Terminals 9.
Step 7. If a fuse is open, use a multimeter to check the input diodes and output IGBTs. See table 9.1. Note that the drives do not have replaceable transistor modules: the entire drive must be replaced if a transistor malfunctions. Step 8. Reconnect the motor to the drive. Step 9. Reattach the drive's cover. Step 10. Reapply input power. Table 9.1 – Resistance Checks Input Diode No.
9.5 Replacement Parts Tables 9.2 to 9.4 list the replacement parts that are available from Reliance Electric. See figures 2.2 to 2.4 for the location of the parts. Table 9.
Table 9.
9-6 GV3000/SE 230 VAC 1-20 HP Drive, Hardware Reference Version 6.
APPENDIX A Technical Specifications Table A.1 – Service Conditions (1) AC Line Distribution System Capacity (maximum) for 230 VAC Units 500 KVA, three-phase with 30,000 amps symmetrical fault current capacity with a line impedance of less than 5%. Control Method All-digital vector, sinusoidal pulse-width-modulated (PWM) Displacement Power Factor 0.
Table A.2 – Environmental Condition Condition Specification Operating Temperature (Ambient) 0° to 40°C (32° to 104°F) Storage Temperature (Ambient) -40° to 65°C (-40° to 149°F) Humidity 5 to 95% non-condensing Table A.3 – Terminal Strip Input Specifications Signal Type Speed Reference Input Terminal(s) Specification 12-15 5 KW potentiometer (0 to +/– 10 VDC @ 50 Kilohms input impedance) or 0-20 mA (@250 Ohms input impedance) with 10-bit resolution.
Table A.5 – Terminal Strip RS-232 Specifications Signal Type RS-232 Communications Terminal(s) Specification 1 XMIT 2 RECV 3 COMMON Table A.
Table A.7 – Input Signal Response Times (Maximum) Signal Type and Source Volts/Hertz Regulation (1) Vector Regulation (1) 150 milliseconds 130 milliseconds START 126 milliseconds 105 milliseconds STOP, RESET, FL 75 milliseconds 75 milliseconds Preset Speeds 75 milliseconds 75 milliseconds Analog Speed/Trim Reference 16 milliseconds 5 milliseconds N/A 0.
U.S. Allen-Bradley Drives Technical Support - Tel: (1) 262.512.8176, Fax: (1) 262.512.2222, Email: support@drives.ra.rockwell.com, Online: www.ab.com/support/abdrives www.rockwellautomation.com Power, Control and Information Solutions Headquarters Americas: Rockwell Automation, 1201 South Second Street, Milwaukee, WI 53204-2496 USA, Tel: (1) 414.382.2000, Fax: (1) 414.382.