
Quick Start Instruction Manual


9 • Set up historical alarm and event logging
• • • • •
129
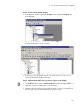
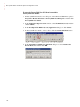
Step 4: Configure the properties of the graphic display
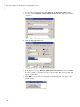
1. On the Edit menu, click Display Settings.
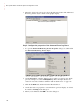
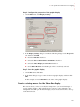
2. In the Display Settings dialog box, make the following changes on the Properties
tab, and then click OK:
Clear the Title Bar check box.
Select the Size to Main Window at Runtime check box.
Select the Allow Display to be Resized check box.
Under When Resized, select Scale option if it is not already selected.
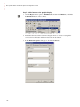
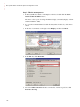
Step 5: Save the graphic display
1. On the File menu, click Save.
2. In the Save dialog box, type a name for the new graphic display, and then click
OK.
In this example, we used
Menu Bar for the name of the graphic display.
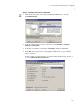
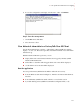
Create a startup macro for the Menu Bar display
This section shows you how to modify the startup macro you created in Chapter 7,
“Set up graphic displays”. This example shows you how to add commands to the
startup macro that will o
pen the button display you just created and dock it
to the top
of the client window.