A.I.
Installation Guide Copyright Notice 1995 Rockwell Software Inc. All rights reserved Printed in the United States of America Portions copyrighted by Allen-Bradley Company, Inc. and used with permission. This manual and any accompanying Rockwell Software products are copyrighted by Rockwell Software Inc. Any reproduction and/or distribution without prior written consent from Rockwell Software Inc. is strictly prohibited. Please refer to the license agreement for details.
Table of Contents 1 Installation/Update Procedure...........................................................................................1-1 Installing A.I. Series Software......................................................................................... 1-2 Installation for Multiple Computers.......................................................................... 1-5 Setting Environment Variables.................................................................................
1 Installation/Update Procedure This chapter discusses installing and updating the software. Note Files are time-stamped to reflect their revision number. For example, files for version 8.02 display a creation time of 8:02 a.m. when the DOS DIR command is used on the directory containing the files. (The date-stamp is the date of the software release.) A.I. Series software is copy protected to prevent unauthorized use.
Installation Guide Installing A.I. Series Software The Setup program performs two functions. First, it uncompresses files from the distribution disks to the destination drive and directory. Second, the Setup program inserts registration information into the programs on the destination disk. A.I. Series software will not run unless the registration information is inserted correctly. You must use the Setup program to install the software correctly.
Installation/Update Procedure 3. Select the INSTALL option. This option moves the Rockwell Software product and activation files from floppy disks to your computer's hard drive. • Type I. • When prompted to confirm, type: Y [Enter] to install the A.I. Series software and display the following screen. Otherwise, type: N [Enter] to return to the beginning of this step. The system displays the following screen, listing the available software modules. Note The Emulation module is an added-cost option.
Installation Guide Note 1-4 5. Setup asks for the directory in which to install the software. Either accept the default directory (recommended) by pressing [Enter], or edit the directory name to one of your own choosing. When you are finished editing, press [Enter]. • If the directory name you entered does not exist, you will be prompted to allow the Setup program to create the directory for you. Press Y [Enter] to install the files in the selected directory.
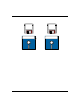
Installation/Update Procedure Write Protected Not Write Protected open closed covered uncovered When the Install routine is complete, store the disks in a safe place. You won't need them again unless you recall the software. Installation for Multiple Computers Note Like all commercial software, Rockwell Software products are licensed for use by a single user on a single PC.
Installation Guide To install the software on more than one computer, perform a full install on the primary system. Then use the Setup program's Update option to transfer the executable files to the secondary system. You then have three options for running the software on these two systems: • Move the activation files from one system to the other as needed. • Move the activation files to a blank, formatted floppy disk and use that disk as a key disk for both systems.
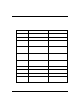
Installation/Update Procedure Setting Environment Variables You can use the DOS SET command to set environment variables to control different functions of your A.I. Series software. The table below describes some environment variables that you can set. Add these commands to your autoexec.bat file or to a batch file that starts your A.I. Series software. If you have this package… You can… With this DOS command… any A.I.
Installation Guide Advanced Installation: Network, Multi-User Note Use of Rockwell Software products in multi-user and network environments may require special licensing arrangements depending on the operating system in use. Call Rockwell Software Technical Support at (414) 321-4266 if you have questions regarding licensing. System configuration options discussed in this section are specific to MS-DOS versions 5.0 and 6.x and have been tested under MS-DOS, Windows 3.
Installation/Update Procedure Preparing a Multi-Tasking or Network Environment Set the PLCLL environment variable with the DOS SET command. The SET command may be used in the AUTOEXEC.BAT file or a batch file that starts the A.I. Series software. To change the PLCLL environment variable, use the SET command to specify a new directory. To erase the PLCLL environment variable and use the default drive and directory, issue the SET command with no parameter.
Installation Guide Files Affected by PLCLL System files affected by the PLCLL variable include: Product PLC-500 A.I. PLC-5 A.I. PLC-2 A.I. PLC-3 A.I. PLC-5/250 A.I. MicroLogix A.I. Filename Purpose SLC5LL.CFG Main configuration file *SLC5LL.DEF Status file descriptions, loaded automatically to new databases SLC5LL.PKY User-defined keyboard mappings PLC5LL0.CFG Main configuration file *PLC5LL.DEF Status file descriptions, loaded automatically to new databases $ICOMRUN.
Installation/Update Procedure Updating A.I. Series Software Software updates consist of a complete set of distribution disks, without the master disks. You can discard the distribution disks from the previous version, but retain any disks labeled “MASTER.” Master disks are not version specific, and will remain in use for the life of the product. ! Executable files access one or more common files. Updating the online OR offline modules replaces these common files with the newer version.
Installation Guide To update A.I. Series software: 1. Start the update procedure by inserting the new Setup disk into your floppy drive. 2. Start the Setup program. • Type: A: [Enter] (Use the appropriate drive letter for your system.) • Type: SETUP [Enter] You will see a screen like the following.
Installation/Update Procedure 3. Note Select the UPDATE option. This option moves the Rockwell Software program files from your floppy disks to your computer's hard drive. Note that an Update does not affect the activation files in any way. • Type U. • When prompted to confirm, type Y [Enter] to update A.I. Series software and display the next screen, or type N [Enter] to return to the beginning of this step. The system displays a screen like the following, listing the available software modules.
Installation Guide Note 1-14 4. Setup asks for the name of the directory where you originally installed the A.I. Series software. Either accept the default directory by pressing [Enter], or edit the directory name appropriately. When you are finished editing, press [Enter]. • If the directory name you entered does not exist, you will be prompted to allow the Setup program to create the directory for you. Press Y [Enter] to update the files in the selected directory.
Installation/Update Procedure If Your Disks Are Damaged If your product disks (or hard drive) are damaged, you might need to call Rockwell Software for assistance. The following questions and answers illustrate some common situations and their solutions. Note All disk replacements assume that your product support is up to date. Call Rockwell Software at (414) 321-4266 for information on Rockwell Software's Extended Product Support. 1. “I have A.I.
Installation Guide 3. “A.I. Series software was installed on my hard disk, but my hard disk crashed (was damaged) and now I've lost my Activation files.” This isn't as bad as it sounds. First, use the Update procedure in the Setup program to re-copy the A.I. Series software files onto the new or repaired hard disk. (See Updating A.I. Series Software on page 1-11 for the Update procedure.) After updating the files, you can run the A.I.
Installation/Update Procedure Running A.I. Series Software To start the A.I. Series software: 1. Change to the directory where the A.I. Series software has been installed. (See the table below for the default directory.) • Type CD pathname [Enter] 2. Enter the command to run the software. (See the table below for the run command.) Software Package Default Directory Run Command PLC-2/1774-PLC A.I. C:\PLC2 AB2 PLC-3 A.I. C:\PLC3 AB3 C:\PLC5 AB5 PLC-5 A.I. PLC-500 A.I.
Installation Guide The Main Menu will appear. The screen shown below is from the PLC-500 A.I. software for Allen-Bradley SLC 500 processors. The second line from the top of the screen identifies the currently selected Project, on the left, and the default network address for the processor, on the right.
Installation/Update Procedure Executable Files The A.I. Series Ladder Logistics products consist of a number of separately executable modules. These executable files may be run directly from the DOS prompt by typing in the filename. Note Before attempting to run any of the executable files directly, run the A.I. Series software and configure it (select a project and configure a communication device). PLC-2/1774-PLC A.I. Executable file Function AB2.EXE Main Menu COMP2.EXE Program Compare Utility DBE2.
Installation Guide PLC-3 A.I. Executable file Function AB3.EXE Main Menu AITERM.EXE Terminal Utility Program COMP3.EXE Program Compare Utility DBE3.EXE Database Editor EXP2AB3.EXE Export to A-B 6200 Series INSTOVL.EXE Selects screen overlay mode ITIMPRT3.EXE Import A-B 6200 Series MAKEVDI.EXE Converts .ACH file to .VDI file MEMEDIT3.EXE Offline editor for PLC-3 E5 memory area MEMEDO3.EXE Online editor for PLC-3 E5 memory area OFF3.EXE Offline Programming ON3.EXE Online Programming REPORT3.
Installation/Update Procedure PLC-5 A.I. Executable file Function AB5.EXE Main Menu AITERM.EXE Terminal Utility Program COMP5.EXE Program Compare Utility DBE5.EXE Database Editor EXP2AB.EXE Export to A-B 6200 Series INSTOVL.EXE Selects screen overlay mode IOCFG5.EXE* Configures smart I/O modules ITIMPORT.EXE Import A-B 6200 Series LIB2PC5.EXE Converts a .LIB file to a .PC5 file OFF5.EXE Offline Programming OFF5N.EXE Offline “normal” mode; no emulation available OFF5P.
Installation Guide PLC-500 A.I. Executable file Function AB500.EXE Main Menu AITERM.EXE Terminal Utility Program COMP0.EXE Program Compare Utility CP5.EXE* Ladder program compiler DBE0.EXE Database Editor EXP2AB0.EXE Export to A-B APS ITIMPORT.EXE Import A-B APS OFF0.EXE Offline Programming REPORT0.EXE Program Reporting SYSCONF0.EXE Security System VIDSETUP.EXE* Determines video display for online or offline ladder editing XFER0.EXE Upload/Download Module XREF0.
Installation/Update Procedure MicroLogix A.I. Executable file Function AITERM.EXE Terminal Utility Program CP5.EXE* Ladder program compiler DBE0.EXE Database Editor MICRO.EXE Main Menu OFFM.EXE Offline Programming REPORT0.EXE Program Reporting VIDSETUP.EXE* Determines video display for online or offline ladder editing XFER0.EXE Upload/Download Module XREF0.EXE Cross Reference Generation *Do not run files marked with an asterisk ( * ) directly.
Installation Guide Exiting A.I. Series Software 1-24 1. Use the [Esc] key to move backwards through the menu structure until you reach the Main Menu screen. (You may see messages asking if you want to save your work. Answer any questions accordingly.) 2. From the Main Menu, press [Esc] again. 3. The A.I. software asks you if you want to exit. Answer yes to exit the program.
2 Copy Protection A.I. Series software is copy protected. The software is intended for use solely by the party who has registered the software. This company’s name and address appear in a window at the bottom of the A.I. Series software’s Main Menu. Since the package is copy protected, only a computer with access to the activation files installed can actually execute the software package (see the section on Activation Files, on page 2-2).
Installation Guide How the Copy Protection System Works When you install the software, the setup program asks you to insert a Master disk for the product you are installing. The Master disk has two main functions; it carries the activation file for the software, and it provides you with a key disk in case the activation file is lost or damaged. The software will not run without the activation file.
Copy Protection You can use the Checkdrives environment variable to specify the drives and order in which to check them for the activation file. In your AUTOEXEC.BAT file or a batch file that starts your software, include the line SET CHECKDRIVES=drive_letters where “drive_letters” is a list of drives to check. The command can be in upper or lower case and no punctuation is required. For example, SET CHECKDRIVES=AQC will check drives A, Q, and C in that order for the activation file.
Installation Guide Using a Floppy Disk as a Key Disk Rockwell Software products require either an activation file (installed by the Rockwell Software setup program) or a Rockwell Software Master disk to operate. In certain circumstances you may want to use a floppy disk to operate your software. Damaged Activation File The first circumstance is when you have lost the copy protection because the activation file is damaged (hard drive crash, file corruption on the hard drive, etc.).
Copy Protection Using a Key Disk To use a key disk: 1. Place the master disk or a floppy containing the activation files in the floppy drive. 2. Execute the desired function. The A.I. Series software will check first your local hard drives, then network hard drives, and finally local floppy drives. If your network contains a large number of drives, you can speed up the activation search by using the CHECKDRIVES environment variable. See page 2-3 for more information on using CHECKDRIVES.
Installation Guide Removing A.I. Series Software (Recall Function) You can use the Setup program’s Recall feature to remove the activation files from your computer's hard drive and place them back on your Master disk. The Recall function does not delete any of the product files from your hard disk. Delete these files from the hard disk manually, using DOS or another disk management program. Note Make certain that your Master Disk is not write protected before attempting to recall your software.
Copy Protection 3. Select the RECALL option. • Type: R • When prompted to confirm, type: Y [Enter] to recall the A.I. Series software and display the next screen. Type: N [Enter] to return to the beginning of this step. A window will appear listing the packages you can recall. 4. Note Type Y in the field to the right of each module you want to recall. When you reach the bottom of the screen, type Y and press [Enter]. The Emulation module is an added-cost option.
Installation Guide Note If you ran Setup from Windows or from a DOS box in Windows 95 or Windows NT, the dialog box for the Windows version of EvMove will appear at this point. Click OK. Another dialog box will appear. Click Move. For more information on the Windows version of the move utility, see page 2-15. 7. 2-8 Following the prompts on the screen, insert the Master disks as they are requested.
Copy Protection Moving Activation Files If you decide to move your A.I. Series software to another computer, you need to remove the activation files from the computer on which the software is installed. The Setup program provides a utility for moving Activation files. The Move function will not install any of the program or data files associated with the A.I. Series software.
Installation Guide DOS Mode To move the A.I. Series software: 1. Insert the Setup disk into your floppy drive. 2. Start the Setup program either from DOS or a DOS box under Windows. • Type: A:[Enter] • Type: SETUP [Enter] You will see a screen like the following. 3. Select the MOVE option. • Type: M • When prompted to confirm, type Y [Enter] to move the A.I. Series software and display the next screen. Type N [Enter] to return to the beginning of this step.
Copy Protection A window will appear listing the packages you can move. 4. Note Type Y in the field to the right of each module you want to move. When you reach the bottom of the screen, type Y and press [Enter]. The Emulation module is an added-cost option. Do not attempt to move Emulation unless you have an Emulation Master disk. 5.
Installation Guide Shortcut for Moving Activation Files You can move the activation files without using the SETUP disk. Note Make certain that your Master Disk is not write protected before using it to move your software. (See the note on page 1-4 if you need help distinguishing a write protected disk.) Note In this example, we use drive A: for the floppy disk drive, and C: for the hard drive. This is a common configuration, but yours may be different.
Copy Protection EvMove Command Line Switches The DOS version of EvMove has the following syntax. Note The syntax is shown in upper case for clarity; it is not case sensitive. It may be typed in upper case, lower case or mixed upper/lower case. Items in brackets [ ] are optional items; the brackets are not part of the required syntax. EVMOVE [[/]?] or EVMOVE SOURCE DESTINATION [/B] or EVMOVE SOURCE DESTINATION [PRODUCT [SERIAL# [COUNT]]] [/B] where: /? displays help text for EvMove; the slash is optional.
Installation Guide PRODUCT is an optional switch and is used to move the activation for a specific product. PRODUCT represents the executable file name of a product. You may use ALL or an asterisk ( * ) to move all products on the source drive to the destination drive. A list of currently installed products may be obtained by typing the following at a DOS prompt: RESET SOURCE /V (see Resetting Activation on pages 2-19 through 2-21).
Copy Protection EVMOVE A C OFF5.EXE 1 Moves one install of the Offline editor for PLC-5 A.I. Series Ladder Logistics from drive A to drive C. EVMOVE A C OFF5.EXE 12345 1 /B Moves one install of the Offline editor for PLC-5 A.I. Series Ladder Logistics having serial number 12345 from drive A to drive C and suppresses the confirmation prompt. Windows Mode Note Windows mode requires sharing services for any local or network drives. In Windows 3.1, SHARE.EXE may need to be loaded in CONFIG.SYS or AUTOEXEC.
Installation Guide 4. EvMove is asking you to select the drive you are moving the activation file from, and the drive to which you want it moved. Use the drop-down list boxes to set the drive letters, then click the OK button. 5. EvMove displays an EvMove dialog box similar to the one shown below. This dialog box shows the activation files on the source and destination drives you selected (the lists on your screen will look different).
Copy Protection 6. To change the number of installs to be moved for a particular product, scroll through the list, select the product and either double-click on it or click the Edit Selected... button. An Item Detail dialog box similar to the one shown below is displayed. 7. The number of installs to move is highlighted in the Move data field. Type the number representing the number of installs to be moved and click the OK button to set the Moving value and return to the previous dialog box.
Installation Guide the Moving value for all products to 0, then use the Edit Selected... button to set the Moving value for the selected product to 1. 9. Click the Move button to move the activation file(s). To go back to the previous dialog box, click the Back button. To cancel moving the activation file, click the Cancel button. When EvMove finishes moving the selected activation files, an EvMove report dialog box similar to the one shown below is displayed.
Copy Protection Resetting Activation Resetting activation is required when you have lost the copy protection because the activation file is damaged (hard drive crash, file corruption on the hard drive, etc.). In this case, read and familiarize yourself with the procedures below, locate the Master disk for your software, then contact Rockwell Software Technical Support at (414) 3214266. You will want to be at an IBM compatible computer when you call Technical Support.
Installation Guide DOS Reset Utility To use the DOS version of the reset utility: 2-20 1. Insert your Master disk from the Rockwell Software product that needs to be reset in the floppy disk drive. We will assume this is drive A for our example. 2. At the DOS prompt, type: A: [Enter] 3. Type the following command. You can enter this command in several different formats. See the next section for the correct syntax. RESET 4. Information like the following will appear on your screen. 5.
Copy Protection DOS Reset Command Syntax The DOS version of RESET has the following syntax. RESET RESET RESET RESET RESET /? DRIVE RESETCODE DRIVE [/V] [/D] /F [/V] [/D] where /? displays help text for Reset; the slash is optional.
Installation Guide 3. A Reset dialog box similar to the one shown below is displayed. 4. The checkbox, buttons, fields, and lists in this window are described below. Use these functions to set up the reset utility for your situation. 5. Call Rockwell Software Technical Support at (414) 321-4266 for the reset code. 6. Click the Apply button to reset the copy protection.
Copy Protection System ID Data Display Field The System ID data display field contains information that will be requested by the Rockwell Software technician for use in generating the reset code. Product Field The Product field displays a text string that identifies the specific Rockwell Software products found on the selected drive. Serial# Field The Serial# field displays the serial number of the product that was found on the selected drive.
Installation Guide Cancel Button Click the Cancel button to abort the reset process and exit the reset software.
Index Index —A— Activation File ....................... 1-16, 2-1, 2-2–2-3, 2-4 damaged ........................................ 1-17, 2-4, 2-20 moving................................................... See Move recalling (removing).................................. 2-6–2-9 reset...................................................... 2-20–2-25 resetting......................................................... 1-17 search for..................................................2-2, 2-3 AUTOEXEC.BAT File........
Installation Guide —N— Networks copy protection and............................ 1-9, 2-2–2-3 file sharing ...................................................... 1-9 installation on..........................................1-9–1-11 NOEXITTODOS .............See Environment Variables —P— —S— SET command (DOS) ......See Environment Variables Setup Program ..................................................... 1-2 INSTALL option.............................................. 1-3 MOVE option.....................