User Manual Integrated Display Industrial Computers Catalog Numbers 6181F, 6181P
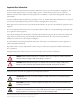
Important User Information Read this document and the documents listed in the additional resources section about installation, configuration, and operation of this equipment before you install, configure, operate, or maintain this product. Users are required to familiarize themselves with installation and wiring instructions in addition to requirements of all applicable codes, laws, and standards.
Summary of Changes This manual contains new and updated information. Changes throughout this revision are marked by change bars, as shown to the right of this paragraph. New and Updated Information This table contains the changes made to this revision.
Summary of Changes Notes: 4 Rockwell Automation Publication 6181P-UM002D-EN-P - February 2014
Table of Contents Preface Preface Objectives. . . . . . . . . . . . . . . . . . . . . . . . . . . . . . . . . . . . . . . . . . . . . . . . . . 9 Purpose of This Manual . . . . . . . . . . . . . . . . . . . . . . . . . . . . . . . . . . . . . . . . . . . . 9 Additional Resources . . . . . . . . . . . . . . . . . . . . . . . . . . . . . . . . . . . . . . . . . . . . . . . 9 Abbreviations. . . . . . . . . . . . . . . . . . . . . . . . . . . . . . . . . . . . . . . . . . . . . . . . . . . .
Table of Contents Chapter 4 Component Replacement Chapter Objectives . . . . . . . . . . . . . . . . . . . . . . . . . . . . . . . . . . . . . . . . . . . . . . Accessories and Replacement Parts . . . . . . . . . . . . . . . . . . . . . . . . . . . . . . . . Voltage Precautions . . . . . . . . . . . . . . . . . . . . . . . . . . . . . . . . . . . . . . . . . . . . . . Electrostatic Discharge Precautions . . . . . . . . . . . . . . . . . . . . . . . . . . . . . . . . Pre-configuration. . . . . . . . . . .
Table of Contents Chapter 6 Maintenance Chapter Objectives. . . . . . . . . . . . . . . . . . . . . . . . . . . . . . . . . . . . . . . . . . . . . . . Clean the Computer . . . . . . . . . . . . . . . . . . . . . . . . . . . . . . . . . . . . . . . . . . . . . Clean the Integrated Display . . . . . . . . . . . . . . . . . . . . . . . . . . . . . . . . . . Clean the Heat Sink and Vent Holes . . . . . . . . . . . . . . . . . . . . . . . . . . . Remove Paint and Grease from Bezel . . . . . . . . . . . . . .
Table of Contents Notes: 8 Rockwell Automation Publication 6181P-UM002D-EN-P - February 2014
Preface Preface Objectives This preface covers the following topics: • Purpose of This Manual • Additional Resources • Abbreviations Purpose of This Manual This manual is a user guide for integrated display industrial computers. It provides procedures to the following: • Install the computer. • Make computer connections. • Operate the computer. • Troubleshoot the computer. Additional Resources These documents contain additional information to related products from Rockwell Automation.
Preface Abbreviations 10 This publication can use the following abbreviations. Abbr Meaning Abbr Meaning ACPI Advanced configuration (and) power interface PCB Printed circuit board AHCI Advanced host controller interface PCDC Product Compatibility and Download Center AMI American Megatrends, Inc.
Chapter 1 Features Chapter Objectives This chapter provides information on the following topics: • Computer Overview • Operating Systems • Computer Options • Before You Begin • Parts List • Hardware Features Computer Overview Integrated display industrial computers combine a TFT flat-panel display with industrial computing power for performing visual interface, maintenance, and basic information applications.
Chapter 1 Features Operating Systems The following Microsoft-licensed operating systems are available: • Windows 7 Professional (32 bit) • Windows XP Professional, Service Pack 3 • Windows Embedded Standard (WES) 2009 Computers with Windows XP Professional Operating System • No operating system updates have been applied to the factory image beyond Service Pack 3. • The I386 source directory for Microsoft Windows is on the system drive of your computer off the root directory, C:\I386.
Features Chapter 1 This table summarizes the options available for the integrated display industrial computers. A comparative summary of features for the computers is in Appendix A, Specifications on page 61. Computer Options Table 1 - Integrated Display Industrial Computers Cat. No.
Chapter 1 Features Table 1 - Integrated Display Industrial Computers (continued) Cat. No. Model 6181F-17TPW7 1700P 6181F-17TPW7DC(1) 6181F-17TPW7SS(2) 6181F-17TPWE 6181F-17TPWEDC(1) 6181F-17TPWESS(2) 6181F-17TPXP 6181F-17TPXPSS(2) 6181F-17TPXPDC(1) 6181F-17TSXP 6181F-17TSWE 6181P-17NSXP 6181P-17NPXP 6181P-17TPW7 6181P-17TPW7DC(1) 6181P-17TPW7SS(2) 6181P-17TPXP 6181P-17TPXPDC(1) 6181P-17TPXPSS(2) 6181P-17TSXP Series E Display Size (in.
Features Chapter 1 The illustrations in this section show the hardware features of each computer.
Chapter 1 Features Figure 2 - Standard Computers Front and Back Views 5 Bottom View 7 8 6 9 15 14 13 4 12 11 10 IMPORTANT: The HDD or SSD is underneath the power adapter. See Replace a Standard Computer Drive on page 40 for more information.
Chapter 2 Installation Chapter Objectives This chapter provides information on the following topics: • Installation Precautions • Installation Guidelines • Mounting Clearance Requirements • Computer Dimensions • Required Tools • Install the Computer • Connect Peripherals • Connect Power • Functional Ground Screw • Connect to a Network Review each mounting type and computer dimensions before installing.
Chapter 2 Installation Installation Precautions Read and follow these precautions before installing the computer. Environment and Enclosure Information ATTENTION: This equipment is intended for use in a Pollution Degree 2 industrial environment, in overvoltage Category II applications (as defined in IEC 60664-1), at altitudes up to 2000 m (6561 ft) without derating. This equipment is considered Group 1, Class A industrial equipment according to IEC/CISPR 11.
Installation Installation Guidelines Chapter 2 Follow these guidelines to make sure your computer provides safe and reliable service: • The installation site must have sufficient power. ATTENTION: To maintain an electrically safe installation, AC powered computers must be plugged into a grounded outlet. • In dry environments, static charges can build up easily. Proper grounding of the computer helps to reduce static discharges, which can cause shock and damage electronic components.
Chapter 2 Installation Mounting Clearance Requirements IMPORTANT Because of self-heating, do not operate the computer in an enclosure with the minimum clearances unless adequate ventilation or other cooling methods are used to lower the temperature within the enclosure. Allow enough clearance to easily install or remove peripheral components, such as internal drives. Figure 4 - Minimum Clearances 1 2 3 4 Item Description Value 1 Top 50 mm (2 in.) 2 Left (for airflow) 50 mm (2 in.
Installation Chapter 2 Figure 6 - 1200P Integrated Display Computer – Performance 320 (12.60) 115 (4.5) 115 (4.5) 124 (4.90) 99.8 (3.93) 14.5 (0.57) 349 (13.74) 250 (9.84) 279 (10.98) Figure 7 - 1200P Integrated Display Computer – Standard 320 (12.60) 99.4 (3.91) 90.35 (3.56) 115 (4.5) 115 (4.5) 85 (3.36) 349 (13.74) 279 (10.98) Rockwell Automation Publication 6181P-UM002D-EN-P - February 2014 14.5 (0.57) 251 (9.
Chapter 2 Installation Figure 8 - 1500P Integrated Display Computer – Performance 31.8 (1.25) 320 (12.60) 31.8 (1.25) 100 (3.94) 145 (5.7) 145 (5.7) 28 (1.10) 15.8 (0.62) 14.5 (0.57) 410 (16.14) 309 (12.16) 251 (9.88) NOTE: 1500P models with stainless steel bezels do not have the front USB port shown at right. 15.8 (0.62) Figure 9 - 1500P Integrated Display Computer – Standard 32.55 (1.28) 32.55 (1.28) 320 (12.60) 95 (3.74) 57 (2.24) 144 (5.67) 144 (5.67) 29 (1.14) 86 (3.38) 14.5 (0.
Installation Chapter 2 Figure 10 - 1700P Integrated Display Computer – Performance 51 (2.0) 320 (12.60) 51 (2.0) 100 (3.94) 145 (5.7) 145 (5.7) 28 (1.10) 14.5 (0.57) 38.5 (1.51) 452 (17.8) 356 (14.01) 251 (9.88) NOTE: 1700P models with stainless steel bezels do not have the front USB port shown at right. 38.5 (1.51) Figure 11 - 1700P Integrated Display Computer – Standard 51 (2.0) 320 (12.60) 51 (2.0) 95 (3.74) 28 (1.10) 14.5 (0.57) 150 (5.9) 86 (3.38) 150 (5.9) 452 (17.8) 14.5 (0.
Chapter 2 Installation Required Tools These tools are required for computer installation: • #2 cross-head screwdriver • Panel cutout tools (for panel mounting) • Drill motor and drill bit (for wall mounting) • Antistatic wrist strap Install the Computer The computers support the following mounting options: • Panel mount (display computer models) • Wall mount (non-display computer models) Panel Mounting Guidelines Observe these guidelines when installing the computer in a panel: • Remove all electrical
Installation Chapter 2 Mount the Display Computer in a Panel Mounting clips secure the display computer to the panel. The number of clips varies by model. Model Clips (qty.) All with aluminum bezel and 1500P with stainless steel bezel 10 1700P with stainless steel bezel 12 Cat. No. Description 6189V-MCLPS3 Replacement mounting clips (14) Follow these steps to mount the computer in a panel. 1. Remove power from the panel. 2.
Chapter 2 Installation 9. Repeat this process at least three times until the clips are hand-tight and the gasket is compressed uniformly against the panel. 10. Tighten the mounting clips to a torque of 1.35 N•m (12 lb•in) by following the torquing sequence on the previous page, making sure to not overtighten. 11. Repeat this process at least three times until the clips are properly torqued, making sure the gasket is compressed uniformly against the panel.
Installation Connect Peripherals Chapter 2 Connect the required peripherals, such as keyboard and mouse, to the corresponding I/O ports on the computer. Refer to the appropriate illustrations for connector locations in Hardware Features starting on page 13. Display computer models with aluminum bezels have USB ports located on both the I/O port side panel and the front panel. Use these ports to connect various USB devices to the computer, such as an external drive.
Chapter 2 Installation Connect AC Power A grounded, 3-prong IEC60320-C13 power cord provides power to the computer. The power supply input accepts 100…240V AC and is autoranging. TIP If using an alternate IEC60320 cord, make sure the female end of the cord is sized appropriately for the retention clip. Performance and Non-display Computers Follow these steps to connect performance and non-display computers to an AC power source. 1. Connect the power cord to the AC power input (A). 2.
Installation Chapter 2 3. Connect the DC barrel connector to the power input jack (C). 4. Twist the locking ring clockwise to secure it in place (D). D C 5. Connect the AC power cord to a power source. SHOCK HAZARD: Connect the AC power cord to a power source with an earth ground. Failure to follow this warning can result in electrical shock. 6. Apply 100…240V AC power to the computer.
Chapter 2 Installation 3. Secure the DC power wires to the correct terminal-block screws, and the DC ground wire to the GND terminal screw. Torque the terminal screws to 0.687 N•m (6.1 lb•in). 4. Apply 18…32V DC power to the computer. Non-display Computer Shown +v -v GND Pre-installed DC Ground Bus Strip Functional Ground Screw The pre-installed functional ground screw is not required for safety or regulatory compliance.
Chapter 3 Operation Chapter Objectives This chapter provides information on the following topics: • Operating Guidelines • Start the Computer • Restart the Computer • Shut Down the Computer Operating Guidelines Follow these operating guidelines for your computer: • Operator access is limited to the front of the computer, which includes the display and the touchscreen (if available).
Chapter 3 Operation Start the Computer Follow these steps to start the computer. IMPORTANT The following steps apply to when you must manually start the computer. See Connect Power on page 27 for when power is applied to the computer for the first time. 1. Make sure any connected components with separate power supplies (such as an external display) are turned on first. 2. Make sure all necessary peripheral devices are connected to the corresponding I/O ports on the computer. 3.
Operation Restart the Computer Chapter 3 Use either of the following methods to restart your computer: • From the Start menu, choose Restart. • Press CTRL+ALT+DEL on an attached keyboard. During a restart, the computer does the following: • Clears the RAM. • Starts the POST. • Initializes peripheral devices such as drives and printers. • Loads the operating system.
Chapter 3 Operation Notes: 34 Rockwell Automation Publication 6181P-UM002D-EN-P - February 2014
Chapter 4 Component Replacement Chapter Objectives This chapter provides information on the following topics: • Accessories and Replacement Parts • Voltage Precautions • Electrostatic Discharge Precautions • Pre-configuration • Post-configuration • Required Tools • Remove the Cover • Reinstall the Cover • CompactFlash Card • Drive Precautions • Replace a Drive • Install an Add-in Card • Replace or Add Memory Modules • Replace the RTC Battery Accessories and Replacement Parts You can view a list of acc
Chapter 4 Component Replacement Electrostatic Discharge Precautions ATTENTION: Electrostatic discharge (ESD) can damage static-sensitive devices or microcircuitry. • Disconnect all power before working on the computer as detailed in Voltage Precautions on page 35. • Observe proper packaging and grounding techniques to prevent damage. Follow the precautions listed below: • Transport the computer and replacement parts in static-safe containers, such as conductive tubes, bags, or boxes.
Component Replacement Post-configuration Chapter 4 Follow these steps after installing or removing a hardware component. 1. Make sure all components are installed according to instructions. 2. Make sure that no tools or loose parts are left inside the computer. 3. Reinstall any expansion boards, peripherals, and system cables that were previously removed. 4. Reinstall the cover according to the instructions on page 38. 5. Reconnect all external cables and power to the computer. 6.
Chapter 4 Component Replacement Standard Computers Follow these steps to remove the rear cover. 1. Follow the steps for Pre-configuration on page 36. 2. Loosen the one screw that secures the rear cover (A). 3. Slide the cover downward to release the inner tabs from the chassis (B). 4. Detach the rear cover from the chassis (C). A C B 5. After installing, replacing, or upgrading internal computer components, reinstall the cover as detailed in Reinstall the Cover on page 38.
Component Replacement Chapter 4 4. Tighten the three screws to secure the rear cover (C). A C C B A C 5. Follow steps 4 and 5 for Post-configuration on page 37. Standard Computers Follow these steps to reinstall the rear cover. 1. Follow steps 1…3 for Post-configuration on page 37. 2. Insert the rear cover tabs on the slats lining the internal slot bay (A). 3. Slide the cover upward to engage the tabs to the chassis (B). 4. Tighten the one screw to secure the rear cover (C). C A B 5.
Chapter 4 Component Replacement CompactFlash Card The computers have a CompactFlash (CF) Type II card slot for loading CF cards: • The standard computers have one CF slot on the right side of the computer. • Performance and non-display computers have two CF slots: one on the right side of the computer, and another on the I/O port panel below the serial ports. Load a Card in the Right CF Card Slot Follow these steps to load a CF card in the card slot of all three computer models.
Component Replacement Chapter 4 Load a Card in the Bottom CF Card Slot Follow these steps to load a CF card in the bottom card slot of performance and non-display computer models. IMPORTANT The CF card slot on the bottom of performance and non-display computers is hot-swappable. You can insert or remove a card from this slot while the computer is on. 1. Loosen the two screws that secure the CF card slot cover. 2. Remove the CF card slot cover. Bottom View of Non-display Computer 3.
Chapter 4 Component Replacement Drive Precautions Follow these precautions when working with a drive. IMPORTANT Back up or clone your computer before replacing a drive. • Do not touch internal components. • Always handle the drive by its frame. • Never remove or install a drive with the power on. • Store the drive in an antistatic bag when it is not installed. SHOCK HAZARD: Electrostatic discharge (ESD) can damage the computer and components.
Component Replacement Chapter 4 9. Hold the new drive by its edge and remove it from its protective packaging. 10. Align the new drive on the carrier (F). 11. Connect the power and data cables to the drive (G). 12. Secure the new drive to the carrier with the four screws (E). Torque the screws to 0.452 N•m (4 lb•in). 13. Use the extended carrier lever to slide the assembly into the drive bay (H). 14. Retract the carrier lever (I) and tighten its screw to lock in place ( J). 15.
Chapter 4 Component Replacement 3. Remove the four screws that secure the power adapter assembly (A). 4. Remove the power adapter assembly from the chassis (B). A A A A B TIP Refer to Figure 12 on page 45 for the corresponding letters in parentheses in steps 5 though 13. 5. Remove the four screws that secure the drive assembly (C). 6. Lift the bottom end of the drive metal frame about 45° from the chassis (D). 7. Remove the four screws that secure the drive (E). 8.
Component Replacement Chapter 4 Figure 12 - Drive Replacement for Standard Computers C C C C E E F D E E J J J J H H G H I H 14. Place the power adapter assembly over the drive assembly (K). 15. Secure the power adapter assembly with the four screws (L). L L L L K 16. Reconnect the DC barrel connector as detailed on page 29. 17. Follow the steps for Post-configuration on page 37.
Chapter 4 Component Replacement Install an Add-in Card The performance and non-display computers support half-length, full-height add-in cards. Half-length PCI cards are 106.68 mm (4.2 in.) high by 175.26 mm (7.0 in.) long. Even though the standard computer has onboard PCI slots, its chassis design prevents it from supporting add-in card installation. IMPORTANT The following table lists onboard PCI slots and configurations supported by the performance and non-display computers.
Component Replacement Chapter 4 3. Remove the screw that secures the slot cover (A). 4. Pull out the slot cover (B) and store it. B A ATTENTION: Do not discard the slot cover. If the add-in card is removed in the future, the slot cover must be reinstalled to maintain proper cooling. 5. Remove the add-in card from its protective packaging. 6. Slide the add-in card into a compatible riser-board slot (C). Press to make sure it is firmly seated in the slot. 7. Secure the add-in card with the screw (D).
Chapter 4 Component Replacement PCI Riser Board Options You can use the PCI expansion slot kit, catalog number 6189V-EXTPCIS, to change the default one-slot PCI riser board to the following: • Two-slot PCI riser board • One-slot PCI Express riser board • Two-slot riser board with one PCI slot and one PCI Express x1 slot Follow these steps to install the PCI expansion slot kit (the performance computer is shown). SHOCK HAZARD: Electrostatic discharge (ESD) can damage the computer and components.
Component Replacement Chapter 4 8. Hold the new riser board by its edge and remove it from its protective packaging. 9. Align the new riser board with the PCI riser board bracket (E). 10. Secure it with the screws provided with the kit (F). F E F If you are installing Then use Secure it with A two-slot riser board The PCI riser bracket provided with the kit Four screws A single-slot riser board The default PCI riser bracket Two screws 11.
Chapter 4 Component Replacement If you intend to install Then A compatible add-in card now Proceed to page 46 for instructions. An add-in card later 1. Reinstall the rear cover. 2. Apply power to the computer. 13. Reinstall the rear cover as detailed in Reinstall the Cover on page 38. 14. Follow the steps for Post-configuration on page 37. Replace or Add Memory Modules The computers have two dual-channel DDR2 DIMM slots that support up to 4 GB maximum system memory.
Component Replacement Chapter 4 Replace or Add a Memory Module Follow these steps to replace or add a memory module. IMPORTANT Use an antistatic wrist strap connected to the work surface, and properly grounded tools and equipment. 1. Follow the steps for Pre-configuration on page 36. 2. Remove the computer cover as detailed in Remove the Cover on page 37. TIP To install additional memory, proceed to step 4 of this section. 3. Remove the selected memory module. a.
Chapter 4 Component Replacement Replace the RTC Battery The computers use nonvolatile memory that require a RTC battery to retain system information when power is removed. The lithium battery is on the computer’s motherboard next to the DIMM1 slot. The battery must be replaced during the life of the computer. The battery life depends on the amount of time the computer is on, or on-time. On-time (hrs/wk) Expected Battery Life (yrs) 0 4 40 5.
Component Replacement Chapter 4 4. Disengage the battery latch (A) from the battery. 5. Remove the old battery from its socket (B). 6. Insert the new battery, with the positive polarity (+ side) facing the latch, in the socket, making sure the battery is seated completely (C). 7. Engage the battery latch (D). C D A B IMPORTANT Do not over-bend the battery latch when replacing the RTC battery. The latch must retain contact with the battery for proper operation. 8.
Chapter 4 Component Replacement Notes: 54 Rockwell Automation Publication 6181P-UM002D-EN-P - February 2014
Chapter 5 System Troubleshooting Chapter Objectives This chapter provides information on the following topics: • Hardware Monitoring • Troubleshooting • Troubleshooting Checklists • Diagnostic Utility • Load the System Defaults • Clear the CMOS • Ship or Transport the Computer Hardware Monitoring The built-in hardware monitor of the computer tracks the operating threshold levels of the voltage and temperature sensors. Follow these steps to determine whether an operating threshold has been reached. 1.
Chapter 5 System Troubleshooting Troubleshooting Follow these steps to identify and isolate an issue with the computer’s operation. 1. Shut down the computer by using the appropriate method for the installed operating system. See Shut Down the Computer on page 30 for more information. 2. Disconnect power to the computer. 3. Disconnect all peripheral devices from the computer. 4. If using a keyboard and mouse, verify that they are properly connected. 5.
System Troubleshooting Chapter 5 • Is the BIOS properly configured? You can restore the default BIOS settings by either of the following methods: – Load system defaults as detailed in Load the System Defaults on page 59. – Use the CMOS jumper to reset the BIOS as detailed in Clear the CMOS on page 59. Issues after Startup • If an issue is intermittent, you can have a loose connection.
Chapter 5 System Troubleshooting Issues with the Add-in Card • Is the card installed and configured correctly? Verify the jumper and other configuration settings. • Are the card cables properly connected? • Is the add-in card recognized in Device Manager? • A card issue not listed here? Refer to troubleshooting information supplied by the add-in card manufacturer. Issues with the Integrated Display • Verify that the selected character color is not the same as the background color.
System Troubleshooting Load the System Defaults Chapter 5 If the computer fails after you make changes in the set-up menus, load the system default settings to correct the error. These default settings have been selected to optimize your computer’s performance. Follow these steps to load the system defaults. 1. Restart the computer as specified in Restart the Computer on page 41. 2. During POST, press F2 to access the BIOS set-up utility.
Chapter 5 System Troubleshooting 8. Return the jumper block to its default position. IMPORTANT The jumper block must be returned to its default position over pins 1 and 2. The computer will not start if you leave the jumper block over pins 2 and 3. 9. Reinstall the rear cover as detailed in Reinstall the Rear Cover on page 35. 10. Follow the steps for Post-configuration on page 33. IMPORTANT When you clear the CMOS, all BIOS settings return to their defaults.
Chapter 6 Maintenance Chapter Objectives This chapter provides information on the following topics: • Clean the Computer • Backlight Assembly Disposal Clean the Computer It is important to maintain your computer by cleaning the display, heat sink and vent holes, and removing grease or paint. Clean the Integrated Display Perform the following steps to clean the display. 1. Disconnect power from the computer at the power source.
Chapter 6 Maintenance Clean the Heat Sink and Vent Holes Perform the following steps to clean the chassis. 1. Disconnect power from the computer at the power source. 2. Disconnect all peripheral devices from the computer. 3. Vacuum dust and debris from the heat sink and vent holes. Remove Paint and Grease from Bezel Perform the following steps to remove paint and grease from the bezel of computers properly mounted in NEMA Type 4/4X or IEC IP66 enclosures. 1.
Appendix A Specifications The following tables contain specifications for the 1200P, 1500P, and 1700P integrated display industrial computers. For additional specifications, go to http://ab.rockwellautomation.com/Computers. Table 2 - Hardware and Software Specifications Specification Attribute 6181F, 6181P Hardware Processor Performance Standard Intel Core Duo U2500, 1.2 GHz/2M L2 cache/533 MHz 9 W Intel Celeron M423, 1.06 GHz/1M L2 cache/533 MHz 5.
Appendix A Specifications Table 3 - Display Specifications Attribute 6181F, 6181P Display Active Matrix Color TFT Touch screen (optional) Resistive antiglare Display size (diagonal) 1200P 1500P 1700P 308 mm (12.1 in.) 381 mm (15 in.) 432 mm (17 in.) Display area (WxH) 1200P 1500P 1700P 246 x 185 mm (9.7 x 7.3 in.) 305 x 229 mm (12 x 9 in.) 338 x 270 mm (13.3 x 10.7 in.) Native resolution 1200P 1500P 1700P 800 x 600, 256K colors 1024 x 768,16.7M colors 1280 x 1024, 16.
Specifications Appendix A Table 5 - Environmental Specifications Attribute 6181F, 6181P Weight, approx Non-display 1200P Performance 1200P Standard 1500P Performance 1500P Performance w/stainless steel bezel 1500P Standard 1700P Performance 1700P Performance w/stainless steel bezel 1700P Standard 7.7 kg (17.0 lb) 9.5 kg (20.9 lb) 7.85 kg (17.31 lb) 10.7 kg (23.6 lb) 11.9 kg (26.2 lb) 9.0 kg (19.8 lb) 12.6 kg (27.8 lb) 14.5 kg (32.1 lb) 11.0 kg (24.
Appendix A Specifications Table 6 - Certifications(1) Attribute 6181F, 6181P c-UL-us UL/c-UL Listed per UL 60950-1 and CSA C22.2 No. 60950-1-03 CE Marked for all applicable directives: EMC 2004/108/EC LVD 2006/95/EC C-Tick Australian Radiocommunications Act, compliant with: AS/NZS CISPR 11; Industrial Emissions RoHS China RoHS Turkey RoHS (EEE Yönetmeliğine Uygundur. In Conformity with the EEE Regulation) (1) See http://www.
Appendix B Use a Touchscreen Touchscreen Controller Computers with a touchscreen are shipped with the touchscreen controller installed and connected. The touchscreen controller connects internally to a USB port. The touchscreen is factory configured with the proper USB and touchscreen driver settings, so no user configuration is required. Driver Software The touchscreen driver is already loaded on the computer.
Appendix B Use a Touchscreen Notes: 68 Rockwell Automation Publication 6181P-UM002D-EN-P - February 2014
Appendix C Upgrade to a New BIOS BIOS Upgrade Procedure Sometimes a new BIOS is released to enhance the performance of your computer or to correct a defect. In such cases, you can download BIOS upgrades at the Rockwell Automation Product Compatibility and Download Center (PCDC) website at http://www.rockwellautomation.com/support/pcdc. CD and floppy disk drive upgrades are available. Upgrade the BIOS from a CD Drive Follow these steps to upgrade the BIOS in your computer from an external CD drive. 1.
Appendix C Upgrade to a New BIOS 7. After the download completes, click Open to access the folder where ZIP files were downloaded. 8. Open the downloaded file to locate and extract the ISO (*.iso) file. 9. Write the ISO file to a blank CD/CD-RW with the included CD Write utility (or one of your choice). 10. With the BIOS upgrade CD in the CD drive, restart the computer. 11. During POST, press F2 to access the BIOS set-up utility.
Upgrade to a New BIOS Upgrade the BIOS from an External Floppy Disk Drive Appendix C Follow these steps to upgrade the BIOS in your computer from an external floppy disk drive. 1. Attach the following external peripherals to your computer: • Display (for non-display models) • Keyboard • Floppy disk drive 2. Follow step 2 through step 7 in Upgrade the BIOS from a CD Drive starting on page 69 before proceeding to step 3 in this section. 3. Open the downloaded file to locate and extract the executable (*.
Appendix C Upgrade to a New BIOS Notes: 72 Rockwell Automation Publication 6181P-UM002D-EN-P - February 2014
Index A AC power connect 28 accessories 35 add-in cards PCI expansion slot kit options 48 riser board options 48 slot description 46 troubleshooting 58 audio jacks in non-display computers 16 in performance computers 15 in standard computers 16 F functional ground screw 30 H hard disk drive precautions 42 removal 42 specifications 63 hardware diagnostics 55 hardware features non-display 16 performance 15 hardware monitor 55 B backlight assembly disposal 62 BIOS upgrade 69 C calibrating touch screen 67
Index P panel mounting guidelines 24 panel cutout 24 tools 24 parts list 14 PCI cards 46 PCI Expansion Slot Kit install 48 PCI express cards 46 peripherals connect 27 POST, see Power On Self Test power AC 28 DC 29 functional ground screw 30 precautions 27 turn on 32 voltage precaution 35 power connection notices 27 Power On Self Test product options 13 overview 11 product dimensions 1200P display, performance 21 1200P display, standard 21 1200P non-display 20 1500P display, performance 22 1500P display, st
Rockwell Automation Support Rockwell Automation provides technical information on the Web to assist you in using its products. At http://www.rockwellautomation.com/support you can find technical and application notes, sample code, and links to software service packs. You can also visit our Support Center at https://rockwellautomation.custhelp.com/ for software updates, support chats and forums, technical information, FAQs, and to sign up for product notification updates.