
User guide
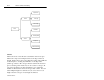
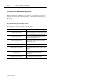
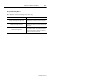
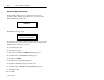
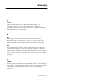
Table Of Contents
- Front Cover
- Important User Information
- Table of Contents
- Preface
- 1 - Scanner Features
- 2 - Installing Your Hardware
- Important Notes on Scanner Systems
- 1. Unpacking the Equipment
- 2. Setting the Address of the Base/Charger Unit
- 3. Connecting the Host Cable to the Base/Charger Unit
- 4. Mounting the Base/Charger Unit
- 5. Mounting the Power Supply
- 6. Connecting the Power Supply to the Base/Charger Unit and Power Receptacle
- 7. Connecting the Host Cable to the Host Device
- 8. Charging the Battery
- 9. Pairing the Scanner to the Base/Charger Unit
- 3 - Configuring Your Scanner
- 4 - Scanner Operation
- 5 - Maintenance and Troubleshooting
- A - Specifications
- B - Cable Pinouts
- C - Advanced Data Formatting
- Glossary
- Index
- Test Symbols
- Back Cover

Advanced Data FormattingC–6
Publication 2755-6.3
ADF Sorting Application Example
In this example, ADF is used to expand the message seen by
assembly workers packing and sorting boxes on a conveyor line.
Without ADF, the message reads:
PURPLE 123
With ADF, the message reads:
Place item in PURPLE box
Place box on conveyor # 123
To expand the message by scanning the appropriate bar codes located
in the Hand-Held Cordless Bar Code Scanners Programming Guide
(Publication No. 2755-6.6), you need to:
1. Select the Input Source.
2. Select the Code Type.
3. Select the Code Length of
PURPLE 123 including spaces.
4. Send Keystrokes of
Place item in including spaces.
5. Send Data of
PURPLE.
6. Send Keystrokes of
box including space.
7. Send Preset including carriage return line feed.
8. Send keystrokes of
Place box on conveyor # including spaces.
9. Send Data of
123.
10. Save Rule.