
User guide
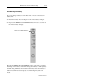
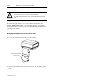


Table Of Contents
- Front Cover
- Important User Information
- Table of Contents
- Preface
- 1 - Scanner Features
- 2 - Installing Your Hardware
- Important Notes on Scanner Systems
- 1. Unpacking the Equipment
- 2. Setting the Address of the Base/Charger Unit
- 3. Connecting the Host Cable to the Base/Charger Unit
- 4. Mounting the Base/Charger Unit
- 5. Mounting the Power Supply
- 6. Connecting the Power Supply to the Base/Charger Unit and Power Receptacle
- 7. Connecting the Host Cable to the Host Device
- 8. Charging the Battery
- 9. Pairing the Scanner to the Base/Charger Unit
- 3 - Configuring Your Scanner
- 4 - Scanner Operation
- 5 - Maintenance and Troubleshooting
- A - Specifications
- B - Cable Pinouts
- C - Advanced Data Formatting
- Glossary
- Index
- Test Symbols
- Back Cover

5–12 Maintenance and Troubleshooting
Publication 2755-6.3
Cleaning the Scan Window
Carefully clean the window by first removing loose particles of dirt
with clean air. Then use an optical quality cloth moistened with an
optical quality cleaning fluid for plastic lenses and wipe the window
in a single direction (don’t wipe cloth back and forth across
window). Do not leave streaks.
!
ATTENTION: Do not use abrasive materials such as
disposable wipes and facial tissue. Do not use solvents
like alcohol or acetone. These materials will damage
the window and the finish on the scanner.
!
ATTENTION: The scanner has no serviceable parts.
Do not open the housing of the scanner.