
User guide
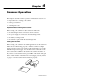
Table Of Contents
- Front Cover
- Important User Information
- Table of Contents
- Preface
- 1 - Scanner Features
- 2 - Installing Your Hardware
- Important Notes on Scanner Systems
- 1. Unpacking the Equipment
- 2. Setting the Address of the Base/Charger Unit
- 3. Connecting the Host Cable to the Base/Charger Unit
- 4. Mounting the Base/Charger Unit
- 5. Mounting the Power Supply
- 6. Connecting the Power Supply to the Base/Charger Unit and Power Receptacle
- 7. Connecting the Host Cable to the Host Device
- 8. Charging the Battery
- 9. Pairing the Scanner to the Base/Charger Unit
- 3 - Configuring Your Scanner
- 4 - Scanner Operation
- 5 - Maintenance and Troubleshooting
- A - Specifications
- B - Cable Pinouts
- C - Advanced Data Formatting
- Glossary
- Index
- Test Symbols
- Back Cover

Chapter 4
Publication 2755-6.3
Scanner Operation
This chapter describes scanner operation. Included are sections on:
• important notes on using your scanner
• testing your scanner
• scanning bar codes
Important Notes on Using Your Scanner
Before using your scanner for data collection, make sure:
• the base/charger unit is connected to the host device,
• the power supply is connected to the base/charger unit,
• the battery is charged, and
• the scanner is paired with the base/charger unit.
Testing Your Scanner
Before using your scanner in an actual application, test the scanner to
make sure it is functioning properly. Aim the scanner at a slight
angle towards a test bar code found on the inside back cover of this
manual and press the trigger. You should see the scan beam on the
bar code and the red LED on the back of the scanner should be on.
If you have a successful read, the green LED on the back of the gun
turns on and remains on until the next scan (trigger pressed). Refer
to page 5–13 if the scanner did not function properly.