
User guide
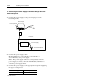
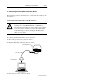
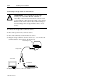
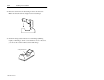
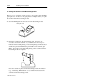
Table Of Contents
- Front Cover
- Important User Information
- Table of Contents
- Preface
- 1 - Scanner Features
- 2 - Installing Your Hardware
- Important Notes on Scanner Systems
- 1. Unpacking the Equipment
- 2. Setting the Address of the Base/Charger Unit
- 3. Connecting the Host Cable to the Base/Charger Unit
- 4. Mounting the Base/Charger Unit
- 5. Mounting the Power Supply
- 6. Connecting the Power Supply to the Base/Charger Unit and Power Receptacle
- 7. Connecting the Host Cable to the Host Device
- 8. Charging the Battery
- 9. Pairing the Scanner to the Base/Charger Unit
- 3 - Configuring Your Scanner
- 4 - Scanner Operation
- 5 - Maintenance and Troubleshooting
- A - Specifications
- B - Cable Pinouts
- C - Advanced Data Formatting
- Glossary
- Index
- Test Symbols
- Back Cover
2–16 Installing Your Hardware
Publication 2755-6.3
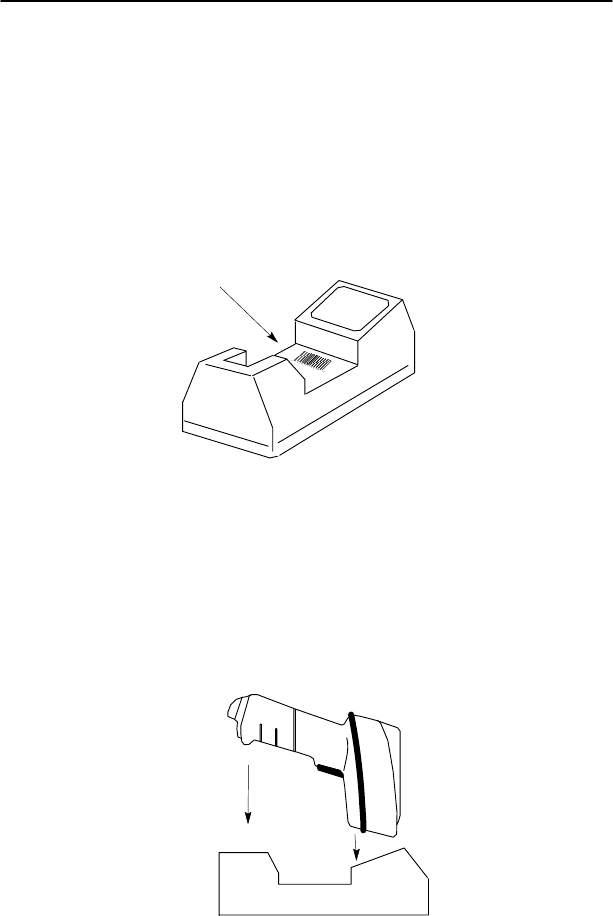
9. Pairing the Scanner to the Base/Charger Unit
There is a 1-to-1 pairing of guns to bases. (You cannot have multiple
guns paired to one base or one gun paired to multiple bases.) To pair
the scanner with the base/charger unit:
1. Scan the Pairing Bar Code located on the base/charger unit.
Pairing Bar Code
2. Insert the scanner into the base/charger unit. You have 15
seconds to insert the scanner or you will hear 4 error beeps to
indicate unsuccessful pairing. Successful pairing is indicated by a
warble beep and an illuminated green LED on the scanner gun.
Note: You cannot scan data until pairing of the scanner with the
base/charger unit is complete.
Once the scanner is placed in the base/charger unit, information
(e.g., addressing, RF channels, etc.) is transferred between the
scanner and the base/charger unit.