
User guide
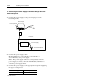
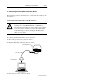
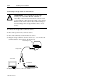
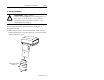
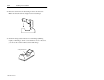
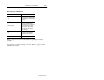
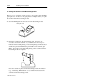
Table Of Contents
- Front Cover
- Important User Information
- Table of Contents
- Preface
- 1 - Scanner Features
- 2 - Installing Your Hardware
- Important Notes on Scanner Systems
- 1. Unpacking the Equipment
- 2. Setting the Address of the Base/Charger Unit
- 3. Connecting the Host Cable to the Base/Charger Unit
- 4. Mounting the Base/Charger Unit
- 5. Mounting the Power Supply
- 6. Connecting the Power Supply to the Base/Charger Unit and Power Receptacle
- 7. Connecting the Host Cable to the Host Device
- 8. Charging the Battery
- 9. Pairing the Scanner to the Base/Charger Unit
- 3 - Configuring Your Scanner
- 4 - Scanner Operation
- 5 - Maintenance and Troubleshooting
- A - Specifications
- B - Cable Pinouts
- C - Advanced Data Formatting
- Glossary
- Index
- Test Symbols
- Back Cover
2–10 Installing Your Hardware
Publication 2755-6.3
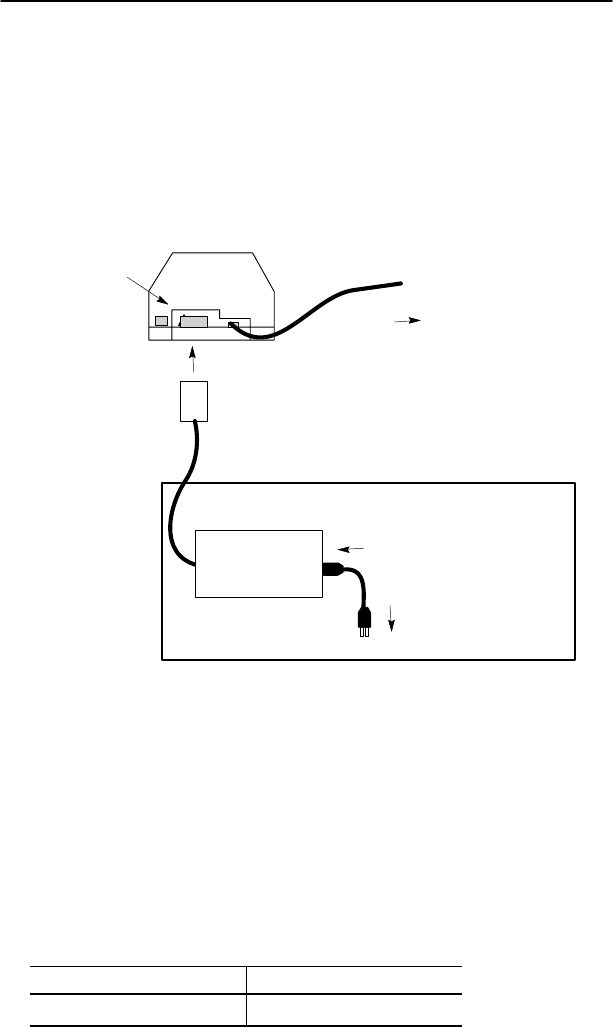
6. Connecting the Power Supply to the Base/Charger Unit and
Power Receptacle
1. Connect the power supply to the power input port on the
base/charger unit.
Base/Charger
To Host
Power Supply
Power Input Port
To Power Receptacle
Enclosure
To Power Supply
2. Connect the power supply cable
(Renewal Part Nos. 77121-801-01, 77121-801-02, or
77121-801-03) to the power supply.
Note: The power supply cables are sold separately from the
power supply. Contact your local Allen-Bradley distributor to
order the power supply cables.
3. Connect the power supply to the appropriate receptacle supplying
the proper voltage level.
Power Supply Voltage Level
2755-HCP-D1 100–240V ac/50–60 Hz