
User guide
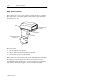
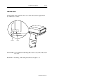
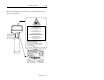
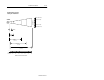
Table Of Contents
- Front Cover
- Important User Information
- Table of Contents
- Preface
- 1 - Scanner Features
- 2 - Installing Your Hardware
- Important Notes on Scanner Systems
- 1. Unpacking the Equipment
- 2. Setting the Address of the Base/Charger Unit
- 3. Connecting the Host Cable to the Base/Charger Unit
- 4. Mounting the Base/Charger Unit
- 5. Mounting the Power Supply
- 6. Connecting the Power Supply to the Base/Charger Unit and Power Receptacle
- 7. Connecting the Host Cable to the Host Device
- 8. Charging the Battery
- 9. Pairing the Scanner to the Base/Charger Unit
- 3 - Configuring Your Scanner
- 4 - Scanner Operation
- 5 - Maintenance and Troubleshooting
- A - Specifications
- B - Cable Pinouts
- C - Advanced Data Formatting
- Glossary
- Index
- Test Symbols
- Back Cover
1–2 Scanner Features
Publication 2755-6.3
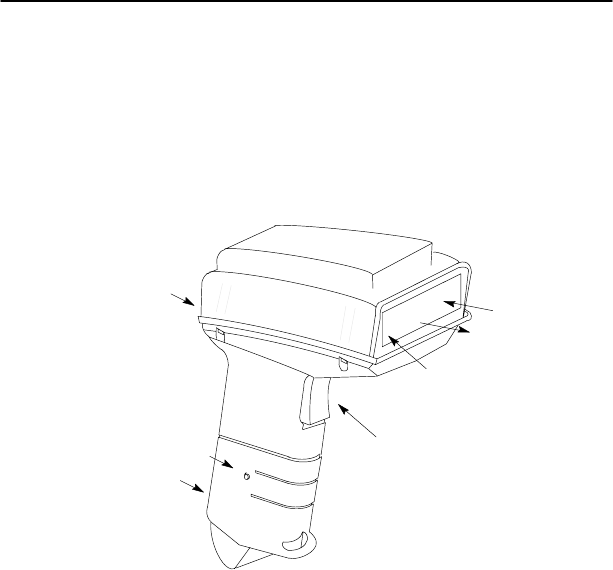
Major Scanner Features
The scanners use a low power visible (red) laser diode for scanning.
The trigger turns on the laser which scans a label at approximately
36 scans per second.
Trigger
LEDs
Battery Pack
Handle Release Button
Scan Window
Laser Light
Reflected Light
The laser beam:
• exits through the scan window
• reflects off the label back through the window
• is detected by a sensor in the scanner
When a label is read, the laser beam is automatically turned off until
the trigger is pressed again. If no label is read, the laser beam
automatically turns off after 0.5 to 3 seconds (timeout is adjustable)
and remains off until the trigger is released and pressed again.