PanelView™ e Transfer Utility (Cat. No.
Important User Information Because of the variety of uses for the products described in this publication, those responsible for the application and use of this control equipment must satisfy themselves that all necessary steps have been taken to assure that each application and use meets all performance and safety requirements, including any applicable laws, regulations, codes and standards.
Preface Before You Begin . . . . . . . . . . . . . . . . . . . . . . . . . . . . . . . . . . . . . Purpose of This Manual . . . . . . . . . . . . . . . . . . . . . . . . . . . . . . . . Contents of This Manual . . . . . . . . . . . . . . . . . . . . . . . . . . . . . . Related Publications . . . . . . . . . . . . . . . . . . . . . . . . . . . . . . . . Technical Support Services . . . . . . . . . . . . . . . . . . . . . . . . . . . . . . Allen-Bradley Support . . . . . . . . . . . . . . . . .
toc–ii Table of Contents Uploading 1000e/1200e/1400e Application Files and Alarm History Files Chapter 3 Downloading 1000e/1200e/1400e Application Files Chapter 4 Configuring Communications Settings for 1000e/1200e/1400e Application Transfers Chapter 5 Uploading PanelView 1000e/1200e/1400e Application Files . . . . . . Uploading the PanelView 1000e/1200e/1400e Alarm History File . . . Alarm History Information . . . . . . . . . . . . . . . . . . . . . . . . . . . . .
Preface Preface Welcome to the Allen-Bradley PanelView e Transfer Utility 32. With this software, you can transfer PanelBuilder applications to and from an IBM-compatible personal computer and PanelView 1000e, and 1400e operator terminals. This utility is referred to as FTU 32 in this manual and supports RSLinx drivers. There are references to FTU ver 3 in this manual which is a 16 bit PV “e”, upload/download program designed to be used on computers with Windows 3.
P–2 Preface Contents of This Manual Chapter Title Contents Preface An overview of this manual and a list of related publications. 1 Introducing the PanelView e Transfer Utility 32 Introduces the PanelView e Transfer Utility 32 and the methods of transferring PanelBuilder applications. 2 Working with the PanelView e Transfer Utility 32 Step-by-step instructions for installing the PanelView e Transfer Utility 32 and starting it for the first time.
Preface P–3 For See Publication Number A complete list of current Allen-Bradley documentation, including ordering instructions. Also indicates whether the documents are available on CD-ROM or in multiple languages. Allen-Bradley Publication Index SD499 A glossary of industrial automation terms and abbreviations. Allen-Bradley Industrial Automation Glossary AG-7.
P–4 Preface Technical Support Services If you have questions about the PanelView e Transfer Utility 32, consult the online help and user documentation first. If you can’t find the answer, take advantage of our Technical Support Fax Back system, available 24 hours a day, 7 days a week at 1-440-646-6701. Or, browse our technical document library on the World Wide Web at http://www.ab.com/mem/technotes/kbhome.
Chapter 1 Introducing the PanelView e Transfer Utility 32 This chapter introduces you to the PanelView e Transfer Utility 32, version 5, including: • what the Transfer Utility is used for • the methods of transferring application files • tips for transferring files About the PanelView e File Transfer Utility 32 Use the PanelView e Transfer Utility 32 to transfer PanelBuilder application files between a computer and the PanelView terminal.
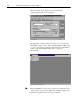
1–2 Introducing the PanelView e Transfer Utility 32 When the splash screen disappears, the following main download/upload dialog box is displayed. The PanelView e Transfer Utility 32 can also be accessed from the PanelBuilder 1400e software. In the main PanelBuilder 1400e dialog box, choose Download or Upload from the File menu. The Transfer Utility’s main download/upload dialog box is displayed automatically. " Note: PanelBuilder software does not need to be installed in order to do file transfers.
Introducing the PanelView e Transfer Utility 32 1–3 Types of Applications You can transfer terminal application files, whose names end in .pvd, using the PanelView e Transfer Utility 32. The *.pvd files are created in PanelBuilder 1400e for Windows. Files are initially created and edited as *.pvc. You then must save the file as a *.pvd to download it. These are PanelView enhanced 1200 (Series F and later) and 1000e/1200e/1400e terminal files.
1–4 Introducing the PanelView e Transfer Utility 32 To do network downloads, you can use RSLinx drivers. RSLinx Lite is included on floppy disks with your PanelBuilder 1400e software package (A-B Catalog Number 2711E-ND1) or Transfer Utility software package (A-B Catalog Number 2711E-ND7); you must install RSLinx separately. For RSLinx installation procedures, see the RSLinx user documentation provided. For a complete list of hardware and driver requirements, refer to the table in Chapter 5.
Introducing the PanelView e Transfer Utility 32 1–5 • Do not try to download application files from two development computers to the same location at the same time. Results are unpredictable. • During the download, the PanelView terminal ignores all operator inputs and PLC outputs. The current application screen is removed and the Transfer screen and progress bar are displayed.
1–6 Introducing the PanelView e Transfer Utility 32 PanelView e Transfer Utility 32 and RSLinx The Transfer Utility supports RSLinx network drivers. RSLinx Lite, Version 2.0 or later, is included with your PanelBuilder 1400e software package (A-B Catalog Number 2711E-ND1) or Transfer Utility software package (A-B Catalog Number 2711E-ND7). The PanelView e Transfer Utility 32 supports a subset of the RSLinx drivers which are used by DH+ or ControlNet.
Introducing the PanelView e Transfer Utility 32 1–7 If your version of INTERCHANGE is earlier than 6.1.0, you must view and configure the ports outside of the PanelView 1200/1400e Transfer Utility. Refer to your INTERCHANGE user documentation. Again, make sure the port you select is configured correctly for your communication device and settings.
Chapter 2 Working with the PanelView e Transfer Utility 32 This chapter provides instructions for setting up and using the PanelView e Transfer Utility 32, including: • minimum hardware and software requirements • installing and starting the PanelView e Transfer Utility 32 • exiting from the PanelView e Transfer Utility 32 The PanelView e Transfer Utility 32 has context-sensitive online help that you can access at any time, by pressing the Help button, F1 on your keyboard, or by clicking the Help menu ite
2–2 Working with the PanelView e Transfer Utility 32 PanelBuilder Applications For details about PanelBuilder applications, see Types of Applications in Chapter 1 of this manual. PanelView Terminals To transfer files using the PanelView e Transfer Utility 32, you must have one or more of the following PanelView terminals. Table 2.B lists the terminal products and their catalog numbers. Table 2.
Working with the PanelView e Transfer Utility 32 Equipment Required for Transferring Applications 2–3 This section describes the equipment required to perform the following application transfers: • serial transfer • DH+ network transfer • ControlNet network transfer • Remote I/O Pass-Through transfer Serial Upload/Download To transfer applications serially, you need an RS-232 Serial (Upload/Download) cable (A-B Catalog Numbers 2706-NC13, 2711-NC13, 2711-NC14 for PanelView 1000e/1400e Series F and later
2–4 Working with the PanelView e Transfer Utility 32 DH+ Network Transfers You need one of the following Allen-Bradley Data Highway Plus (DH+) interface modules installed in the development computer to transfer applications over a DH+ network: • 1770-KF2/1785-KE • 1784-KL • 1784-KT • 1784-KT2 • 1784-KTK1 • 1784-PCMK • 1784-KTX You can transfer applications over a DH+ network using RSLinx drivers, or Serial 1 or Serial 2 drivers if the transfer is over a KF2 module.
Working with the PanelView e Transfer Utility 32 2–5 Figure 2.
2–6 Working with the PanelView e Transfer Utility 32 Figure 2.
Working with the PanelView e Transfer Utility 32 2–7 Figure 2.
2–8 Working with the PanelView e Transfer Utility 32 ControlNet Network Transfers The 1200e terminals are not compatible with ControlNet. You need the following Allen-Bradley ControlNet Interface modules installed in the development computer to transfer applications over ControlNet: • 1784-KTCX (Series B or later) • 1784-KTC • 1770-KFC You can transfer applications over a ControlNet network using RSLinx drivers, or Serial 1 or Serial 2 drivers if the transfer is over a KFC module.
Working with the PanelView e Transfer Utility 32 2–9 Figure 2.
2–10 Working with the PanelView e Transfer Utility 32 Figure 2.
Working with the PanelView e Transfer Utility 32 2–11 Figure 2.
2–12 Working with the PanelView e Transfer Utility 32 Remote I/O Pass-Through Transfers The Remote I/O Pass-Through feature enables you to download a PanelBuilder Remote I/O application file from your computer over the Data Highway Plus (DH+), ControlNet, or Ethernet networks and then over the Remote I/O network, to a PanelView terminal. You can do this without connecting the serial cable to the terminal and without going from terminal to terminal with a PC.
Working with the PanelView e Transfer Utility 32 2–13 Figure 2.
2–14 Working with the PanelView e Transfer Utility 32 Figure 2.
Working with the PanelView e Transfer Utility 32 2–15 Figure 2.
2–16 Working with the PanelView e Transfer Utility 32 General Installation Information You can install the PanelView e Transfer Utility 32 software using the CD-ROM provided in the PanelBuilder 1400e software kit (A-B Catalog Number 2711E-ND1) or using the CD provided in the Transfer Utility software package (A-B Catalog Number 2711E-ND7). You can also create your own floppy disks of the PanelView e Transfer Utility 32 software from the CD this manual was on.
Working with the PanelView e Transfer Utility 32 Installing FTU32 from PanelBuilder 1400e CD-ROM on Windows 2000(SP2)/NT/95 2–17 PanelView e Transfer Utility 32 (FTU32) Version 5 is provided on the PanelBuilder 1400e CD-ROM. The software installation program creates a directory on your hard drive for the FTU32 and copies all necessary files to it. By default, the drive and directory is C:\AB\PB1400E\FTU32. You can change this default.
2–18 Working with the PanelView e Transfer Utility 32 The CD-ROM includes two install versions for the Transfer Utility software: • Version 3—This version offers you the Transfer Utility for Windows 3.1 or later, or Windows 95. Version 3 supports PanelView application file transfers over networks using INTERCHANGE and WINtelligent LINX software drivers. • Version 5—This version offers you the Transfer Utility for Windows 95 or Windows NT.
Working with the PanelView e Transfer Utility 32 2–19 6. In the Choose Applications dialog box, choose to install the Transfer Utility. You can choose to install more than one application. Then choose Next. 7. In the registration window, enter your user name, company name, and serial number. You can obtain registration information from the software registration card that is in your PanelBuilder 1400e package (A-B Catalog Number 2711E-ND1) or Transfer Utility package (A-B Catalog Number 2711E-ND7).
2–20 Working with the PanelView e Transfer Utility 32 11. Choose the program folder (program group) in which you want to install the FTU32’s icons, which includes a Readme file icon, the Transfer Utility icon, and an Uninstall icon. By default, the icons are installed in the PanelBuilder 1400e program folder. Then choose Next. 12. Choose whether the installation utility will modify the AUTOEXEC.BAT file.
Working with the PanelView e Transfer Utility 32 Installing the FTU from PanelBuilder 1400e CD-ROM on Windows 95 or Windows 3.x 2–21 PanelView 1200/1400e Transfer Utility (FTU) Version 3 is provided on the PanelBuilder 1400e CD-ROM. The software installation program creates a directory on your hard drive for the FTU and copies all necessary files to it. By default, the drive and directory is C:\AB\PB1400E\FTU. You can change this default. You can create your own 3.5-inch floppy disks from the CD.
2–22 Working with the PanelView e Transfer Utility 32 6. In the Choose Applications dialog box, choose File Transfer Utility as the application you want to install. You can choose more than one application to install. Then choose Next. 7. The Welcome dialog box for the File Transfer Utility recommends that you close all open Windows applications. If you have done that, choose Next. 8. In the registration window, enter the required information.
Working with the PanelView e Transfer Utility 32 2–23 13. After all the applications have completed installing, you are prompted to reboot your computer. You can reboot immediately or later, but you must reboot before you can run the Transfer Utility or other applications successfully. If you want to upload or download PanelView files over the PLC networks after you finish installing the Transfer Utility, you also need to install INTERCHANGE or WINtelligent LINX software.
2–24 Working with the PanelView e Transfer Utility 32 7. Choose the program folder (program group) in which you want to install the FTU32’s icons, which include a Readme file icon, the Transfer Utility icon, and an Uninstall icon. By default, the icons are installed in the PanelBuilder 1400e program folder. Then choose Next. 8. Choose whether the installation utility will modify the AUTOEXEC.BAT file.
Working with the PanelView e Transfer Utility 32 2–25 3. Browse the CD for file “FTU_V3”. Browse Disk 1. Run “SETUP.EXE”. If you are running on Windows 3.x, choose Run from the File menu. In the Run window command line, type: E:\FTU_V3\DISK1\SETUP.EXE where E is the drive containing the PanelView 1200/1400e Transfer Utility disk, and press Enter. 4. A window appears, recommending you close all open Windows applications.
2–26 Working with the PanelView e Transfer Utility 32 Do not cancel the installation while it is in progress. If you want to undo the installation, let the installation finish, then use the Uninstall Transfer Utility to remove all the installed files and to update the registration. For information on how to start and exit from the PanelView 1200 Transfer Utility, see the PanelView 1200 Transfer Utility User Manual (Publication Number 2711-UM010B–EN–P).
Working with the PanelView e Transfer Utility 32 2–27 If you have problems running the Transfer Utility and you have had previous versions of the Transfer Utility on your computer, we recommend you select “Uninstall PanelView e Transfer Utility 32” in the PanelBuilder 1400e folder. The “Uninstall PanelView e Transfer Utility 32” program deletes any of the shared files and windows system file conflicts that may exist from earlier installations. You will then have to reinstall the Transfer Utility software.
2–28 Working with the PanelView e Transfer Utility 32 To start the FTU32 from PanelBuilder 1400e: " In the PanelBuilder 1400e main dialog box, choose Download or Upload from the File menu. The Transfer Utility’s download/upload dialog box is displayed. Exiting the PanelView e Transfer Utility 32 When you have finished transferring applications, exit the Transfer Utility.
Working with the PanelView e Transfer Utility 32 Starting the PanelView 1400e Transfer Utility Version 3 (FTU) 2–29 The PanelView 1200/1400e Transfer Utility Version 3 (FTU) includes two utilities that can be accessed from the same icon: • the Transfer Utility for the PanelView 1000e/1200e/1400e terminals that is activated from toolbar buttons. • the PanelView 1200 Transfer Utility that can be selected from the Transfer menu bar. This section describes how to start the program from Windows 3.
2–30 Working with the PanelView e Transfer Utility 32 If you have problems running the File Transfer Utility and you have had previous versions of the File Transfer Utility on your computer, we recommend you select “Uninstall Transfer Utility” in the PanelBuilder 1400e folder. The “Uninstall Transfer Utility” program deletes any of the shared files and windows system file conflicts that may exist from earlier installations. You will then have to reinstall the File Transfer Utility software again.
Working with the PanelView e Transfer Utility 32 Exiting the PanelView 1200 Transfer Utility 2–31 When you have finished transferring applications, exit the PanelView 1200 Transfer Utility. To exit the PanelView 1200 Transfer Utility: 1. Choose Exit from the menu bar. The Exit menu appears. Transfer Exit Yes, exit Cancel Exit 20016 2. Choose Yes, exit and press ENTER. You will return to the PanelView 1200/1400e Transfer Utility screen. If you don’t want to quit, choose Cancel Exit.
Chapter 3 Uploading 1000e/1200e/1400e Application Files and Alarm History Files This chapter describes how to upload PanelView application files and alarm history files from the PanelView terminal to your computer, using the various transfer methods. Uploading PanelView 1000e/1200e/1400e Application Files You can upload application files using either a serial connection, a network connection, or a Remote I/O connection.
3–2 Uploading 1000e/1200e/1400e Application Files and Alarm History Files To prepare the PanelView terminal for a serial upload: 1. Using the hardware keyswitch or the Goto Configure Mode button, switch the PanelView terminal to the Configure mode. 2. In the Terminal Configuration screen, choose the Transfer Setup button to display the Transfer Setup screen. 3. To change the settings, choose the Baud Rate, Parity, or Error buttons to move the check mark to the setting you want.
Uploading 1000e/1200e/1400e Application Files and Alarm History Files 3–3 5. To transfer an application serially, in the Terminal Configuration screen, choose the Transfer Application button to display the Transfer Application screen. Important: The application file to be uploaded must be the Current Application in the PanelView terminal.
3–4 Uploading 1000e/1200e/1400e Application Files and Alarm History Files 2. In the Terminal Configuration screen, choose the Terminal Network Setup button to display the Terminal Network Setup screen. For DH+ applications, you can change both the baud rate and the terminal network address. For ControlNet applications, you can change the terminal network address, not the baud rate. The first screen shows the Terminal Network Setup screen for ControlNet (KTCX) application with no scheduled tags assigned.
Uploading 1000e/1200e/1400e Application Files and Alarm History Files 3–5 2 For Remote I/O applications, you can change the baud rate. The following shows the Terminal Network Setup screen for a Remote I/O application. 3 7 Low 3. When you have selected the required settings, choose OK to exit the screen. 4. Switch the PanelView terminal to Run mode. The application starts to run. You can now transfer application files over the selected network.
3–6 Uploading 1000e/1200e/1400e Application Files and Alarm History Files To configure the PanelView e Transfer Utility 32 for the upload: 1. In the PanelView e Transfer Utility 32, choose the Upload tab from the main dialog box. 2. In the Path box, type the name of the directory to which the uploaded application file will be saved, or choose Browse to find a directory. 3. In the Data to Upload box, select Application file. 4.
Uploading 1000e/1200e/1400e Application Files and Alarm History Files 3–7 If you want the file to upload with the same name as the selected upload file, then clear the Prompt Upload Destination box. If you want to enter a new name for the uploaded file, select Prompt Upload Destination. Windows NT or Windows 95 file naming restrictions apply. The file name can exceed 8 characters, but the PanelView firmware truncates file names that exceed 8 characters. 5.
3–8 Uploading 1000e/1200e/1400e Application Files and Alarm History Files Uploading the PanelView 1000e/1200e/1400e Alarm History File The PanelView e Transfer Utility 32 allows you to upload an application’s historical alarm data from PanelView 1000e/1200e/1400e terminals. The Alarm History file can be uploaded using any of the upload methods: Serial, Network, or Remote I/O Pass-Through. " Note: The Upload Alarm History function works only for PanelView 1000e/1200e/1400e terminals with Version 02.00.
Uploading 1000e/1200e/1400e Application Files and Alarm History Files 3–9 Box Data Alarm Trigger Signed long integer value Alarm Message The alarm message associated with the trigger value Message delimited by a pair of double quotes Double quote character () in the message text is translated to 2 double quotes (). For Version 02.00.00 and later applications, the character sequence \n (backslash-n) in the message text is translated to \\n For Version 02.00.
3–10 Uploading 1000e/1200e/1400e Application Files and Alarm History Files Uploading the Alarm History Files To upload alarm history files, you must complete these steps in order: • prepare the PanelView terminal for the upload • configure the PanelView e Transfer Utility 32 for the upload • initiate the alarm history file upload To prepare the PanelView terminal for a serial upload: 1. Using the hardware keyswitch or the Goto Configure Mode button, switch the PanelView terminal to the Configure mode. 2.
Uploading 1000e/1200e/1400e Application Files and Alarm History Files 3–11 4. When you have selected the required settings, choose OK to exit this screen. 5. To upload the terminal’s alarm history serially, in the Terminal Configuration screen, choose the Transfer Application button to display the Transfer Application screen. To prepare the PanelView terminal for a network or Remote I/O Pass-Through upload: 1.
3–12 Uploading 1000e/1200e/1400e Application Files and Alarm History Files 2. In the Terminal Configuration screen, choose the Terminal Network Setup button to display the Terminal Network Setup screen. For DH+ application files, you can change both the baud rate and the terminal network address. For ControlNet application files, you can change the terminal network address, not the baud rate.
Uploading 1000e/1200e/1400e Application Files and Alarm History Files 3–13 2 For Remote I/O application files, you can change the baud rate. The following shows the Terminal Network Setup screen for a Remote I/O application file. 3 7 Low 3. When you have selected the required settings, choose OK to exit the screen. 4. Switch the PanelView terminal to Run mode. The application file starts to run. You can now transfer alarm history files over the selected network.
3–14 Uploading 1000e/1200e/1400e Application Files and Alarm History Files To configure the PanelView e Transfer Utility 32 for the upload: 1. In the PanelView e Transfer Utility 32, choose the Upload tab from the main dialog box. 2. In the Path box, type the name of the directory to which the uploaded application file will be saved, or choose Browse to find a directory. 3. In the Data to Upload box, select Alarm History. 4.
Uploading 1000e/1200e/1400e Application Files and Alarm History Files 3–15 If you want the file to upload with the same name as the selected upload file, then clear the Prompt Upload Destination box. If you want to enter a new name for the uploaded file, select Prompt Upload Destination. Windows NT or Windows 95 file naming restrictions apply. The file name can exceed 8 characters, but the PanelView firmware truncates file names that exceed 8 characters. 5.
3–16 Uploading 1000e/1200e/1400e Application Files and Alarm History Files 8. To save your settings, choose System Options from the Options menu, or from the toolbar. In the General tab of the System Options dialog box, select Auto-save All Settings to automatically save all settings when you exit. You only need to select this check box once, because your selection becomes the application default.
Chapter 4 Downloading 1000e/1200e/1400e Application Files This chapter describes how to download application files using the various transfer methods described in Chapter 2, Working with the PanelView e Transfer Utility 32. For file transfers over ControlNet, DH+, or Remote I/O Pass-Through, be sure the PanelView terminal address is correct, otherwise the transfer could corrupt data used by another device on the network, such as the PLC.
4–2 Downloading 1000e/1200e/1400e Application Files To prepare the PanelView terminal for a serial download: 1. Using the hardware keyswitch or the Goto Configure Mode button, switch the PanelView terminal to the Configure mode. 2. In the Terminal Configuration screen, choose the Transfer Setup button to display the Transfer Setup screen. 3. To change the settings, choose the Baud Rate, Parity, or Error buttons to move the check mark to the setting you want.
Downloading 1000e/1200e/1400e Application Files 4–3 To prepare the PanelView terminal for a network download: 1. To use the Current Application’s transfer parameters, make sure the PanelView terminal is in Run mode to start running the application, and then follow the next procedure to configure the PanelView e Transfer Utility 32 for the download. A Current Application is a file that is currently selected and running on the PanelView terminal.
4–4 Downloading 1000e/1200e/1400e Application Files In the examples below, the first screen displays a ControlNet transfer setup. The second screen displays a DH+ transfer setup. Important: After a successful download of an application file over DH+ or ControlNet, the terminal automatically resets the Address Source to Application, uses the application file parameters, and discards the Manual Address parameters. 5. Make changes to the transfer parameters.
Downloading 1000e/1200e/1400e Application Files 4–5 7. Switch the PanelView terminal to Run mode. The Application Transfer screen is displayed. You can now transfer application files over the network. To prepare the PanelView terminal for a Remote I/O Pass-Through download: 1.
4–6 Downloading 1000e/1200e/1400e Application Files 3. Choose RIO Pass-Through as the Address Source. When you choose RIO Pass-Through, the configuration parameters for the currently-selected application file are disabled. 4. Make changes to the transfer parameters. For Remote I/O Pass-Through applications, you can change the baud rate, device type, and the control byte. 5. Choose OK. The Current Application is deselected. 6. Switch the PanelView terminal to Run mode.
Downloading 1000e/1200e/1400e Application Files 4–7 To configure the PanelView e Transfer Utility 32 for the download: 1. In the PanelView e Transfer Utility 32, choose the Download tab from the main dialog box. 2. In the Source File box, type the full path and file name of the download file, or choose Browse to locate a file on the disk. The file must be a .pvd file created by PanelBuilder 1400e. A .pvd file may already be displayed in the Source File box.
4–8 Downloading 1000e/1200e/1400e Application Files If you do not want to format the storage area or if you cannot format the storage area, the following pop-up window is displayed to provide information about the storage area. 4. Determine the destination file name for the application file you are downloading, by pressing the Download Options button or clicking from the toolbar. The File Transfer Options dialog box is displayed.
Downloading 1000e/1200e/1400e Application Files 4–9 5. Select or clear the following download options: Download Option Description Overwrite Existing File If a file of the same name already exists in the terminal’s storage, it will be erased automatically. Clear the check box if you want to be warned before the existing file is erased. The default is to prompt before overwriting the existing file. Format If Full All files downloaded to the terminal occupy space, even if they are erased.
4–10 Downloading 1000e/1200e/1400e Application Files 6. Click OK to save the settings and exit from the File Transfer Options dialog box. 7. Configure communications settings for the transfer following instructions in Chapter 5, Configuring Communications Settings for 1000e/1200e/1400e Application Transfers. 8. To save the settings in the Download main dialog box, choose from the toolbar.
Chapter 5 Configuring Communications Settings for 1000e/1200e/1400e Application Transfers This chapter provides instructions for configuring communications settings when planning to transfer application files and Alarm History files between the PanelView 1000e/1200e/1400e terminals and the development computer. The communication settings must be configured before a transfer can be started. For PV 1200 Upload/Download configurations, refer to PV 1200 Transfer Utility Manual, publication 2711–UM010B–EN–P.
5–2 Configuring Communications Settings for 1000e/1200e/1400e Application Transfers FTU32 Version 5 Table 5.
Configuring Communications Settings for 1000e/1200e/1400e Application Transfers If you have this communication hardware 1784-KT / KT2 / PCMK Decide which transfer link to use Network Direct Select Network Type and Address DH+ Choose one of these driver packages Select the corresponding driver WIN LINX 1784-KT/KT2/PCMK to DH+ 5–3 WIN LINX using INTERCHANGE to DH+ Remote I/O Pass-Through 1784-KTX Network Direct DH+ INTERCHANGE Interchange Port 1 – 8 WIN LINX 1784-KT/KT2/PCMK to DH+ WIN LINX us
5–4 If you have this communication hardware 1784-KTCX Configuring Communications Settings for 1000e/1200e/1400e Application Transfers Decide which transfer link to use Network Direct Select Network Type and Address ControlNet Choose one of these driver packages Select the corresponding driver WIN LINX 1784-KTC to ControlNet (DH+ Mode) WIN LINX using INTERCHANGE to ControlNet Remote I/O Pass-Through ControlNet INTERCHANGE Interchange Port 1 – 8 WIN LINX 1784-KTC to ControlNet (DH+ Mode) WIN LIN
Configuring Communications Settings for 1000e/1200e/1400e Application Transfers Selecting the Transfer Method To select the transfer method: Configuring the Transfer Parameters You can configure the transfer parameters using either of the following methods: • obtain transfer parameter values from an application file • manually select the transfer parameter values " 5–5 In the main download/upload dialog box, select the download/upload transfer method.
5–6 Configuring Communications Settings for 1000e/1200e/1400e Application Transfers To obtain transfer parameter values using an application file: 1. Choose Get Transfer Parameters From in the Parameters menu; or choose from the toolbar. The Runtime PV File tab in the Get Transfer Parameters From dialog box is displayed. 2. Enter the name of the *.pvd file from which you want to get the values for the communication parameters, or choose Browse to find the *.pvd file. 3.
Configuring Communications Settings for 1000e/1200e/1400e Application Transfers 5–7 4. Click Apply. The transfer path, network type, and driver values from the *.pvd file are placed in the appropriate boxes in the Configure Transfer Method dialog box. If you are performing a Remote I/O Pass-Through transfer, the Pass-Through (device type, rack, word, and byte) values from the *.pvd file are placed in the appropriate boxes in the Configure Transfer Method dialog box.
5–8 Configuring Communications Settings for 1000e/1200e/1400e Application Transfers Serial Transfer Method — Driver Configuration When you select Serial as the transfer method, the driver is the only option you can configure. To select the driver: 1. Click the Refresh List button to refresh the list of drivers. 2. Select a serial driver from the list of available drivers. Driver options are Serial 1 or Serial 2.
Configuring Communications Settings for 1000e/1200e/1400e Application Transfers 5–9 3. Select the Configure Driver button. For Serial 1 or Serial 2, the Communication Driver Configuration dialog box appears. 4. Define the settings in the Communication Driver Configuration dialog box as follows: Baud Specify the data-transfer rate between your computer and the PanelView terminal. This must match the baud rate configured for the PanelView terminal. The default setting is 9600.
5–10 Configuring Communications Settings for 1000e/1200e/1400e Application Transfers Network Transfer Method — Network and Driver Configuration When you select Network as the transfer method, Network Accessed, Driver, and Transfer Path are the options you can configure. To select the network: " Specify DH+ or ControlNet as the network to which your PC is connected. To select the driver: 1. Click the Refresh List button to refresh the list of drivers. 2.
Configuring Communications Settings for 1000e/1200e/1400e Application Transfers 5–11 Before the RSLinx driver appears on the driver list, you must first configure the RSLinx driver, and then refresh the list of available drivers. To configure an RSLinx driver, you must start RSLinx by clicking the Invoke RSLinx button. To refresh the list of available drivers, choose the Refresh List button.
5–12 Configuring Communications Settings for 1000e/1200e/1400e Application Transfers Parity Specify None or Even for the type of error-checking to be used. This must match the parity configured for the 1770-KF2/KE or 1770-KFC. The default setting is None. Error Specify the error-detection protocol used by the device. BCC is Block Check Character and CRC is Cyclic Redundancy Check. This must match the error-checking protocol configured for the 1770-KF2/KE or 1770-KFC. The default setting is BCC.
Configuring Communications Settings for 1000e/1200e/1400e Application Transfers 5–13 Remote I/O Pass-Through — Network, Driver, and Pass-Through Setup Configuration When you select Remote I/O Pass-Through as the transfer method, Network Accessed, Driver, and Pass-Through Setup (Device Type, Transfer Path, Rack, Word, and Byte) are the options you can configure. To select the network: " Specify DH+, ControlNet, or Ethernet as the network to which your PC is connected. To select the driver: 1.
5–14 Configuring Communications Settings for 1000e/1200e/1400e Application Transfers Driver options include serial and RSLinx ports. When selecting a driver, Serial 1 and Serial 2 are available to communicate directly with the PanelView terminal serial port, or with a 1770-KF2/KE or 1770 KFC, without using RSLinx. The other driver selections need RSLinx, which can be installed on the computer being used.
Configuring Communications Settings for 1000e/1200e/1400e Application Transfers 5–15 Port Specify COM1, COM2, COM3, or COM4 as the serial port used to connect the serial cable to the 1770-KF2/KE or 1770-KFC. The default setting is COM1. Parity Specify None or Even for the type of error-checking to be used. This must match the parity configured for the 1770-KF2/KE or 1770-KFC. The default setting is None. Error Specify the error-detection protocol used by the device.
5–16 Configuring Communications Settings for 1000e/1200e/1400e Application Transfers To set the transfer path using Runtime PV File: " See “Obtain Transfer Parameters from Application File” in this chapter for details. To configure Pass-Through Byte Definition parameters: " Specify Pass-Through settings as follows: Rack Select the rack number that contains the Pass-Through control byte. Your selection should match the rack number configured in your application file or in the PanelView terminal.
Chapter 6 Troubleshooting for the PanelView e Transfer Utility 32 This chapter describes how to diagnose and solve problems you might encounter while transferring applications to PanelView 1000e/1200e/1400e terminals. PanelView e Transfer Utility 32 has context-sensitive online help. When an error message appears during any stage of file or application transfer, press F1 on the keyboard to display probable causes of the error.
6–2 Troubleshooting for the PanelView e Transfer Utility 32 ÁÁÁÁÁÁÁÁÁÁÁÁÁÁÁÁÁÁÁÁÁÁÁÁÁÁÁÁÁÁÁÁÁÁÁ ÁÁÁÁÁÁÁÁÁÁÁÁÁÁÁÁÁÁÁÁÁÁÁÁÁÁÁÁÁÁÁÁÁÁÁ ÁÁÁÁÁÁÁÁÁÁÁÁÁ ÁÁÁÁÁÁÁÁÁÁÁ ÁÁÁÁÁÁÁÁÁÁÁ ÁÁÁÁÁÁÁÁÁÁÁÁÁÁÁÁÁÁÁÁÁÁÁÁÁÁÁÁÁÁÁÁÁÁÁ ÁÁÁÁÁÁÁÁÁÁÁÁÁÁÁÁÁÁÁÁÁÁÁÁÁÁÁÁÁÁÁÁÁÁÁ ÁÁÁÁÁÁÁÁÁÁÁÁÁ ÁÁÁÁÁÁÁÁÁÁÁ ÁÁÁÁÁÁÁÁÁÁÁ ÁÁÁÁÁÁÁÁÁÁÁÁÁ ÁÁÁÁÁÁÁÁÁÁÁ ÁÁÁÁÁÁÁÁÁÁÁ ÁÁÁÁÁÁÁÁÁÁÁÁÁ ÁÁÁÁÁÁÁÁÁÁÁ ÁÁÁÁÁÁÁÁÁÁÁ ÁÁÁÁÁÁÁÁÁÁÁÁÁÁÁÁÁÁÁÁÁÁÁÁÁÁÁÁÁÁÁÁÁÁÁ ÁÁÁÁÁÁÁÁÁÁÁÁÁÁÁÁÁÁÁÁÁÁÁÁÁÁÁÁÁÁÁÁÁÁÁ ÁÁÁÁÁÁÁÁÁÁÁÁÁ ÁÁÁÁÁÁÁÁÁÁÁ ÁÁÁÁÁÁÁÁÁÁÁ ÁÁÁÁÁÁÁÁÁÁÁÁÁÁÁÁÁÁÁÁÁÁÁÁÁÁÁÁÁÁÁÁÁÁÁ ÁÁÁÁÁÁÁÁ
Troubleshooting for the PanelView e Transfer Utility 32 FTU32 Ver 5 Communication Errors 6–3 Use the following table to identify communication problems you may encounter.
6–4 Troubleshooting for the PanelView e Transfer Utility 32 *.pvd File Errors Use the following table to identify Transfer Utility problems you may encounter due to *.pvd files. In the following error or warning messages, %s is the name of the file. Problem Cause What to do Unable to access specified file %s. Cause: An unspecified error occurred. (01) (Error 4100) The specified application file cannot be read. Ensure the specified application file exists and is not corrupted.
Troubleshooting for the PanelView e Transfer Utility 32 6–5 Problem Cause What to do Unable to read application header details from the PVD file “%s”. This file may be corrupt or incorrectly used. (Error 4126) The runtime application may be corrupt. Ensure your file is a *.pvd file and that it is not corrupted. Unable to read file transfer details from the PVD file “%s”. This file may be corrupt or incorrectly used. (Error 4127) The runtime application may be corrupt. Ensure your file is a *.
6–6 Troubleshooting for the PanelView e Transfer Utility 32 Problem Cause What to do No ControlNet (KTCs) driver found on PanelView A required ControlNet Scheduled driver is not installed in the PanelView terminal. terminal. The download application cannot be made current when download completes. Do you want to continue? (Warning 4205) Choose Yes to continue. Choose No to cancel the file transfer. The application will not be selected. Host PC failed to communicate with PanelView terminal.
Troubleshooting for the PanelView e Transfer Utility 32 6–7 Problem Cause Host PC failed to communicate with PanelView terminal. Error code RDM number: 0x%X (Error 4209 continued) For Remote I/O Pass-Through transfers: Check the Pass-Through device for its The specified transfer path may be incorrect address. Ensure it matches the Transfer for the target Pass-Through device. Utility’s transfer path.
6–8 Troubleshooting for the PanelView e Transfer Utility 32 Problem Cause What to do The application %s of %s type cannot run on a %s type terminal. The application cannot be made current after download. Do you want to continue? (Warning 4224) The download application’s type is incompatible with the PanelView terminal’s type. Choose Yes to continue. Choose No to cancel the file transfer. The application will not be selected. The application is not a 1200e touch screen application.
Troubleshooting for the PanelView e Transfer Utility 32 Driver Errors 6–9 Use the following table to identify Transfer Utility problems you may encounter due to driver selection. Problem Cause What to do The Rockwell Software RSLinx communication software is not currently running. This software package is required in order to perform file transfers. (Error 4300) RSLinx communication software is not installed. Install RSLinx. The selected driver is a Rockwell Software RSLinx network driver.
6–10 Troubleshooting for the PanelView e Transfer Utility 32 ÁÁÁÁÁÁÁÁÁÁÁÁÁÁÁÁÁÁÁÁÁÁÁÁÁÁÁÁÁÁÁÁÁÁÁ ÁÁÁÁÁÁÁÁÁÁÁÁÁ ÁÁÁÁÁÁÁÁÁÁÁ ÁÁÁÁÁÁÁÁÁÁÁ ÁÁÁÁÁÁÁÁÁÁÁÁÁ ÁÁÁÁÁÁÁÁÁÁÁ ÁÁÁÁÁÁÁÁÁÁÁ ÁÁÁÁÁÁÁÁÁÁÁÁÁÁÁÁÁÁÁÁÁÁÁÁÁÁÁÁÁÁÁÁÁÁÁ Message Cause What to do Might not be accessing COM port. Check other program or devices that use the COM port, and ensure that they do not conflict with the interrupt request (IRQ) or the COM settings. Parity error detected. Serial cable becomes disconnected during a serial download.
Troubleshooting for the PanelView e Transfer Utility 32 Message 6–11 Cause What to do During a pass-through download or upload, the DH+ cable is not connected correctly. Check the cable connections. During a pass-through download or upload, the terminal is not in “pass-through” mode (that is, not in the application transfer screen). On the PanelView terminal, go to the Transfer Setup screen, select the Network tab, define an RIO Pass-Through, and then switch the terminal into Run mode.
6–12 Troubleshooting for the PanelView e Transfer Utility 32 Messages/General Types of Messages Cause What to do Communications hardware or driver not present. Check for supported communications network information, which resides in the PanelView terminal, by pressing the Terminal Information button on the Terminal Configuration screen. For details, see Chapter 5 in the PanelView 1000e, 1200e, and 1400e Operator Terminals User Manual.
Appendix A Constructing the Transfer Path This appendix explains how to construct the transfer path in the PanelView e Transfer Utility 32 for network and Remote I/O Pass-Through file transfers. This appendix explains the different transfer path formats, if you are entering the transfer path manually. ControlNet Addressing Local Station Addressing: For a development computer connected to the same ControlNet network as the PanelView terminal, valid station numbers are between 1 and 99 decimal.
A–2 Constructing the Transfer Path DH+ Networks Bridged by a 1785-KA The format of the transfer path on remote DH+ networks is: Transfer Path Format Valid Entries ll.rrr.ss ll local KA address 0 – 77 (octal) rrr remote KA address 0 – 376 (octal) ss PanelView address on remote DH+ 0 – 77 (octal) or You can shorten the offlink address by combining the remote KA address and remote transfer path into one three-digit number.
Constructing the Transfer Path A–3 The valid transfer paths for the various PanelView terminals in the figure are: PanelView Address Valid Transfer Path 21 7.310.21 or 7.321 Figure A.
A–4 Constructing the Transfer Path Multiple DH+ Networks Connected by a Pyramid Integrator (PI) The format of the transfer path on a remote DH+ network is: Transfer Path Format Valid Entries ll:rrrrr.ss ll local PI address 0 – 77 (octal) rrrrr PI Link number 0 – 65535 (decimal) ss PanelView address on remote DH+ 0 – 77 (octal) The Pyramid Integrator (PI) Link number for each DH+ network must be unique. Use your PI Programming Software to configure link numbers.
Constructing the Transfer Path A–5 Figure A.
I–1 Index Symbols *.csv file, 3-8 *.pvd file, 1-3 Numbers 1770ĆKF2, 2-4 1770ĆKFC, 2-8 1784ĆKL, 2-4 1784ĆKTC, 2-8 1784ĆKTCX, 2-8 1784ĆKTK1, 2-4 1784ĆKT, 2-4 1784ĆKT2, 2-4 1784ĆKTX, 2-4 1784ĆPCMK, 2-4 1785ĆKA, A-2 bridging DH+ networks, A-2 1785ĆKE, 2-4 A Alarm History configuring communications, 5-4 record, 3-8 uploading, 3-10 Alarm trigger value, 3-9 AllenĆBradley, PI Programming Software, A-4 Application downloading, tips, 1-4ć1-7 uploading, tips, 1-4ć1-7 AUTOEXEC.
Index E Error checking, 5-9, 5-12, 5-15 Error message, 6-1 ErrorĆdetection protocol, 5-9, 5-12, 5-15 Ethernet equipment required for transfer, 2-12 selecting driver, 5-1 Exiting from Transfer Utility, 2-28, 2-31 H Hardware requirements, minimum, 2-1 Help. See Online help I Installation requirements, 2-1 Installing FTU, floppy disks on Windows 3.
I–3 Index Publications, related, P-2 Pyramid Integrator, bridging DH+ networks, A-4 Transfer Application screen, doing serial transfers, 3-3, 3-11, 4-2 Transfer link, selecting, 5-1 Transfer method, selecting, 5-5 R Rack assignments, 1-5 Refresh List button, 5-11, 5-14 Remote station address, DH+, A-1 RIO PassĆThrough, 1-4 RM, modules, A-4 RSLinx, 2-4, 2-8, 2-12 drivers, 1-6 Invoke RSLinx, 5-11, 5-14 S Transferring Alarm History files, 3-10 Transferring application files downloading, 1-3 illustrations
Publication 2711E-UM003B-EN-P - September 2001 Supersedes Publication 2711-E-6.16 - November 1999 PN 41061-138-01(2) © 2001 Rockwell International Corporation. Printed in the U.S.A.