
User guide
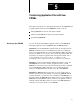
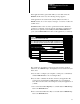
Table Of Contents
- 2711-UM010B-EN-P, PanelBuilder 1200 Transfer Utility
- Important User Information
- Table of Contents
- Preface
- 1 - Introduction to the PanelView 1200 Transfer Utility
- 2 - Setting up the PanelView 1200 Transfer Utility
- 3 - Transferring Application Files Serially
- 4 - Transferring Via the Data Highway Plus and Remote I/O
- 5 - Transferring Application Files with User PROMs
- A - Troubleshooting
- Glossary of Terms
- Index
- Back Cover
Transferring Application Files with
Chapter 5
User PROMs
5-2
Burning EPROMs for Series C and earlier terminals is different from
burning EPROMs for Series D, E and F terminals.
Series C and earlier PanelView 1200 terminals contain two sockets for
optional PROMs.
Series D, E, and F PanelView 1200 terminals have only one socket for
one optional EPROM or EEPROM. Series D and E terminals accept
only a 64K EPROM or EEPROM. Series F terminals accept a 128K
user EPROM or EEPROM, as well as a 64K EPROM or EEPROM, so
that you can continue to use your existing chip.
Burning EPROMS
To burn EPROMs for Series C and earlier terminals:
1
Connect your computer to an EPROM burner with an RS-232 serial
cable.
The EPROM burner is connected to the same RS-232 port on the
development computer that is used to connect the PanelView 1200
terminal. Refer to your EPROM burner user’s manual for connection
instructions.
2
Start the PanelView 1200 Transfer Utility.
3
Open the Transfer menu.
4
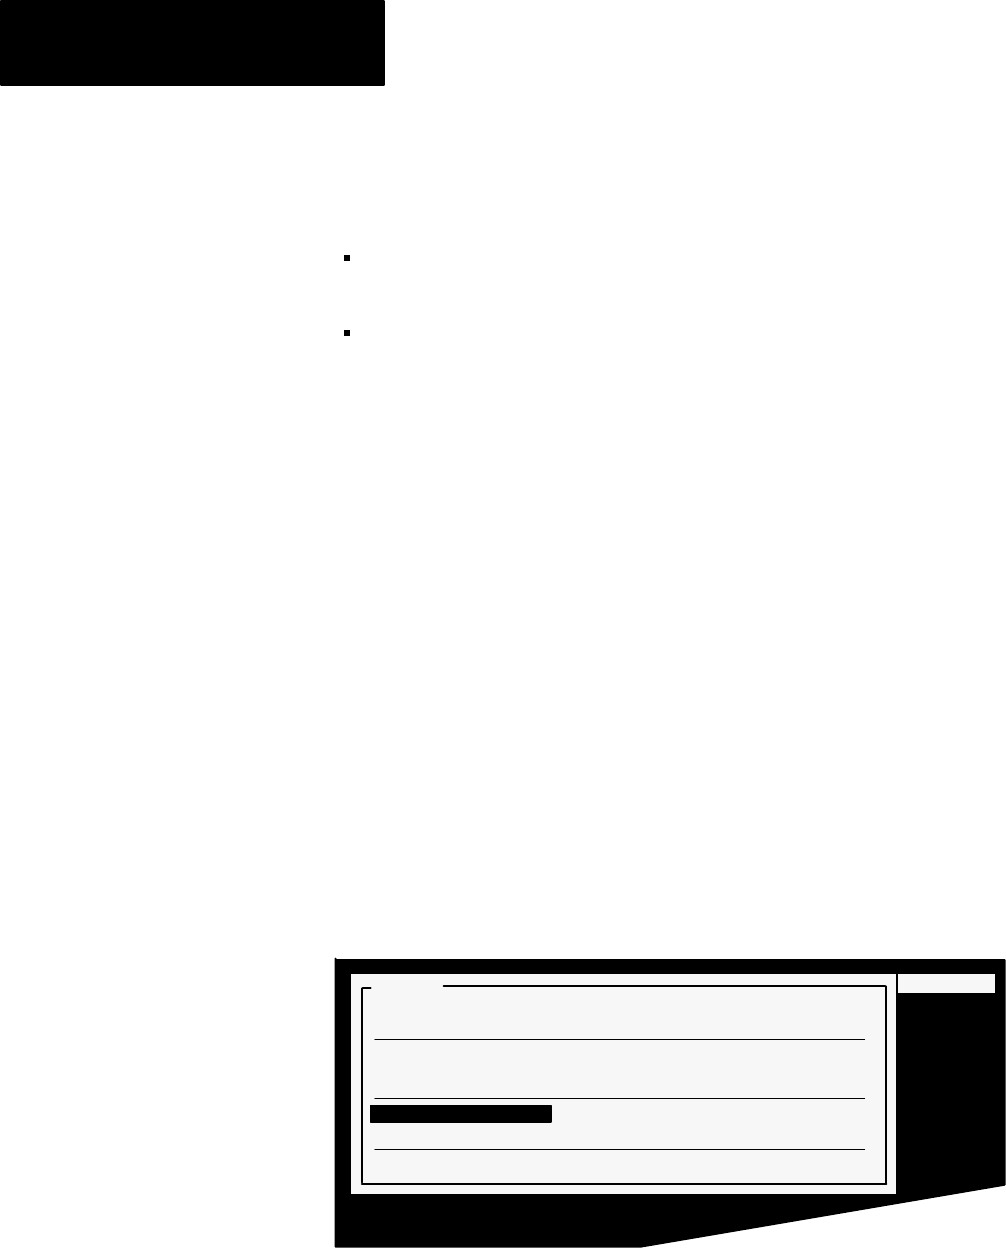
Choose Burn EPROMS from the Transfer Menu.
22013
* '+ $'(.+ ),$('+ (&&-'$-) /$,
*'+! *
(.'%( ,( ' %$ .
)%( !*(& ' %$ .
++#*(-"# (.'%( ,( ' %$ . ' &(,
++#*(-"# )%( !*(& ' %$ . ' &(,
-*'
-*' $'"%
-$,
The Burn EPROMs menu appears.
5
Choose Select Application File and select the application file you will
download to the EPROM burner. Press
ENTER.