
USER MANUAL Manual


Using the Onboard Editor to Create Messages 2–9
Publication 2706-6.1
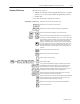
Insert Date Into a Message [CTRL][Y]
To enter the date in a message, place the cursor after the point where
you want the date to appear, then press
[CTRL][Y]. The software will
insert the date symbol DAY MON DT (the numerical day of the
month). You can use the date variable only once in a given message.
The date variable occupies 10 of the available 20 characters on a
display line.
Note: We recommend setting message attributes such as Display
Line and Scroll Message before typing in the message. This allows
you to verify the placement of characters as you type them.
Press
[CTRL][R] while editing a message to run the message as it
would be displayed in Run mode except:
• Message is not put on Historical Events Stack
• [CTRL][V] and [CTRL][W] variable data is not displayed in a
message. They are represented by asterisks (****)
• [CTRL][X] Data Requests are represented by underscores (_ _ _).
Values for Data Requests can be put into a message for testing
using a keyboard
• Data not returned via Remote I/O or RS-485/RS-232 port
Message attributes apply to all messages when they are created. You
can modify the message attributes for an individual message by
using
[CTRL][A] while editing the message. Message attributes you
can control from the Onboard Editor are:
• Display Line
• Scroll message
• Print message
• Send to Slave (Address 0 - 127)
• Wait Time
• AutoClear
• AutoRepeat
• Chain to Msg
• Energize relay
• Stack Message
• Send message time to the stack
• Hide message
• Acknowledge message
• Slave color
• Slave length
• Echo relay
Testing Messages
Message Attributes