
User Manual


14 PowerFlex® DC Drive - Frame C Bimetal Thermostat
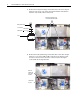
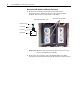
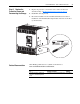
Step 4: Install the New
Bimetal Thermostat
Install the new Bimetal Thermostat in reverse order of removal as detailed
in Step 3: Remove the Existing Bimetal Thermostat
on page 4.
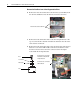
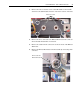
• Apply thermal grease to the bottom of the Bimetal Thermostat before
securing it to the heatsink.
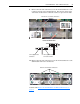
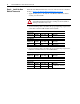
• Use the following table to determine the proper tightening torque for the
screws that secure the SCR modules to the heatsink:
• Use the following table to determine the proper tightening torque for the
bolts that secure the bus bars to the SCR modules:
!
ATTENTION: Thermal grease must be applied to the bottom
of the Bimetal Thermostat before securing it to the heatsink or
damage to the drive may occur.
230V AC Input
Drive Current
Rating Code DC Amps AC Line Amps HP Final Torque
521 521 426 150 6 Nm (53 lb.-in.)
460V AC Input
Drive Current
Rating Code DC Amps AC Line Amps HP Final Torque
495 495 404.4 300 4.5 - 5.5 Nm (40 - 48.7 lb.-in.)
667 667 544.9 400 6 Nm (53 lb.-in.)
230V AC Input
Drive Current
Rating Code DC Amps AC Line Amps HP Final Torque
521 521 426 150 11 - 13 Nm (97.4 - 115 lb.-in.)
460V AC Input
Drive Current
Rating Code DC Amps AC Line Amps HP Final Torque
495 495 404.4 300
11 - 13 Nm (97.4 - 115 lb.-in.)
667 667 544.9 400